

There is nothing quite like biting into a perfect brownie. It should be rich, deeply chocolatey, incredibly fudgy in the center, and boast that irresistible, shiny crackly top. If you have been searching for the ultimate Fudge Brownie Recipe, your quest ends here. I am going to share not just a recipe, but the science and expert tips behind achieving bakery-quality homemade brownies every single time. Get ready to unlock the secrets to deep chocolate flavor and that coveted crackly top that makes everyone ask for more.
Why You’ll Love This Recipe
My unique twist is what truly elevates these fudgy brownies. The secret lies in blooming the unsweetened cocoa powder and espresso powder. I whisk them directly into the hot melted butter and oil mixture for about 30 seconds, off the heat, before adding the sugar and eggs. This simple step makes an incredible difference.
Blooming the cocoa powder with hot fat and liquid intensifies its chocolate flavor significantly. It helps to dissolve and release more of those wonderful aromatic compounds, giving you a deeper, richer chocolate experience. The espresso powder, which simply enhances the chocolate without adding a coffee taste, also gets fully dissolved and integrated at this stage. This improved solubility of the cocoa particles also contributes to a smoother, fudgier texture and more even distribution of chocolate flavor throughout the entire brownie.
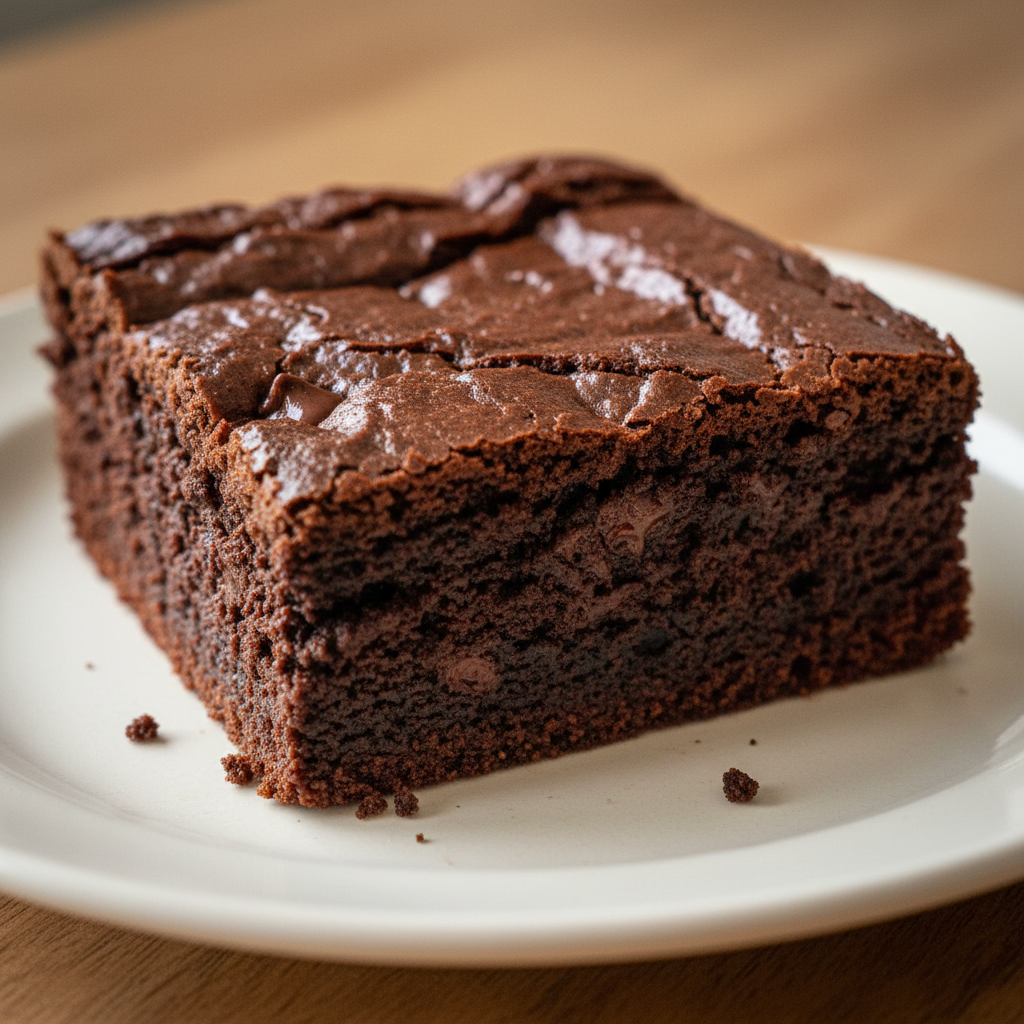
The result is truly spectacular: thick, chewy, fudgy, rich chocolate brownies with that beautiful, shiny crackly top. You will consistently achieve reliable, restaurant-quality taste right in your own kitchen. It is a surprisingly easy method for such a gourmet outcome, making this one of my all-time favorite dessert recipes.
Ingredients Needed

Here is exactly what you will need to create these incredible brownies.
1 cup (120g) all-purpose flour
1/2 teaspoon baking powder
1/2 teaspoon salt
1/2 cup (43g) unsweetened cocoa powder
1 teaspoon espresso powder (optional (don’t use if you don’t like coffee))
3/4 cup (170g) unsalted butter
2 Tablespoons (28ml) oil (canola, vegetable, or coconut will work)
1 and 1/3 cups (265g) granulated sugar (divided )
2 large eggs
1 large egg yolk
2 teaspoons vanilla extract (optional, but recommended )
3/4 cup (128 grams) chocolate chips
Ingredient Notes & Substitutions
Cocoa Powder: This recipe specifically calls for natural unsweetened cocoa powder. Natural cocoa powder is acidic and gives a sharp, intense chocolate flavor. While some recipes use Dutch-processed cocoa powder, which is alkalized for a darker color and milder flavor, I find the natural cocoa here, combined with our blooming technique, yields the richest taste. For the best flavor in your homemade brownies, I recommend high-quality brands like Droste, Ghiradelli, or Guittard Rouge, though everyday options like Hershey’s will also work.
Espresso Powder: The espresso powder is optional, but I highly recommend it if you enjoy deep chocolate flavor. It does not make your brownies taste like coffee. Instead, it subtly enhances and intensifies the chocolate notes, making them even more pronounced.
Butter & Oil: Using both unsalted butter and oil is key to the perfect texture. The unsalted butter provides that rich, classic butter flavor we all love in baked goods. The oil, whether canola oil, vegetable oil, or coconut oil, contributes to an incredibly moist and fudgy texture, ensuring your brownies stay soft and delicious for days. If you only have salted butter, be sure to reduce the added salt in the recipe by about 1/4 teaspoon.
Sugar: Granulated sugar is essential for achieving that iconic crackly top and the proper dense texture in these fudgy brownies. Brown sugar is not a suitable substitute here as it contains molasses, which would add moisture and alter the texture, making the brownies less crackly and potentially more cakey.
Eggs: The combination of two large eggs and one additional large egg yolk is crucial. The extra egg yolk adds richness and helps create that supremely fudgy texture that defines a great brownie. Eggs also play a vital role in emulsification, which contributes to the shiny, crackly top.
Chocolate Chips: I love adding chocolate chips for extra pockets of melted chocolate throughout. Dark, milk, or even white chocolate chips will work beautifully, depending on your preference. Chocolate chunks are another excellent option. For recipe variations, consider adding chopped walnuts, pecans, or hazelnuts to the batter for a delightful crunch.
Flour: This recipe uses all-purpose flour. If you need a dietary swap, a 1:1 gluten-free all-purpose flour blend can be used, but other specialty flours are not recommended as they can significantly alter the texture.

How to Make the Best Fudge Brownies
Follow these steps precisely to make the best homemade fudge brownies you have ever tasted.
Step 1: Prep the Pan & Preheat the Oven
Preheat your oven to 350 degrees F (175 degrees C). Line a 9×9-inch baking pan with parchment paper, making sure to leave an overhang on two sides. This overhang acts as a sling, making it incredibly easy to remove the cooled brownies from the pan. Lightly spray the parchment paper with non-stick baking spray and set the pan aside.
Step 2: Sift Dry Ingredients
In a large bowl, sift together the all-purpose flour, baking powder, salt, unsweetened cocoa powder, and espresso powder (if using). Sifting is important because it prevents lumps and ensures that all the dry ingredients, especially the flavor enhancers, are evenly distributed throughout your batter. Set this bowl aside until it is needed.
Step 3: Melt Fats and Sugar
In a medium saucepan, combine the unsalted butter, oil, and 1/3 cup of the granulated sugar. Heat this mixture over medium heat, stirring frequently, until the butter is completely melted. Once melted, remove the saucepan from the heat immediately to prevent the butter from overheating or scorching. Allow the mixture to cool slightly to a temperature between 120-130 degrees F (49-54 degrees C) before combining with the eggs in a later step.
Step 4: Whisk Eggs & Sugar
In a separate large mixing bowl, combine the two large eggs, the additional large egg yolk, vanilla extract (if using), and the remaining granulated sugar. Whisk these ingredients vigorously for about 30 seconds until they are well combined and slightly foamy. This vigorous whisking helps to incorporate air and dissolve the sugar, which is a key step in achieving that coveted crackly top on your brownies.
Step 5: Emulsify Wet Ingredients (The Unique Twist!)
Now for the unique twist that makes these brownies so special. Slowly pour the slightly cooled warm butter mixture into the egg mixture. It is crucial to add it very gradually, a little bit at a time, while whisking constantly and vigorously. This slow addition and constant whisking creates a stable emulsion. This emulsion is absolutely key for both developing the shiny crackly top and, perhaps more importantly, preventing the eggs from scrambling due to the warm butter mixture. This step also effectively integrates the bloomed cocoa and espresso powder into your batter.
Step 6: Combine Wet & Dry
Add the sifted dry ingredients and the chocolate chips to your wet mixture. Using a rubber spatula, slowly and gently stir the batter until it is just combined. This means stopping as soon as the last trace of flour disappears into the batter. This step is critical: do not overmix! Overmixing develops the gluten in the flour, which will lead to cakey brownies rather than the rich, fudgy texture we are aiming for.
Step 7: Bake
Scrape the brownie batter into your prepared 9×9-inch pan and smooth the top evenly with your spatula. Bake for 28 to 30 minutes. You will know your brownies are done when the edges are firm and set, the top is beautifully shiny and slightly cracked, and there is still a slight “wiggle” in the center when you gently shake the pan. A toothpick inserted into the center should come out with moist crumbs attached, not wet batter.
Step 8: Cool Completely
Once baked, place the pan directly onto a cooling rack. This step is non-negotiable for ultimate fudginess and clean cuts. It is absolutely essential to allow the brownies to cool completely, for several hours, before attempting to slice them. Patience here truly pays off with a superior texture.
Achieving the Perfect Fudgy Brownie Texture & Yield
Understanding the nuances of brownie baking can transform your results from good to absolutely perfect.
The Science of Fudginess and Crackly Tops
The secret to fudgy versus cakey brownies lies in a delicate balance of ingredients and technique. Fudginess is achieved through a higher fat content (thanks to both the unsalted butter and oil), a generous amount of granulated sugar, and a relatively low flour ratio. These elements work together to create a dense, moist, and chewy crumb. The eggs, particularly the extra egg yolk, contribute significantly to this richness and texture, binding everything together without adding excessive leavening.
That signature crackly top is a result of several factors. The vigorous whisking of eggs with sugar helps to dissolve the sugar crystals and incorporate air, forming a stable foam. When the controlled temperature of the warm butter mixture is slowly emulsified into the egg and sugar mixture, it creates a stable emulsion. As the brownies bake, this emulsion creates a thin, delicate sugary crust that becomes brittle and crackles as it cools. Conversely, too much gluten development from overmixing leads to a cakey texture because the gluten strands create a more open, airy crumb. This is why gentle mixing is so critical.
Knowing When Your Brownies Are Done
Baking brownies to the perfect fudgy consistency is all about knowing the specific signs of doneness. When your brownies are ready, the edges of the pan should be firm and fully set. The top will have developed a beautiful, shiny, slightly crinkled or cracked appearance. The most important cue is the “wiggle in the middle” test: when you gently shake the pan, the very center of the brownies should still look slightly underbaked and jiggle subtly. A toothpick inserted into this center should come out with moist crumbs clinging to it, not wet batter, and certainly not clean (which indicates overbaking). Trust these visual and tactile cues for truly fudgy results.
Yield & Serving Size
This Fudge Brownie Recipe, baked in a 9×9-inch pan, will yield approximately 16 standard 2×2-inch squares. These brownies are incredibly rich and decadent, so a single small square is often quite satisfying as a dessert. Of course, I never judge if you go back for a second.
Essential Brownie Baking Equipment & Pan Choice
Having the right tools can make all the difference in your baking success.
Choosing the Right Baking Pan
For fudgy brownies with beautifully crisp edges, I highly recommend using a metal 9×9-inch baking pan. Metal pans are generally preferred over glass for brownies because they conduct heat more efficiently and evenly, which helps to create those desirable crisp edges and a consistent bake throughout. Glass pans can sometimes lead to softer edges and a slightly longer baking time due to their different heat retention properties. Regardless of the material, always prepare your pan properly by lining it with parchment paper, leaving an overhang on two sides, and then lightly spraying it with non-stick baking spray for effortless removal. Remember that pan material can slightly affect baking time, so always monitor your brownies closely for those crucial doneness cues.
Key Kitchen Tools for Success
Beyond the baking pan, a few essential kitchen tools will make your brownie-making experience smooth and enjoyable. You will need a large mixing bowl for your dry ingredients and for combining the wet mixture. A medium saucepan is necessary for melting the butter and oil. A good whisk is vital for thoroughly combining the eggs and sugar, and for creating that critical emulsion when incorporating the warm butter mixture. A rubber spatula is perfect for gently folding in the dry ingredients and chocolate chips without overmixing. Finally, a cooling rack is indispensable for allowing your brownies to cool completely and evenly, which is key to their final fudgy texture. For accuracy, especially with flour, I always recommend using a digital scale along with standard measuring cups and spoons.
Pro Tips & Troubleshooting
Even seasoned bakers appreciate a few extra pointers. Here are my top tips and ways to avoid common pitfalls.
Pro Tips for Perfect Fudge Brownies
Quality Ingredients Matter: For the deepest chocolate flavor in your fudge brownie recipe, invest in high-quality unsweetened cocoa powder. Brands like Droste or Ghiradelli make a noticeable difference. Also, use a good quality vanilla extract; it truly enhances all the other flavors.
Master the Bloom: Do not skip the unique twist of blooming your cocoa and espresso powder in the hot fat. This step is a game-changer for intensifying the chocolate flavor, making your brownies incredibly rich.
Achieve the Crackly Top: For that signature shiny, crackly top, pay attention to a few details. Melt a portion of your granulated sugar with the butter and oil. Vigorously whisk your eggs with the remaining sugar until slightly foamy. Then, slowly and constantly whisk as you pour the slightly cooled warm butter mixture into the egg mixture to create a stable emulsion.
Don’t Overmix: This is perhaps the most important rule for fudgy brownies. Once you add the dry ingredients to the wet, stir only until the last trace of flour disappears. Overmixing develops gluten, leading to a cakey, rather than fudgy, texture.
Cool Completely: I cannot stress this enough. For the absolute best fudgy texture and clean, neat slices, your brownies must cool completely for several hours on a cooling rack. Resist the urge to cut into them warm.
Finishing Touch: For a truly bakery-style touch, sprinkle a little flaky sea salt over the brownies immediately after they come out of the oven, or just before serving. It perfectly balances the richness of the chocolate.
Common Brownie Mistakes to Avoid
Overmixing: The most frequent culprit for cakey brownies is overmixing the batter. As mentioned, this develops excess gluten, which creates an airy, bread-like texture instead of a dense, fudgy one.
Overbaking: If your brownies are dry and crumbly, you likely overbaked them. Keep a close eye on the doneness cues, especially the slight wiggle in the middle, to ensure they remain perfectly fudgy.
Slicing Too Soon: Cutting into warm brownies not only makes a mess but also affects their final texture. They need time to set and firm up as they cool for optimal fudginess and clean cuts.
Incorrect Ingredient Substitutions: Be wary of swapping out key ingredients. Specialty flours like whole wheat or oat flour will alter the texture significantly. Substituting brown sugar for granulated sugar will prevent the crackly top. Using salted butter without adjusting the added salt can make your brownies too salty.
Troubleshooting Issues: If your brownies are greasy, it might be due to too much fat relative to the flour, or baking at too low a temperature causing the fat to separate. A sunken middle often indicates undercooking, but can also be caused by excessive leavening (like too much baking powder) or even overmixing which incorporates too much air. Dry or cakey brownies are almost always a result of overbaking or overmixing.
Serving & Storage
Once your perfect brownies are ready, here is how to enjoy them and keep them fresh.
Serving Ideas
These fudgy brownies are utterly delicious on their own, perhaps with just a cold glass of milk. For an extra touch, I often sprinkle a little flaky sea salt on top before serving; it enhances the chocolate flavor beautifully. To elevate them even further, serve a warm (reheated slightly in the microwave or oven) brownie square with a scoop of creamy vanilla bean ice cream, a drizzle of extra chocolate sauce, or some fresh berries for a lovely contrast. They are a delightful treat for any occasion.
Storage and Make-Ahead
Room Temperature: To maintain their optimal fudginess, store your brownies at room temperature in an airtight container for 3 to 4 days. This keeps them wonderfully moist and chewy.
Refrigeration: If you need to store them for longer, place them in an airtight container in the refrigerator for up to a week. Be aware that they will become firmer when cold. For the best texture, I suggest bringing them back to room temperature before serving.
Freezing Brownies: This is a fantastic make-ahead option! To freeze brownies for longer storage, up to 3 months, first ensure they are completely cool. Wrap individual squares tightly in plastic wrap, then place them in a freezer-safe bag or an airtight container. This prevents freezer burn and makes it easy to grab just one or two when a craving strikes.
Reheating Brownies: For a gooey, just-baked experience, warm individual squares briefly in the microwave for 15-20 seconds. If you prefer slightly crisper edges, you can reheat them in a preheated oven at 300 degrees F (150 degrees C) for a few minutes.
Conclusion
This Fudge Brownie Recipe is truly a testament to how simple techniques can yield extraordinary results. With its deep, intense chocolate flavor, wonderfully fudgy texture, and that irresistible crackly top, these homemade brownies are guaranteed to impress. My unique blooming technique for the cocoa and espresso powder is the secret weapon, ensuring every bite is packed with rich, satisfying chocolate. By following these detailed steps and expert tips, I promise even beginners can achieve perfect brownies every single time. So, gather your ingredients, give this recipe a try, and do not be afraid to experiment with recipe variations like different chocolate chips or a sprinkle of nuts. I encourage you to share your delicious creations and enjoy the magic of homemade baking!
FAQ
Q: What’s the secret to getting a shiny, crackly top on fudge brownies?
A: The secret lies in a few critical steps. First, vigorously whisking the eggs with the granulated sugar helps dissolve the sugar crystals and incorporate air. Then, the slow, constant whisking while gradually pouring in the slightly cooled warm butter mixture creates a stable emulsion. This emulsion, combined with the sugar, forms that delicate, shiny, crackly crust during baking.
Q: How can I ensure my brownies are fudgy and not cakey?
A: To guarantee fudgy brownies, avoid overmixing the batter once the dry ingredients are added; stop stirring as soon as the last trace of flour disappears. Additionally, do not overbake them. The precise balance of butter, oil, eggs, and the extra egg yolk in this recipe is also specifically designed to contribute to a dense, fudgy texture.
Q: What’s the difference between Dutch-processed and natural cocoa powder in brownies?
A: Natural unsweetened cocoa powder, used in this recipe, is acidic and has a strong, bitter chocolate flavor. Dutch-processed cocoa powder, on the other hand, has been treated with an alkali to neutralize its acidity, resulting in a darker color and a milder, less bitter flavor. While both work in different recipes, our blooming technique with natural cocoa delivers an incredibly rich and intense chocolate flavor here.
Q: Can I freeze these homemade fudge brownies for later?
A: Yes, absolutely! These homemade fudge brownies freeze beautifully. Once completely cooled, wrap individual squares tightly in plastic wrap, then place them in a freezer-safe bag or an airtight container. They will keep well in the freezer for up to 3 months.
Q: What are common mistakes to avoid for perfect fudge brownies?
A: The most common mistakes include overmixing the batter, which leads to cakey brownies; overbaking, resulting in dry, crumbly brownies; slicing them too early before they have cooled completely, making them messy and affecting texture; and making inappropriate ingredient substitutions like using specialty flours or brown sugar instead of granulated sugar, or salted butter without adjusting the salt content.
Q: What’s the best type of baking pan for fudgy brownies and does it affect baking time?
A: I recommend using a metal 9×9-inch baking pan for fudgy brownies. Metal pans conduct heat more efficiently than glass pans, helping to create those desirable crisp edges and ensuring more even baking. Different pan materials can indeed affect baking time, so it is always important to monitor your brownies closely for doneness, rather than relying solely on the clock.
Q: Why is melted butter and oil used together in brownie recipes?
A: The combination of melted unsalted butter and oil offers the best of both worlds. The butter provides a rich, complex flavor that is essential to great baked goods. The oil, whether vegetable oil, canola oil, or coconut oil, contributes significantly to a chewier, more moist, and incredibly fudgy texture that remains soft for days.
Q: What is the ideal temperature of the butter mixture when combining with eggs?
A: The warm butter mixture should be cooled slightly to between 120-130 degrees F (49-54 degrees C) before you slowly pour it into the egg mixture. This temperature range is crucial to prevent scrambling the eggs while still being warm enough to aid in creating a stable emulsion.
Q: How long do I need to cool brownies before cutting them?
A: For optimal fudginess and clean, neat slices, brownies need to cool completely. This usually takes several hours on a wire rack. While it can be tempting to cut into them sooner, patience ensures they set properly, making them much easier to slice and enhancing their dense, fudgy texture.
Ultimate Fudgy Fudge Brownie Recipe with Crackly Top
Ingredients
Equipment
Method
- Preheat your oven to 350 degrees F (175 degrees C). Line a 9×9-inch baking pan with parchment paper, making sure to leave an overhang on two sides. Lightly spray the parchment paper with non-stick baking spray and set the pan aside.
- In a large bowl, sift together the all-purpose flour, baking powder, salt, unsweetened cocoa powder, and espresso powder (if using). Set this bowl aside.
- In a medium saucepan, combine the unsalted butter, oil, and 1/3 cup of the granulated sugar. Heat this mixture over medium heat, stirring frequently, until the butter is completely melted. Remove from heat and allow to cool slightly to 120-130 degrees F (49-54 degrees C).
- In a separate large mixing bowl, combine the two large eggs, the additional large egg yolk, vanilla extract (if using), and the remaining granulated sugar. Whisk vigorously for about 30 seconds until well combined and slightly foamy.
- Slowly pour the slightly cooled warm butter mixture into the egg mixture, a little at a time, while whisking constantly and vigorously. This creates a stable emulsion and prevents the eggs from scrambling.
- Add the sifted dry ingredients and the chocolate chips to your wet mixture. Using a rubber spatula, slowly and gently stir the batter until just combined, stopping as soon as the last trace of flour disappears. Do not overmix.
- Scrape the brownie batter into your prepared 9×9-inch pan and smooth the top. Bake for 28 to 30 minutes at 350 degrees F (175 degrees C), until edges are firm, top is beautifully shiny and slightly cracked, and the center has a slight wiggle. A toothpick inserted into the center should come out with moist crumbs.
- Once baked, place the pan directly onto a cooling rack. Allow the brownies to cool completely for several hours before attempting to slice them for ultimate fudginess and clean cuts.