
Ingredients
Equipment
Method
Prepare Your Cucumbers for Crispness
- Start by thoroughly rinsing your `pickling cucumbers`. Identify the `blossom end` (opposite the stem) and remove about 1/16-inch, as enzymes here can cause softening. For extra crispness, place the trimmed cucumbers in an `ice bath` for 15-30 minutes. Keep them whole for better texture retention. They should feel firm and cold.
Mix the Brine
- In a separate bowl, combine 2 tablespoons of `fine sea salt` with 5 cups of cold `filtered water`. Whisk or stir thoroughly until the `salt` is completely dissolved. A clear brine means it’s ready.
Clean Your Equipment (No Need to Sterilize)
- Wash your hands, `Mason jars` (a `two-quart jar` or `half-gallon jar` works well), and all utensils with hot, soapy water. Rinse them well. `Sterilizing` is not necessary for fermentation; simply clean is sufficient.
Assemble Your Jar with Care
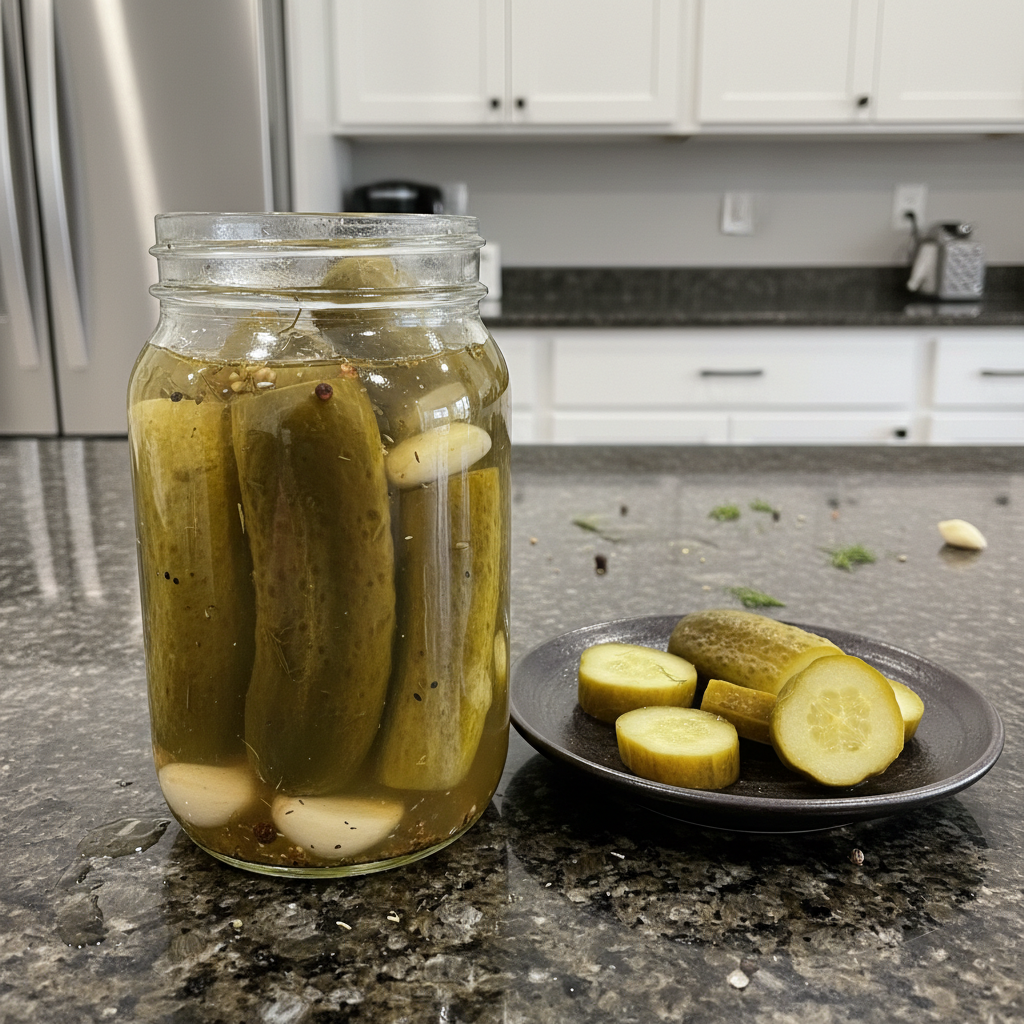
- Into the bottom of your clean `Mason jar`, add all the whole spices: `fennel seeds`, `coriander seeds`, `allspice`, `peppercorns`, `dill seeds`, `mustard seeds`, and `celery seeds`. Next, layer in the `fresh dill`, `sliced garlic cloves`, and `onion` or `turmeric` if using. Carefully pack in the cucumbers, starting with one layer standing on end. Add the `bay leaves` (or `grape leaf`/`oakleaf`), then add a second layer of cucumbers, packing them tightly. Leave about 1 ½ inches of `headroom` at the top.
- Pour 1-2 tablespoons of your unpasteurized live `starter brine` over the packed cucumbers. Finally, pour your prepared `saltwater brine` over everything until the cucumbers are completely submerged. Use a `fermentation weight` to keep all cucumbers and spices pressed down under the `brine`. It's crucial that everything stays submerged to prevent `mold`. Remove any rogue spices that float to the surface. Loosely cover the jar with a `lid` or a breathable `cloth cover` to allow `gases` to escape while keeping dust out.
Begin the Fermentation Process
- Place your jar in a pan or bowl to catch any potential `overflow`. Find a cool, dark place (ideally between `60-70°F`) in your home. Let it ferment for 2-3 days for the initial stage. You'll soon see `bubbles` rising, a slightly cloudy `brine`, and perhaps a faint tangy aroma.
- For `half-sour pickles`, 3-5 days at this temperature is usually ideal. For `full-sour pickles`, you'll ferment for 14-21 days (and might use a slightly stronger salt ratio for a tangier flavor and softer texture). The starter brine helps ensure you'll see activity quickly!
Check and Inspect Your Ferment
- After about 2 days, start checking for active `bubbles`, `overflow`, or a `clouding` of the brine. Tapping the jar can help dislodge tiny bubbles. Ferment for 3-4 days for really crunchy and vibrant pickles. Longer ferments yield a tangier pickle, which will naturally soften a bit and lose some bright green color. Taste your pickles at any point after you see `bubbles`. Once you observe consistent bubbling, move the jar to the `refrigerator storage`, where the `fermentation process` will slow down significantly. Always ensure the pickles remain submerged under the brine, even in the fridge.
Refrigerate and Enjoy
- Once your pickles are chilled, give them a taste. They should be wonderfully crispy, packed with flavor, and have that characteristic tang. If you desire a tangier or slightly softer pickle, you can always bring them back out of the fridge and let them ferment for a few more days at room temperature.
- If you enjoy a `fizzy brine`, simply tighten the lid once refrigerated and `burp` the jar (release the pressure) every week or so. Alternatively, using an `airlock` will allow gases to escape without daily attention. If you prefer not to think about `burping jars`, just give the lid one loose twist.
Nutrition
Notes
For optimal crispness, use fresh `pickling cucumbers`, remove their blossom ends, and ferment at cooler temperatures (60-70°F). Always ensure pickles remain submerged under the brine. Leftover brine is excellent as a `probiotic tonic` or starter for new batches. Adjust fermentation time for `half-sour` (3-5 days) or `full-sour` (14-21 days) preferences. Nutrition information is estimated based on common ingredients and serving sizes and may vary.