

There is something undeniably enchanting about Starbucks Cake Pops. These delightful, bite-sized treats have captured hearts with their irresistible blend of moist cake and sweet frosting, all encased in a dreamy chocolate shell. I know the joy of biting into that perfect cake pop, and I also understand the desire to recreate that magic right in my own kitchen. This guide will show you how to master the art of homemade Starbucks Cake Pops, ensuring every bite is a taste of bakery perfection. Get ready to discover my special twist for achieving superior texture and flavor, along with all the expert tips you need for cake pop success.
Why You’ll Love This Recipe
This recipe for Starbucks Cake Pops is truly special, thanks to a unique twist that sets it apart. I discovered that incorporating a small amount of full-fat cream cheese directly into the cake crumb mixture creates an unparalleled moistness and a wonderfully tender texture.
The cream cheese also balances the sweetness beautifully. It prevents the cake pops from being overly sugary, which is a common issue with traditional recipes that rely solely on frosting. For more on the characteristics of this ingredient in baking, you can learn about cream cheese.
This addition makes the cake pop mixture easier to handle. It binds the cake crumbs more effectively, resulting in perfectly smooth, crack-free cake balls that are a breeze to dip.
You will achieve bakery-quality results every time. These cake pops are incredibly quick to prepare once you get the hang of it. They are also a fantastic family-friendly project that everyone will enjoy. Finally, these impressive treats are perfect for any party or celebration.
Ingredients Needed

For the Cake Pop Base
- 1 box (15.25 oz) vanilla cake mix, prepared according to package directions for a 9×13 inch cake
- 1/4 cup unsalted butter, softened
- 4 oz full-fat cream cheese, softened
- 1 teaspoon vanilla extract
For the Chocolate Coating and Decorations
- 16 oz white candy melts or high-quality white chocolate chips
- 2 tablespoons coconut oil or shortening (optional, for thinning)
- Sprinkles or edible glitter for decoration
- Lollipop sticks
Ingredient Notes & Substitutions
For the cake mix, I always recommend a high-quality vanilla cake mix for the best flavor base, but any brand will work. You can also use a homemade vanilla cake recipe if you prefer. When choosing your cream cheese, make sure it is full-fat. This is crucial for achieving the desired moisture and texture in our unique twist. Low-fat or whipped cream cheese will not yield the same results. For the chocolate coating, white candy melts are excellent for ease of use and a smooth finish. However, you can use good quality white chocolate chips, adding a tablespoon of paramount crystals or extra coconut oil to help them melt smoothly. To understand more about the differences, read about candy melts vs white chocolate. If you are looking for a dairy-free option, ensure your cake mix and frosting are dairy-free, and use a dairy-free cream cheese alternative. Gluten-free cake mixes can also be used, simply follow their package instructions.

How to Make Starbucks Cake Pops
Prepare the Cake
First, bake your vanilla cake according to the package directions for a 9×13 inch pan. Allow the cake to cool completely in the pan on a wire rack. Cooling is very important before you crumble the cake.
Crumble and Mix the Cake Base
Once the cake is fully cooled, gently crumble it into a large mixing bowl. Make sure there are no large lumps remaining. Add the softened unsalted butter, softened full-fat cream cheese, and vanilla extract to the crumbled cake. Mix these ingredients together with your hands or a sturdy spoon until the mixture is fully combined and has the consistency of a thick dough. It should be moist enough to hold its shape when pressed together but not sticky. This is where our unique cream cheese twist works its magic, ensuring a wonderfully moist cake pop base.
Shape and Chill the Cake Balls
Scoop out approximately 1-inch portions of the cake mixture. Roll each portion firmly between your palms to form smooth, uniform cake balls. This step requires a bit of pressure to ensure they are dense and crack-free. Place the rolled cake balls onto a baking sheet lined with parchment paper. Once all the cake balls are formed, place the baking sheet in the refrigerator for at least 30 minutes, or in the freezer for 15 minutes, to chill thoroughly. This firming up is essential for easy dipping and to prevent cracking.
Melt the Chocolate Coating
While the cake balls are chilling, prepare your chocolate coating. In a microwave-safe bowl, melt the white candy melts or white chocolate chips in 30-second intervals, stirring well after each interval, until completely smooth. If the chocolate seems too thick, stir in 1-2 tablespoons of coconut oil or shortening until you reach a pourable consistency. The consistency should be thin enough to coat easily but thick enough to adhere without dripping excessively.
Dip the Cake Pops
Take a lollipop stick and dip the tip about half an inch into the melted chocolate. Immediately insert the chocolate-dipped end of the stick into the center of a chilled cake ball, going about halfway through. This chocolate acts as a glue, securing the cake ball to the stick. Let this “glue” set for a few seconds.
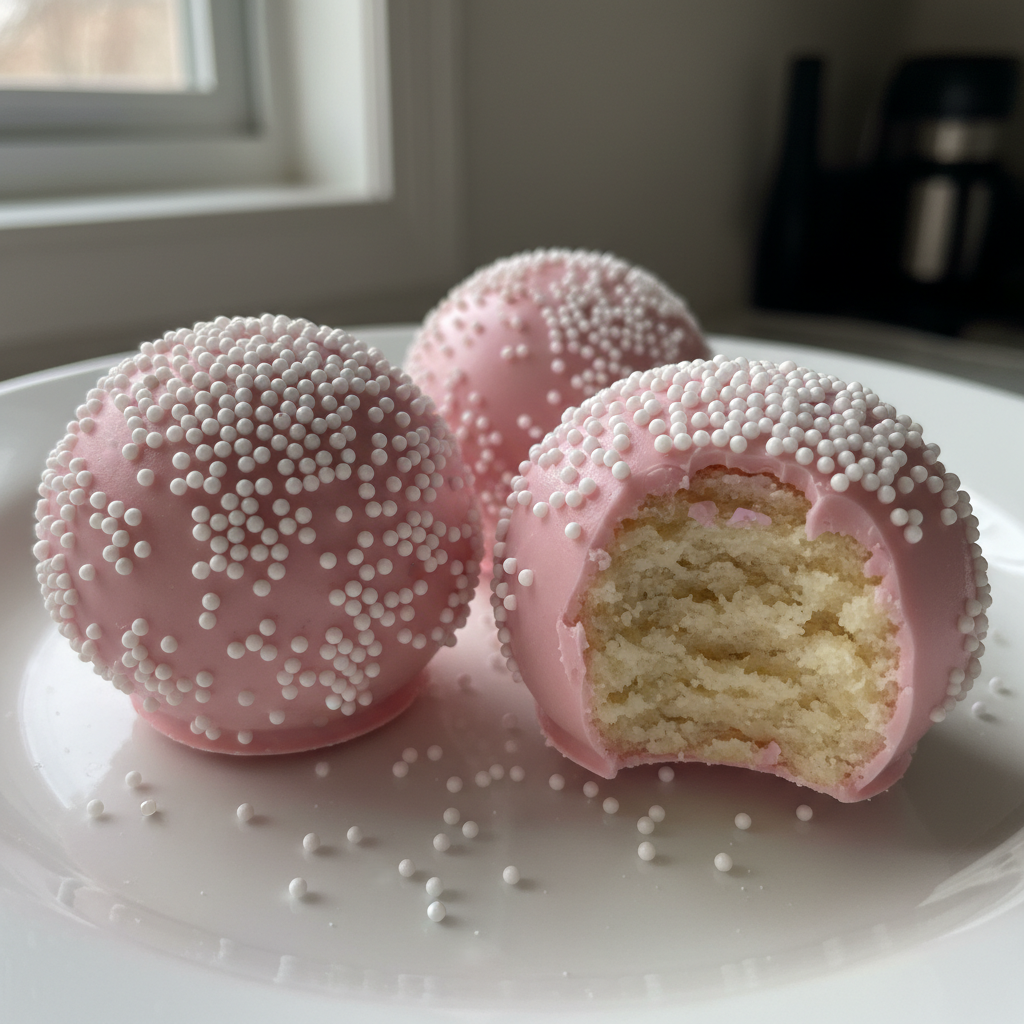
Once the glue is set, fully submerge each cake pop into the melted chocolate, rotating gently to ensure a complete and even coating. Carefully tap the stick against the edge of the bowl to remove any excess chocolate. You want a thin, even layer. If you desire, add sprinkles or other decorations immediately while the chocolate is still wet.
Set and Serve
Insert the dipped cake pops into a block of styrofoam or a cake pop stand to allow the chocolate coating to fully set. This can take about 15-30 minutes at room temperature, or you can place them back in the refrigerator for quicker setting. Once the chocolate is firm, your homemade Starbucks Cake Pops are ready to enjoy.
Gap-Filling Section(s)
Mastering the Perfect Cake Pop Coating & Troubleshooting
Achieving a flawless coating on your cake pops is key to their bakery-quality appearance. Start by ensuring your cake balls are uniformly rolled and thoroughly chilled. Cold cake balls help the chocolate set quickly, preventing excess dripping and creating a smoother finish.
When melting your chocolate or candy melts, a microwave is convenient, but be careful not to overheat it. Melt in short bursts, stirring frequently. A double boiler offers a gentler, more controlled melting process, reducing the risk of scorching. If your chocolate is too thick, incorporate a thinning agent like coconut oil or paramount crystals. This creates a smoother, more manageable consistency for dipping.
To color white chocolate, always use oil-based or powdered food coloring. Water-based gel colors can seize and ruin your chocolate, making it lumpy and unusable. Add color gradually until you achieve your desired hue.
Common issues like cracking or peeling coatings often stem from temperature shock. If your cake balls are too cold and your chocolate is too hot, the rapid temperature change can cause cracks as the chocolate sets. Ensure your cake balls are simply chilled, not frozen solid, and your melted chocolate is warm but not scorching hot. Lumpy coatings usually indicate moisture in your chocolate or overheating. Keep all utensils dry and avoid any contact with water. If your chocolate is too thick, it will create a heavy, uneven coating; thin it out as described above.
Creative Variations & Make-Ahead Tips
While the vanilla Starbucks Cake Pops are a classic, the possibilities for flavor variations are endless. For a rich treat, use a chocolate cake mix and pair it with a chocolate cream cheese mixture for decadent chocolate cake pops. Red velvet cake pops are another popular choice, offering a beautiful color and tangy flavor. Lemon zest added to the vanilla cake mixture or a lemon-flavored cake mix can create bright, zesty lemon cake pops perfect for spring. For holiday seasons, consider incorporating pumpkin spice or gingerbread flavors into your cake base.
Decorating cake pops allows for wonderful creativity. Beyond simple sprinkles, you can drizzle contrasting chocolate colors, create patterns with edible markers, or use themed sprinkles for birthdays, holidays, or specific events. Small edible pearls or sanding sugar can add an elegant touch to any dessert recipe.
These Starbucks Cake Pops are excellent for making ahead. You can prepare the cake balls and store them in an airtight container in the refrigerator for up to 3-4 days. You can also freeze the un-dipped cake balls for up to 1 month; just thaw them in the refrigerator for a few hours before dipping. For finished cake pops, store them in an airtight container in the refrigerator for up to a week. If you need to freeze finished cake pops, arrange them in a single layer on a baking sheet to freeze solid, then transfer them to an airtight container or freezer bag. Thaw them in the refrigerator before serving to prevent condensation from affecting the coating.
Pro Tips & Troubleshooting
Pro Tips
- Always use full-fat cream cheese for the best moisture and less-sweet balance.
- Chill your cake balls thoroughly before dipping; this prevents cracking and makes handling easier.
- Melt chocolate in short bursts, stirring frequently, to avoid scorching or seizing.
- Use a thinning agent like coconut oil if your chocolate is too thick for a smooth coating.
- Dip lollipop sticks in chocolate before inserting them into cake balls to act as a strong glue.
- Tap off excess chocolate gently by tapping the stick against the bowl for a perfectly thin coating.
- Decorate immediately after dipping while the chocolate is still wet to ensure sprinkles adhere.
Common Mistakes to Avoid
- Do not overmix the cake crumb mixture; this can make the cake pops tough.
- Avoid using warm cake crumbs; always cool your cake completely to prevent a greasy mixture.
- Do not skip the chilling step for the cake balls; warm cake balls will fall apart when dipped.
- Never overheat your chocolate; this can cause it to seize, become lumpy, or burn.
- Do not use water-based food coloring in chocolate; it will cause the chocolate to seize.
- Avoid dipping too quickly or without tapping off excess; this leads to thick, clunky coatings.
- Do not store cake pops in overly humid conditions, which can make the coating sticky.
Serving & Storage
Serving Ideas
My homemade Starbucks Cake Pops are perfect for a variety of occasions. Present them upright in a decorative stand or a block of styrofoam for an elegant display at parties. For individual gifts or party favors, wrap them in small cellophane bags tied with a ribbon. They pair wonderfully with a hot cup of coffee, much like you would find at Starbucks, or with a cold glass of milk for a delightful snack. Consider garnishing with a light dusting of edible glitter or a contrasting chocolate drizzle for an extra touch of sophistication.
Storage and Make-Ahead
Once dipped and set, Starbucks Cake Pops can be stored at room temperature in an airtight container for up to 2 days, provided your home is cool. For longer freshness, store them in an airtight container in the refrigerator for up to 1 week. If you wish to make them ahead, the un-dipped cake balls can be refrigerated for up to 4 days or frozen for up to 1 month. To freeze un-dipped cake balls, place them on a baking sheet in the freezer until solid, then transfer them to an airtight freezer bag. When ready to use, thaw them in the refrigerator for several hours before dipping. Finished cake pops can also be frozen in an airtight container for up to 1 month. Thaw them slowly in the refrigerator to prevent condensation from forming on the chocolate coating. There is no need to reheat cake pops; they are best enjoyed chilled or at room temperature.
Adaptations for Special Occasions
These cake pops are incredibly versatile for any celebration. For birthdays, customize them with colorful sprinkles matching the party theme. During the holidays, use festive candy melts in red and green, or add holiday-themed edible decorations. For a bridal shower or baby shower, soft pastel colors and delicate sprinkles create an elegant dessert.
Conclusion
Crafting your own Starbucks Cake Pops at home is a rewarding experience, especially with my unique twist of adding cream cheese for unmatched moisture and perfect texture. This method guarantees a less-sweet, easier-to-handle mixture that results in consistently beautiful and delicious cake pops. Even if you are new to baking, you can achieve impressive, bakery-quality results with this recipe. I encourage you to experiment with different flavor combinations and decorating ideas to make these treats truly your own. Share your creations with friends and family, and perhaps even share your thoughts in the comments below. Happy baking!
FAQ
What kind of cake is best for cake pops?
A vanilla or yellow cake mix is typically best for Starbucks Cake Pops as it provides a neutral base that pairs well with various flavorings and coatings. You can also use chocolate or red velvet cake.
How do you make cake pops not crack?
Cake pops often crack due to temperature shock. Ensure your cake balls are properly chilled, but not frozen solid, and that your melted chocolate is warm but not excessively hot. Dipping them quickly and evenly also helps.
Why are my cake pops so sticky?
Cake pops can become sticky if there is too much frosting or moisture in the cake mixture. Ensure you use the recommended amount of cream cheese and butter, and chill the cake balls thoroughly. Humid environments can also make the coating sticky.
How do you get cake pops smooth?
To achieve smooth cake pops, roll the cake mixture very firmly into dense, uniform balls. Chill them thoroughly, and then use a smooth, properly thinned chocolate coating, tapping off any excess.
How far in advance can you make cake pops?
You can make cake pops several days in advance. Un-dipped cake balls can be refrigerated for up to 4 days or frozen for up to a month. Finished, dipped cake pops can be refrigerated for up to a week.
Can you use regular chocolate chips for cake pops?
Yes, you can use regular chocolate chips for cake pops, but you might need to add a small amount of coconut oil, shortening, or paramount crystals to thin the melted chocolate for a smoother dipping consistency. Candy melts are formulated to melt more smoothly.
Starbucks Cake Pops: The Ultimate Homemade Copycat Recipe
Ingredients
Equipment
Method
- First, bake your vanilla cake according to the package directions for a 9×13 inch pan. Allow the cake to cool completely in the pan on a wire rack.
- Once the cake is fully cooled, gently crumble it into a large mixing bowl. Make sure there are no large lumps remaining.
- Add the softened unsalted butter, softened full-fat cream cheese, and vanilla extract to the crumbled cake. Mix these ingredients together with your hands or a sturdy spoon until the mixture is fully combined and has the consistency of a thick dough. It should be moist enough to hold its shape when pressed together but not sticky.
- Scoop out approximately 1-inch portions of the cake mixture. Roll each portion firmly between your palms to form smooth, uniform cake balls. This step requires a bit of pressure to ensure they are dense and crack-free.
- Place the rolled cake balls onto a baking sheet lined with parchment paper. Once all the cake balls are formed, place the baking sheet in the refrigerator for at least 30 minutes, or in the freezer for 15 minutes, to chill thoroughly.
- While the cake balls are chilling, prepare your chocolate coating. In a microwave-safe bowl, melt the white candy melts or white chocolate chips in 30-second intervals, stirring well after each interval, until completely smooth.
- If the chocolate seems too thick, stir in 1-2 tablespoons of coconut oil or shortening until you reach a pourable consistency. The consistency should be thin enough to coat easily but thick enough to adhere without dripping excessively.
- Take a lollipop stick and dip the tip about half an inch into the melted chocolate. Immediately insert the chocolate-dipped end of the stick into the center of a chilled cake ball, going about halfway through. Let this “glue” set for a few seconds.
- Once the glue is set, fully submerge each cake pop into the melted chocolate, rotating gently to ensure a complete and even coating. Carefully tap the stick against the edge of the bowl to remove any excess chocolate. If you desire, add sprinkles or other decorations immediately while the chocolate is still wet.
- Insert the dipped cake pops into a block of styrofoam or a cake pop stand to allow the chocolate coating to fully set. This can take about 15-30 minutes at room temperature, or you can place them back in the refrigerator for quicker setting.
- Once the chocolate is firm, your homemade Starbucks Cake Pops are ready to enjoy.