

For years, the idea of cultivating my own sourdough bread starter felt like a mystical art reserved for seasoned bakers. I understand the intimidation, the fear of failure, and the questions about whether it’s truly “working.” But I’m here to tell you that creating a vibrant, active sourdough starter from scratch is far simpler and more rewarding than you might imagine. This guide is designed for both the curious beginner seeking clear, step-by-step instructions and the diligent baker looking for deeper insights into the fascinating world of fermentation. Together, we’ll navigate the process, learn to nurture your starter, and unlock the secrets to truly exceptional homemade sourdough.
Why You’ll Love This Sourdough Starter Method
In my kitchen, I believe baking should be intuitive, not just scientific. That’s why I’ve crafted this method around my unique Sourdough Starter Sensory Readiness & Quick Boost Guide. This isn’t just about measurements; it’s about truly understanding your starter with all your senses.
- Confidence Boost: No more guessing if your sourdough starter is truly “ready.” My guide teaches you to interpret visual cues like bubble size and texture, the changing aromas, and even the feel of your starter. This multi-sensory diagnostic approach builds confidence, letting you know exactly what your starter needs.
- Faster Results: Encounter a sluggish starter? My ‘Quick Boost’ section provides science-backed interventions. For instance, a small addition of rye flour provides a nutrient-rich feast for the wild yeast and bacteria, while a targeted warmer water bath (around 80-85°F) can gently accelerate metabolism. This means less waiting and more baking!
- Reliable Baking: When you understand the nuanced language of your starter, you can ensure it’s consistently potent. This leads to predictable and successful bakes every time, from rustic loaves of sourdough bread to delicate pastries.
- Deep Understanding: Beyond just following a recipe, you’ll learn to ‘read’ your starter like a professional chef. This deep understanding empowers you to adapt, troubleshoot, and even develop your own unique fermentation preferences over time.
Ingredients Needed to Cultivate Your Sourdough Starter

- 1x (5lb) bag all purpose flour or bread flour (I use either KAF, Trader Joe’s, or Whole Foods)
- 1/2 cup (60g) whole wheat flour (I use KAF whole wheat)
- Water, preferably warm around 85 F
Ingredient Notes & Essential Equipment
- Flour Choices: We kickstart our sourdough starter with a small amount of whole wheat flour because its higher nutrient content and bran provide an abundance of food for initial yeast and bacteria activity. As your starter establishes itself, you can transition to feeding with all-purpose flour or bread flour. These maintain activity while developing a milder flavor. For even more robust activity, you can also incorporate rye flour or spelt flour, but be prepared for slight adjustments in hydration due to their different absorption rates. I always recommend using reputable brands like King Arthur Flour (KAF), Trader Joe’s, or Whole Foods brand for their consistent quality. Crucially, always use unbleached flour; bleached flour can inhibit the delicate microbial activity your starter needs to thrive. Opting for organic flour can also provide a richer microbial environment.
- Water Quality: The quality of your water is paramount. Filtered or chlorine-free tap water is essential because chlorine can actively inhibit the delicate wild yeast and bacteria crucial for fermentation. If you use tap water, let it sit out in an open container for 24 hours to allow the chlorine to dissipate. While not strictly necessary, some bakers notice subtle differences in starter activity and flavor based on their local water’s mineral content.
- Essential Equipment: A successful sourdough starter needs a few key tools. A large, wide-mouth glass jar (like a mason jar) provides ample space for growth and visibility. A digital scale is absolutely non-negotiable for accurate flour and water measurements; weighing ingredients ensures precise hydration levels, which is critical for consistency. A rubber spatula is ideal for scraping down the sides of the jar, preventing dried bits from molding. For covering, use plastic wrap, a reusable wax wrap, or a loose-fitting lid – never seal it tightly, as gas needs to escape. A rubber band or a piece of masking tape around the jar is a simple yet effective way to track your starter’s daily rise. Finally, a thermometer can be helpful for monitoring your room temperature and ensuring your water is consistently warm around 85°F (30°C).

How to Make Your Sourdough Bread Starter: A 7-Day Guide
Cultivating a vibrant sourdough bread starter is a journey of patience and observation. Follow these daily steps, paying close attention to the sensory cues, and you’ll soon have a thriving starter ready for baking!
Day 1: The First Mix
- Combine 60 g (1⁄2 cup) of whole wheat flour + 60 g (1⁄4 cup) of warm water (around 85°F) in a large jar.
- Mix thoroughly with a fork until it’s smooth and homogenous. Observe the consistency: it will be thick and pasty, like a stiff dough.
- Cover the jar loosely with plastic wrap, a reusable wax wrap, or a loose lid.
- Let your fledgling starter rest in a warm spot, ideally between 70-75°F (21-24°C), for 24 hours. Consistent temperature is incredibly important for kickstarting the fermentation process.
- Total approximate yield: 120 g starter.
Day 2: First Observations
- Gently check the surface of your starter. Look for any tiny pinprick bubbles or a slight change in texture. Don’t worry if you don’t see much; initial activity can be subtle and might have appeared and dissolved overnight.
- If you wish to oxygenate the mixture, you can give it a gentle stir once or twice with your rubber spatula. Otherwise, simply cover and let it rest for another 24 hours at 70-75°F.
- At this stage, the aroma might be neutral or slightly wheaty.
Day 3: The First Discard & Feed
- Observe the texture: it should now be quite stretchy.
- Remove and discard half (approximately 60g) of your sourdough starter from the jar. You can eyeball this or use your digital scale. Discarding is crucial to manage the acidity and volume of your starter.
- To the remaining starter in the jar, add 60 g (1⁄2 cup) of all-purpose flour + 60 g (1/4 cup) of warm water.
- Mix with a fork until smooth, ensuring no dry spots. Use your rubber spatula to scrape down the sides of the jar; this prevents dried flour from molding.
- Note the consistency now: it should resemble thick pancake batter or plain yogurt.
- Cover loosely and let rest in your warm spot, 70-75°F, for another 24 hours.
- Total yield: 180 g starter.
- Sensory Check-in: You might start to notice more bubbles today, and the aroma might develop a very subtle, slightly fruity note.
Day 4: Navigating the ‘False Start’
- Remove and discard half (approximately 90g) of the sourdough starter.
- Add 60 g (1⁄2 cup) of all-purpose flour + 60 g (1/4 cup) of warm water to the jar. Mix well and scrape down the sides.
- Cover loosely and let rest in a warm spot, 70-75°F, for 24 hours.
- Total yield: 210 g starter.
- Expert Tip: Don’t be alarmed if your starter seems less active today. This is very common and known as the ‘false start’. Different populations of microbes are competing, and it’s a normal part of the development. Patience is key!
Day 5: Building Momentum
- Remove and discard half (approximately 105g) of the sourdough starter.
- Add 60 g (1⁄2 cup) of all-purpose flour + 60 g (1/4 cup) of warm water. Mix well and scrape down the sides.
- Cover loosely and let rest in a warm spot, 70-75°F, for 24 hours.
- Total yield: 225 g starter.
- Sensory Check-in: You should be observing more pronounced bubbles, and your starter might be starting to visibly rise after feeding. The aroma should be shifting from wheaty to pleasantly sour. Use a rubber band or masking tape at the initial feeding line to track its rise time.
Day 6: Observing the Rise
- Remove and discard half (approximately 112g) of the sourdough starter.
- Add 60 g (1⁄2 cup) of all-purpose flour + 60 g (1/4 cup) of warm water. Mix well and scrape down the sides.
- Cover loosely and let rest in a warm spot, 70-75°F, for 24 hours.
- Total yield: 232.5 g starter.
- Sensory Check-in: Look for your starter to be actively bubbling and potentially doubling in size within 4-8 hours after feeding. The texture when stirred should feel lighter and more airy.
Day 7: Approaching Readiness
- Remove and discard half (approximately 116.25g) of the sourdough starter.
- Add 60 g (1⁄2 cup) of all-purpose flour + 60 g (1/4 cup) of warm water. Mix well and scrape down the sides.
- Cover loosely and let rest in a warm spot, 70-75°F, for 24 hours.
- Total yield: 236 g starter.
- Expert Tip: Remember that “equal parts” for feeding always refers to equal *weights* of starter, flour, and water, not equal volumes. A digital scale is your best friend here.
Day 8: Assessing Readiness & The Float Test
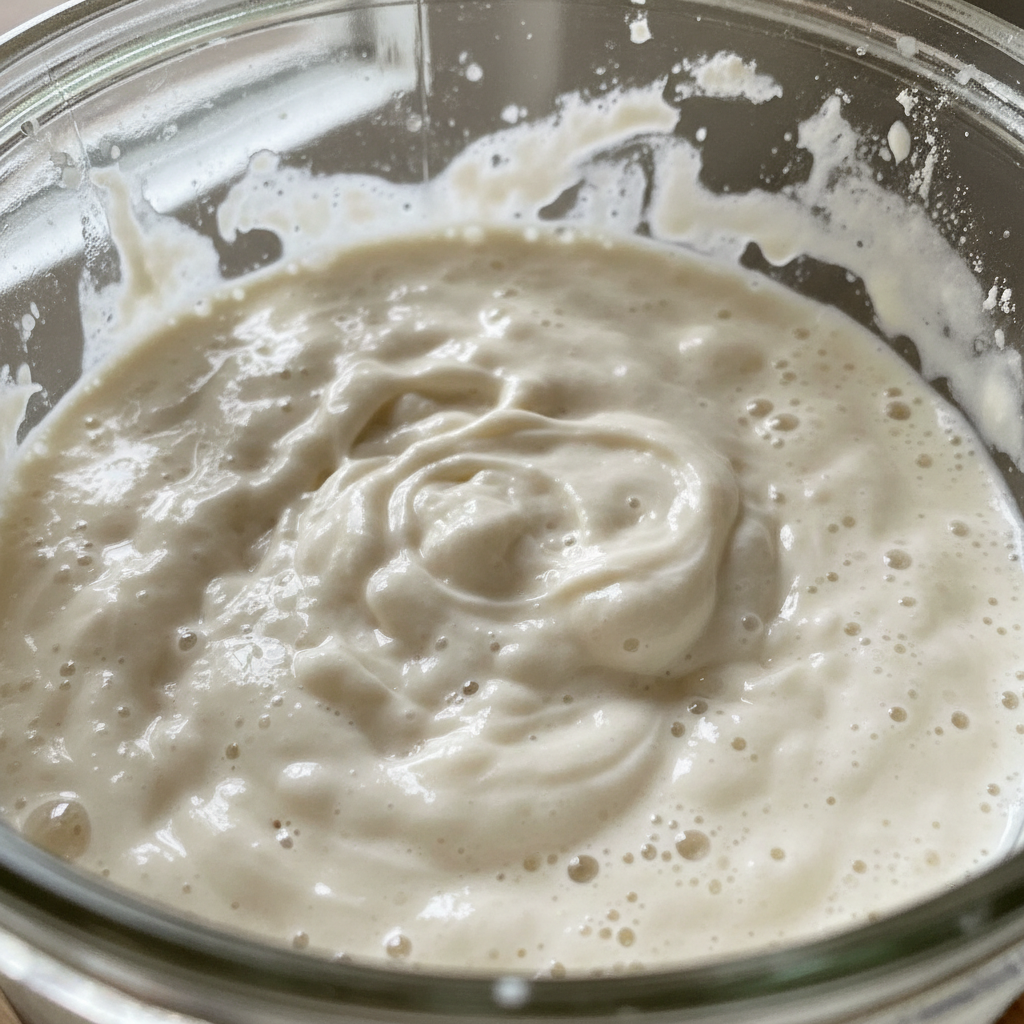
- Visual Cues: Your sourdough starter should have consistently doubled in size (or even tripled) after feeding, with plenty of visible bubbles, both large and small, throughout the mixture and on the surface.
- Textural Cues: When you stir it, the texture should be light, airy, spongy, and fluffy, not dense or pasty. It might even resemble the internal texture of roasted marshmallows.
- Aromatic Cues: The smell should be pleasantly sour, yeasty, and slightly fruity, perhaps akin to roasted marshmallows or good beer. It should absolutely not smell stinky, vinegary, or like nail polish remover.
- If these conditions are met, congratulations! Your sourdough starter is active and ready to use for baking!
- The Float Test: As a final confirmation, perform the classic float test. Drop a small teaspoon of your bubbly, active starter into a glass of room-temperature water. If it floats, your starter is potent and ready. If it sinks, it needs more time to develop strength.
- Quick Boost for Sluggish Starters: If your starter isn’t quite ready by Day 8, don’t despair! Continue feeding it daily. Consider these ‘Quick Boost’ tips:
- Ensure consistent warmth: Aim for the higher end of the 70-75°F range, or even place the jar in a warmer water bath (e.g., 80-85°F water) for a few hours after feeding.
- Add a nutrient boost: Replace 10-20g of your usual feeding flour with whole wheat flour or rye flour for a few feedings. These flours are rich in nutrients that can invigorate sluggish yeast.
- Check hydration: If your starter seems too stiff, it might be struggling to expand. Add an extra 5-10g of water to your next feeding to make it a slightly looser, thick pancake batter consistency.
- Once active, you can transfer your sourdough starter to a clean jar if desired, and feel free to give it a name – many bakers do!
Beyond Day 7: Ongoing Sourdough Starter Care & Maintenance
Once your sourdough starter is active, the journey continues! Understanding how to feed and store it properly will ensure you have a reliable baking partner for years to come.
Regular Feeding Schedules (Room Temperature)
For a starter you use frequently (daily or every other day), keeping it at consistent room temperature (70-75°F) and feeding it regularly is ideal. My recommendation is a 1:1:1 ratio: 1 part starter, 1 part flour, and 1 part water by weight. For example, if you want to maintain about 100g of starter, you would remove and discard all but 50g of starter, then feed it with 50g of flour and 50g of water. This ensures a healthy feeding ratio, preventing the starter from becoming too acidic. I find feeding first thing in the morning works best, establishing a routine that “trains” your starter to be active when you need it.
Refrigeration for Less Frequent Baking
If you don’t bake every day, the refrigerator is your best friend for storing your sourdough starter. Colder temperatures significantly slow down the fermentation process, allowing you to feed it less often. After feeding your starter as usual, let it sit at room temperature for an hour or two until you see some initial activity, then transfer it to the refrigerator. It can comfortably live there for 1-2 weeks without a feeding, sometimes even longer! To reactivate a refrigerated starter for baking, simply remove it from the fridge, let it warm up for an hour or two, discard all but your desired amount (e.g., 50g), and then feed it 1-2 times at room temperature with a 1:1:1 ratio until it doubles consistently, is bubbly, and passes the float test.
Young vs. Mature Starter Performance
You might wonder about the difference between a ‘young’ and a ‘mature’ starter. A young starter (typically 7-14 days old) is active and can certainly produce delicious bread, but it may still be developing the full range of complex flavors and the robust strength needed for a powerful rise. A mature starter, on the other hand, is several weeks or even months old. It’s more resilient, predictable, and boasts a deeper, more nuanced flavor profile. Its established microbiome leads to better gluten development and a more reliable rise in your baked goods.
What to Do with Sourdough Discard
Don’t let your discarded starter go to waste! The discarding process is necessary for a healthy, manageable starter, but the discard itself is a treasure trove of flavor. It’s excellent for making a variety of quick breads and pastries, like sourdough discard recipes for pancakes, waffles, crackers, or muffins. I always keep a separate container in my fridge for discard to use throughout the week.
Advanced Sourdough Starter Troubleshooting & Revival
Every baker encounters hiccups, and understanding how to troubleshoot your sourdough starter is part of the journey. Here’s how to address common issues and bring your starter back to life.
Understanding Hooch
Hooch is the dark liquid layer that sometimes forms on top of your sourdough starter. It’s a natural byproduct of fermentation and usually indicates that your starter is very hungry and needs a feeding. Hooch typically looks dark, often brown or even black, and can smell a bit like alcohol. You can either pour it off before feeding (for a milder flavored bread) or stir it back in (for a more robust, sour flavor). Just remember, hooch is usually a sign of hunger, not a sign of a bad starter.
Identifying and Dealing with Mold
It’s crucial to distinguish between harmless hooch and harmful mold.
- White, fuzzy mold: This can sometimes appear if bits of dried flour cling to the sides of the jar. If it’s minimal and clearly white and fuzzy, you can carefully scrape it off along with a generous layer of starter beneath it, then transfer the healthy starter to a clean jar and resume feeding. However, if it’s extensive, it’s safer to discard.
- Pink, Orange, or Black Mold: This is a different story. If you ever see pink, orange, or black discoloration, or any unusually colored fuzzy patches, on your sourdough starter, you must discard the entire starter immediately. These colors often indicate the presence of harmful bacteria or fungi that can be toxic. Sanitize your jar and all tools thoroughly before starting anew. Always err on the side of caution when it comes to unusual colors.
Reviving a Sluggish or Dormant Starter
- Sluggish (Slow Activity): If your starter is just not rising as much as you’d like, revisit the ‘Quick Boost’ tips:
- Temperature Control: Ensure your starter is consistently in its happy zone (70-75°F, or even a brief period at 80°F). A slightly warmer environment can dramatically increase yeast activity.
- Nutrient Boost: Try feeding with a small amount of rye flour or whole wheat flour. These flours are packed with more nutrients and enzymes that provide a boost to the microbiome.
- Hydration Adjustment: If your starter is too thick, it can struggle to expand. A slightly wetter hydration (e.g., 1:1:1.1 starter:flour:water ratio) might help.
- Smaller Feeding Ratio: Instead of 1:1:1, try a 1:2:2 or 1:3:3 ratio (starter:flour:water). This leaves a larger proportion of active starter to kickstart the new flour and water, often invigorating a slow starter.
- Completely Dormant (After Long Fridge Storage): Even a neglected starter can often be revived. Remove it from the fridge, let it come to room temperature, discard all but a small amount (e.g., 20-30g), and then feed it consistently (1:1:1 ratio) every 12-24 hours. It might take several days of diligent feeding before it shows vigorous activity again.
- Dried Starter Revival: For very long-term storage or if you received a dried starter, the process is simple: crumble the dried starter into a small amount of warm water, let it dissolve completely, and then begin feeding it tiny amounts of flour gradually over several days until it becomes active and bubbly. It’s truly amazing how resilient these little ecosystems are!
The Science of Flour Types
Understanding why certain flour types work better for your sourdough starter goes back to the microbial feast. Whole wheat flour and rye flour are excellent for kickstarting fermentation because they contain more bran and germ, which are rich in minerals, vitamins, and enzymes. These nutrients are exactly what the beneficial wild yeast and bacteria in your starter crave, giving them a vigorous start. Once established, all-purpose flour and bread flour provide a consistent food source that sustains the fermentation. While they have fewer initial nutrients, they contribute to developing a milder flavor profile and specific gluten development characteristics, which are desirable for many sourdough bread recipes. It’s all about balancing that initial burst of energy with sustainable growth!
Pro Tips & Common Mistakes to Avoid
From my kitchen to yours, here are some nuggets of wisdom to guide you, and crucial pitfalls to steer clear of, ensuring your sourdough bread starter journey is a success.
Pro Tips for Sourdough Starter Success
- Consistent Schedule: Just like any living thing, your starter thrives on routine. Try to feed it at roughly the same time each day (e.g., every morning) to “train” it for predictable activity and consistent rise time.
- Track Growth: Always use a rubber band or a piece of masking tape around your jar at the initial level of your starter after feeding. This simple trick makes it incredibly easy to see how much your starter has risen and when it peaks, an essential part of the ‘Sensory Readiness Guide’.
- Sanitation is Key: Always use a clean jar and a fresh rubber spatula. Keeping things tidy prevents unwanted guests like mold or competing bacteria from taking over your precious microbiome.
- Weighing is Essential: I can’t stress this enough – invest in a digital scale! Using equal weights (grams) for flour and water is paramount for precise hydration and consistent starter health, unlike measuring by volume (cups), which can be inaccurate due to varying densities.
- Don’t Fear Hooch: Remember, hooch is usually just a sign of hunger. Don’t panic; simply pour it off or stir it in, then feed your starter. It’s a sign that your starter is alive and metabolizing!
- Temperature Control: Consistent warmth (70-75°F) is absolutely paramount for active fermentation. If your kitchen is cool, consider using your oven with just the light on (ensuring it doesn’t get too hot with an oven thermometer), a dedicated proofing box, or even placing the jar in a microwave or a cooler with a warm (not hot) water bottle to create a stable, warm environment.
- Sensory Check-Ins: Regularly use the ‘Sensory Readiness Guide’ I’ve shared. Beyond just timing, assess the visual cues (bubbly, doubled in size), aroma (pleasant vs. ‘off’), and texture (spongy, fluffy) to truly understand your starter’s readiness.
- Sourdough Resilience: Take heart! Sourdough starters are incredibly resilient. Even if you neglect it for a bit or it seems sluggish, it can almost always be revived with consistent care.
Common Mistakes to Avoid
- Overthinking or Rushing: Patience is truly a virtue in sourdough baking. Don’t expect immediate perfection, and resist the urge to over-analyze every tiny bubble. The process takes time.
- Ignoring Temperature: Letting your starter get too cold is a common culprit for sluggish activity. Cold temperatures slow down or even halt the crucial fermentation process.
- Confusing Weight with Volume: As mentioned, measuring by volume (cups) rather than by weight (grams) for flour and water is a significant error that can lead to inconsistent hydration and an unhappy starter.
- Forgetting to Discard: Failing to discard roughly half of your starter before each feeding will lead to an overly acidic starter, an unmanageable amount of starter, and eventually, a weak one.
- Using Bleached Flour: Avoid bleached flour at all costs. The chemicals used in the bleaching process can kill off the beneficial microbes your starter needs to thrive. Always opt for unbleached varieties.
- Panicking During the ‘False Start’: The temporary slowdown in activity on Days 3-4 is completely normal. It’s not a sign of failure, but rather a microbial battle being won by the beneficial yeasts and bacteria.
- Sealing the Lid Tightly: Your sourdough starter produces gas as it ferments. A tightly sealed lid can lead to pressure buildup, or at best, inhibit proper gas exchange. Always use a loose-fitting lid or plastic wrap.
Serving Your Active Sourdough Starter & Storage Guide
You’ve done it! You’ve cultivated a living, breathing sourdough starter. Now, let’s talk about how to use it and keep it happy for the long haul.
What to Make with Your Active Sourdough Starter
The possibilities are endless! Of course, the classic is a beautiful loaf of sourdough bread. Its tangy flavor and incredible crust are unmatched. But don’t stop there! Your active starter is also perfect for creating:
- Fluffy sourdough focaccia, adorned with herbs and olive oil.
- Crispy, chewy sourdough pizza dough for homemade pizza nights.
- Hearty sourdough bagels, perfect for breakfast.
And remember that wonderful sourdough discard recipes! Don’t let a drop go to waste. Use your discard to make tender pancakes, crispy crackers, or delicious muffins – it’s a fantastic way to utilize every part of your sourdough journey.
Storing Your Sourdough Starter for Long-Term Use
- Room Temperature Storage: If you’re a daily baker, keeping your starter at room temperature (70-75°F) and feeding it every 12-24 hours (1:1:1 ratio) is the way to maintain peak activity. This ensures it’s always ready for your next baking adventure.
- Refrigerator Storage: For less frequent bakers, the refrigerator is your best friend. After a fresh feeding, let your starter sit out for an hour or two to show initial signs of activity, then tuck it into the fridge with a loose lid. The cold slows down fermentation significantly. You can feed it once a week, once every two weeks, or even once a month if it’s very mature and robust. When you’re ready to bake, pull it out, let it warm, discard most of it, and feed it 1-2 times at room temperature until it’s bubbly and passes the float test. It’s incredibly resilient!
- Holiday/Travel Prep: If you’re going away for an extended period, give your starter a larger feeding (e.g., 1:2:2 or 1:3:3 ratio) before placing it in the fridge. This larger “meal” will sustain it longer. For truly long-term storage (months or even years), you can even dry your starter. Rehydrating a dried starter is a simple process, allowing your sourdough legacy to continue indefinitely.
Conclusion: Your Sourdough Journey Begins!
Congratulations! You’ve successfully embarked on the rewarding journey of cultivating your own sourdough bread starter. What might have once seemed daunting is now an accessible and deeply satisfying part of your kitchen routine. By understanding the ‘Sourdough Starter Sensory Readiness & Quick Boost Guide,’ you’re equipped with not just a recipe, but a profound understanding of fermentation and the vibrant life within your jar. The satisfaction of baking your own rustic sourdough bread, knowing you nurtured its very soul from scratch, is unparalleled.
Remember, patience and observation are your greatest tools. Embrace the process, trust your senses, and don’t be afraid to experiment. Your starter is resilient, and it’s ready to bring incredible flavors into your home. Now, go forth and bake! I can’t wait to see what delicious creations you’ll make. Share your progress with me and explore my other sourdough recipes for endless inspiration!
Frequently Asked Questions About Sourdough Starters
How long does it typically take to create an active sourdough starter, and how do I know it’s ready?
It typically takes 7-10 days, but sometimes longer, as every kitchen and starter is unique. Your starter is ready when it consistently doubles in size within 4-8 hours after feeding, is visibly bubbly, smells pleasantly sour (like roasted marshmallows or good beer), and passes the float test (a teaspoon of bubbly starter floats in water).
What is ‘hooch’ and what does it indicate about my sourdough starter’s health?
Hooch is the dark liquid layer that can form on top of your sourdough starter. It indicates your starter is hungry and has consumed most of its food. You can pour it off (for a milder flavor) or stir it in (for a more pronounced sourness) before feeding. It’s a normal part of the fermentation process, not a sign that your starter has gone bad.
Why is maintaining a consistent temperature crucial for successful sourdough starter development?
Maintaining consistent warm temperatures, ideally between 70-75°F (21-24°C), is crucial because it optimizes the activity of the beneficial wild yeast and bacteria responsible for fermentation. Too cold, and the starter becomes sluggish; too hot, and it can over-ferment, produce off-flavors, or inhibit desirable microbes.
Can I use different types of flour like all-purpose, bread flour, or whole wheat throughout the starter process?
Yes, you absolutely can. We recommend starting with whole wheat flour for its higher nutrient content, which gives the initial fermentation a strong kickstart. Once active, you can seamlessly transition to feeding with all-purpose flour or bread flour. Rye flour and spelt flour can also be used, potentially leading to a more robust starter, but may require slight hydration adjustments. Always ensure you use unbleached flour, as bleached flour can hinder the vital microbial activity.
What are the best practices for feeding and storing a sourdough starter for long-term use?
For a starter used daily, feed it every 12-24 hours at room temperature, typically using a 1:1:1 ratio of starter:flour:water by weight. For long-term storage or less frequent baking, store it in the refrigerator after a fresh feeding. It can remain there for weeks, or even months for a well-established starter, requiring a feeding only once a week or every few weeks. To reactivate it for baking, remove it from the fridge, let it warm up, discard most of it, and feed it 1-2 times until it’s bubbly and active again.
Why do flour and water have different cup measurements even when their weights are equal for feeding?
Flour and water have different densities. A cup of flour is much lighter than a cup of water. To ensure the precise and consistent hydration level that is crucial for optimal starter health and activity, it’s absolutely essential to measure your ingredients by weight (grams) rather than by volume (cups). This accuracy is key to successful sourdough.
What if my sourdough starter has pink mold?
If you observe any pink, orange, or black mold on your sourdough starter, it indicates the presence of harmful bacteria or fungi. Unfortunately, it’s best to discard the entire starter immediately. Thoroughly sanitize your jar and tools with hot, soapy water before attempting to start a new one. While white fuzzy mold might be less serious if minimal, always err on the side of caution with unusual colors.
How do I restart a completely dormant or dried sourdough starter?
For a completely dormant starter (e.g., one neglected in the fridge for months), remove it from the fridge, let it warm to room temperature, discard most of it, and then feed it consistently (1:1:1 ratio) every 12-24 hours for several days until it shows vigorous activity. For a dried starter, crumble it into warm water, let it rehydrate fully (this can take a few hours), and then begin feeding it small amounts of flour gradually over several days until it’s active and bubbly again.
Easy Sourdough Bread Starter: A Sensory Guide for Beginners
Ingredients
Equipment
Method
- Combine 60 g (1⁄2 cup) of whole wheat flour + 60 g (1⁄4 cup) of warm water (around 85°F) in a large jar.
- Mix thoroughly with a fork until it’s smooth and homogenous. Observe the consistency: it will be thick and pasty, like a stiff dough.
- Cover the jar loosely with plastic wrap, a reusable wax wrap, or a loose lid.
- Let your fledgling starter rest in a warm spot, ideally between 70-75°F (21-24°C), for 24 hours. Consistent temperature is incredibly important for kickstarting the fermentation process.
- Gently check the surface of your starter. Look for any tiny pinprick bubbles or a slight change in texture. Don’t worry if you don’t see much; initial activity can be subtle and might have appeared and dissolved overnight.
- If you wish to oxygenate the mixture, you can give it a gentle stir once or twice with your rubber spatula. Otherwise, simply cover and let it rest for another 24 hours at 70-75°F.
- Observe the texture: it should now be quite stretchy.
- Remove and discard half (approximately 60g) of your sourdough starter from the jar. You can eyeball this or use your digital scale. Discarding is crucial to manage the acidity and volume of your starter.
- To the remaining starter in the jar, add 60 g (1⁄2 cup) of all-purpose flour + 60 g (1/4 cup) of warm water.
- Mix with a fork until smooth, ensuring no dry spots. Use your rubber spatula to scrape down the sides of the jar; this prevents dried flour from molding.
- Note the consistency now: it should resemble thick pancake batter or plain yogurt.
- Cover loosely and let rest in your warm spot, 70-75°F, for another 24 hours.
- You might start to notice more bubbles today, and the aroma might develop a very subtle, slightly fruity note.
- Remove and discard half (approximately 90g) of the sourdough starter.
- Add 60 g (1⁄2 cup) of all-purpose flour + 60 g (1/4 cup) of warm water to the jar. Mix well and scrape down the sides.
- Cover loosely and let rest in a warm spot, 70-75°F, for 24 hours.
- Don’t be alarmed if your starter seems less active today. This is very common and known as the ‘false start’. Patience is key!
- Remove and discard half (approximately 105g) of the sourdough starter.
- Add 60 g (1⁄2 cup) of all-purpose flour + 60 g (1/4 cup) of warm water. Mix well and scrape down the sides.
- Cover loosely and let rest in a warm spot, 70-75°F, for 24 hours.
- You should be observing more pronounced bubbles, and your starter might be starting to visibly rise after feeding. The aroma should be shifting from wheaty to pleasantly sour. Use a rubber band or masking tape at the initial feeding line to track its rise time.
- Remove and discard half (approximately 112g) of the sourdough starter.
- Add 60 g (1⁄2 cup) of all-purpose flour + 60 g (1/4 cup) of warm water. Mix well and scrape down the sides.
- Cover loosely and let rest in a warm spot, 70-75°F, for 24 hours.
- Look for your starter to be actively bubbling and potentially doubling in size within 4-8 hours after feeding. The texture when stirred should feel lighter and more airy.
- Remove and discard half (approximately 116.25g) of the sourdough starter.
- Add 60 g (1⁄2 cup) of all-purpose flour + 60 g (1/4 cup) of warm water. Mix well and scrape down the sides.
- Cover loosely and let rest in a warm spot, 70-75°F, for 24 hours.
- Remember that “equal parts” for feeding always refers to equal weights of starter, flour, and water, not equal volumes. A digital scale is your best friend here.
- Your sourdough starter should have consistently doubled in size (or even tripled) after feeding, with plenty of visible bubbles, both large and small, throughout the mixture and on the surface.
- When you stir it, the texture should be light, airy, spongy, and fluffy, not dense or pasty. It might even resemble the internal texture of roasted marshmallows.
- The smell should be pleasantly sour, yeasty, and slightly fruity, perhaps akin to roasted marshmallows or good beer. It should absolutely not smell stinky, vinegary, or like nail polish remover.
- If these conditions are met, congratulations! Your sourdough starter is active and ready to use for baking!
- As a final confirmation, perform the classic float test. Drop a small teaspoon of your bubbly, active starter into a glass of room-temperature water. If it floats, your starter is potent and ready. If it sinks, it needs more time to develop strength.
- If your starter isn’t quite ready by Day 8, don’t despair! Continue feeding it daily. Consider these ‘Quick Boost’ tips: Ensure consistent warmth (aim for 70-75°F, or 80-85°F water bath), add a nutrient boost (10-20g whole wheat or rye flour), and check hydration (add extra 5-10g water if too stiff).
- Once active, you can transfer your sourdough starter to a clean jar if desired, and feel free to give it a name – many bakers do!