

As the leaves begin to turn and a crispness fills the air, my kitchen inevitably fills with the comforting aroma of a classic fall dessert. There’s something truly magical about warm, spiced apples, isn’t there? Today, I’m thrilled to share my absolute favorite recipe for baked apple slices. This isn’t just any apple dish; it’s a perfectly balanced, incredibly easy recipe that marries tradition with a surprising, yet delightful, flavor elevation. Whether you’re seeking a simple sweet treat, a healthy snack, or an expert guide to mastering this cozy classic, akin to a comforting fall dessert, you’re in for a real treat.
Why You’ll Love This Recipe
While classic baked apples are undeniably delicious, I’ve discovered a unique twist that transforms them into something truly extraordinary. My secret lies in incorporating a subtle hint of 1/2 teaspoon freshly grated ginger and just a pinch (1/16 tsp) of finely ground black pepper into the traditional spice blend of cinnamon and allspice. The fresh ginger introduces a bright, zesty warmth that perfectly complements the apple’s sweetness, adding a vibrant complexity. The black pepper, with its piperine compound, subtly enhances the perception of sweetness and coaxes the other spices to pop, deepening the flavor profile without overpowering the beloved apple taste. It adds an unexpected layer of sophistication, making these not just any baked apple slices, but truly unforgettable.
- Unforgettable Flavor: This unique ginger and black pepper twist creates a depth of flavor that elevates a simple dessert into a sophisticated delight.
- Effortless Comfort: This is a quick and easy dessert, ready in about 25 minutes of bake time, perfect for bringing cozy warmth to your table without any fuss.
- Healthy & Versatile: Naturally a healthy dessert option, it’s easily customizable for dairy-free or vegan diets, and incredibly versatile for various serving ideas, from a wholesome breakfast to an elegant dessert.
Ingredients Needed

Gathering your ingredients is the first step to creating these wonderfully spiced baked apple slices. Here’s exactly what you’ll need:
- 2 tablespoons unsalted butter or coconut oil
- 4 medium apples a mix of tart (such as Granny Smith) and sweet-crisp (such as Honeycrisp), cored and cut into ¼-inch thick slices (I leave the peels on)
- ¼ cup honey or pure maple syrup
- 1 tablespoon cornstarch
- 2 teaspoons ground cinnamon
- ⅛ teaspoon ground allspice
- ⅛ teaspoon kosher salt
- 2 tablespoons bourbon or water
- Ice cream or whipped cream optional for serving
Ingredient Notes & Substitutions
A great dish starts with understanding your ingredients. Here are a few tips to ensure your baked apple slices are perfect every time:
- Apples: For the best texture and flavor balance, I always recommend using a mix of tart varieties like Granny Smith apples and sweet-crisp options such as Honeycrisp apples, Gala, Fuji, or Pink Lady. Leaving the apple peels on not only adds beautiful color but also provides nutritional benefits like fiber, vitamin C, and antioxidants, plus it saves you prep time!
- Sweeteners: You can use either honey or pure maple syrup in this recipe. Maple syrup is an excellent choice if you’re aiming for a vegan dish. Feel free to adjust the sweetness based on your apple varieties’ natural sweetness and your personal preference.
- Thickener: Cornstarch is used here to create a lovely, thickened sauce that coats the apples beautifully. If you don’t have cornstarch, you can substitute with an equal amount of all-purpose flour or half the amount of arrowroot powder.
- Liquid: A touch of bourbon adds a wonderful depth of flavor and hints of caramelization, contributing to the Maillard reaction. If you prefer to omit alcohol, rum or simply water work perfectly as substitutes.
- Fat: Unsalted butter brings a rich flavor, but for a dairy-free or vegan option, coconut oil is a fantastic alternative that still delivers a delightful richness.
- The Unique Spice Twist: And here’s the star of the show! Remember to incorporate your 1/2 teaspoon freshly grated ginger and a pinch (1/16 tsp) finely ground black pepper into the spice blend alongside the cinnamon and allspice. This is the recipe’s unique twist for ultimate flavor enhancement!

How to Make Baked Apple Slices
Ready to transform simple apples into a warm, spiced delight? Follow these steps for perfectly baked apple slices.
Step 1: Prep Oven & Dish
Begin by preheating your oven to 350°F (175°C). While the oven heats, choose your preferred baking dish—a deep 9×9 inch pan or a similarly sized dish works wonderfully for this recipe.
Step 2: Melt Butter
In a very large, microwave-safe mixing bowl, melt the butter (or coconut oil) in the microwave. If your bowl isn’t microwave-safe, you can melt the fat in a small microwave-safe bowl or a saucepan on the stovetop, then pour it into your larger mixing bowl.
Step 3: Combine Flavors
To that mixing bowl, add the prepared apple slices, honey (or maple syrup), cornstarch, cinnamon, allspice, kosher salt, the crucial freshly grated ginger, a whisper of finely ground black pepper, and your choice of bourbon or water. Stir everything thoroughly, ensuring every single apple slice is beautifully coated in this fragrant, spiced mixture. Take a moment to savor that inviting aroma!
Step 4: Transfer to Dish
Carefully pour the apple mixture into your chosen deep 9×9 or similarly sized baking dish. Be sure to scrape out any liquid that has collected at the bottom of the mixing bowl and pour it over the top of the apples this will become your delicious, jammy sauce.
Step 5: Bake to Perfection
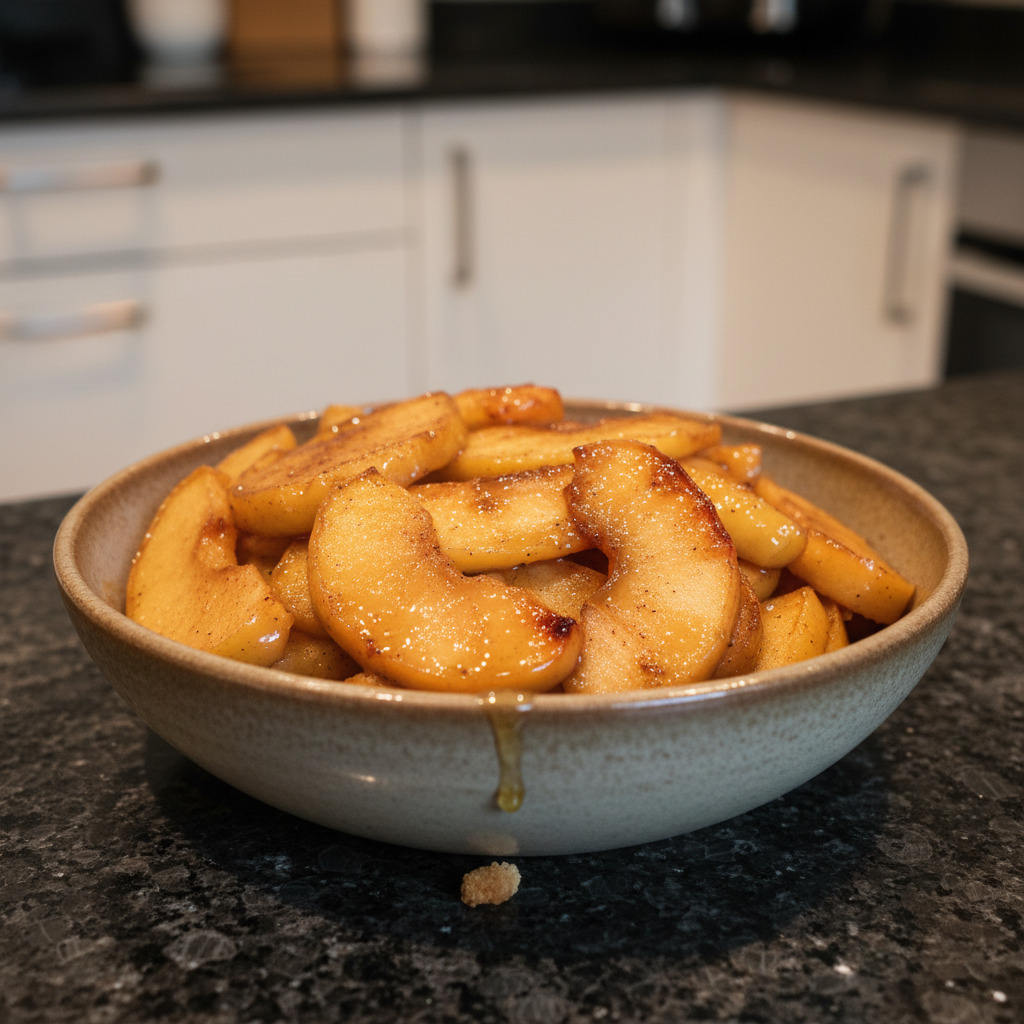
Bake the apples for 25 minutes. Keep an eye on them; they should emerge fork tender but still hold their shape, maintaining a delightful texture that’s jammy but not mushy. The edges of the apples might even show a lovely hint of caramelization.
Step 6: Serve Warm
The best way to enjoy these spiced wonders is piping hot. Serve your baked apple slices immediately, perhaps with a generous scoop of creamy vanilla ice cream or a dollop of fluffy whipped cream, as desired. The warm, sweet, and spiced aroma alone is a treat!
Mastering Your Apple Prep: Slicing & Baking Dishes
Achieving perfectly tender, flavorful baked apple slices goes beyond just the ingredients; it’s also about technique.
Optimal Slicing Technique
The key to evenly cooked, delightfully textured apples is consistent slicing. For this recipe, I recommend aiming for ¼-inch thick slices. This thickness allows the apples to become beautifully tender without turning mushy, holding their structure while absorbing all those wonderful flavors. You can achieve this with a sharp chef’s knife, taking care to make uniform cuts. For even greater precision, consider using a mandoline slicer. While a mandoline offers speed and unparalleled uniformity, always use the safety guard to protect your fingers. This consistent thickness is crucial as it directly affects bake time and ensures that every bite has the desired tender (but not mushy) texture.
Choosing the Right Baking Dish
The right baking dish can make a difference. A 9×9 inch pan or a similarly sized dish is ideal for this quantity of apples, allowing them to spread out just enough for even cooking and a beautiful caramelization of the sauce. Glass and ceramic dishes are both excellent choices. Glass dishes tend to retain heat very well and allow you to see the bubbling, caramelized sauce at the bottom. Ceramic dishes also distribute heat evenly and offer a rustic charm. Whichever material you choose, ensure the dish isn’t too shallow, as you want to contain all that delicious, bubbling liquid. The size and material impact heat distribution and the degree of caramelization on the apples and their luscious sauce.
Beyond the Oven: Air Fryer & Slow Cooker Baked Apples
Don’t have an oven handy or just looking for alternative ways to enjoy these delicious baked apple slices? I’ve got you covered!
Air Fryer Method
You can absolutely make delightful baked apple slices in an air fryer for a quicker option. Simply prepare the apple mixture as directed in Step 3. Then, transfer the coated apple slices to your air fryer basket in a single layer, working in batches if necessary to avoid overcrowding, which ensures even cooking and browning. Cook at 375°F (190°C) for 10-15 minutes, shaking or stirring the basket halfway through. Look for apples that are fork tender with slightly caramelized edges. Air fryers circulate heat very efficiently, so keep a close eye on them to prevent overcooking.
Slow Cooker Method
For a hands-off approach that fills your home with incredible aromas, the slow cooker is your friend. Prepare the apple mixture as usual, then transfer it to your slow cooker insert. Cook on high for 2-3 hours or on low for 4-6 hours, until the apples are tender. One important consideration with slow cookers is that they retain more moisture, so you might want to slightly reduce the amount of added liquid (bourbon or water) to prevent the apples from becoming too watery or mushy. The cornstarch will still do its job, creating a lovely, thick sauce.
Pro Tips & Troubleshooting
Even the simplest recipes benefit from a few expert insights. Here’s my collective wisdom for perfect baked apple slices every time, along with common pitfalls to sidestep.
Pro Tips
- Apple Blend for Best Results: Always use a mix of tart and sweet-crisp apples, such as Granny Smith and Honeycrisp. This blend offers the most balanced flavor and desirable texture, ensuring your apples don’t just taste good, but have a satisfying bite.
- The Power of the Peel: Don’t peel your apples! Leaving the peels on not only adds beautiful color but also boosts the nutritional value with extra fiber, vitamin C, and antioxidants. Plus, it’s a huge time-saver in the kitchen.
- Taste & Adjust Sweetness: Apples vary in sweetness. Before baking, taste a small piece of the coated apple mixture. Feel free to adjust sweetness by adding a little more honey or maple syrup based on your chosen apples and personal preference.
- Embrace the Twist: Seriously, don’t skip the ginger and black pepper! They are the secret to this recipe’s unique depth and truly elevate the flavor profile for an exceptional experience.
- Visual Doneness Cues: To check for doneness, gently pierce an apple slice with a fork. It should be fork tender, soft enough to yield easily but still hold its shape, much like the perfect apple pie filling, not soft and mushy. They should never be crispy.
- Scaling the Recipe: This recipe is incredibly versatile and easily scalable. Whether you’re making a small batch for yourself (e.g., quartered for smaller servings) or doubling it for a crowd, just adjust your dish size accordingly.
Common Mistakes to Avoid
- Choosing the Wrong Apples: A common mistake is using apples that break down too much when baked, like Red Delicious. These will result in a disappointing, mushy texture. Stick to firm, baking-friendly varieties.
- A Bland Spice Profile: Relying on only cinnamon can lead to a one-dimensional flavor. The magic in this recipe comes from the harmonious blend of allspice, ginger, and black pepper, creating a complex and cozy taste.
- Under- or Over-Sweetening: Not tasting and adjusting sweeteners can result in a dish that’s either too tart or cloyingly sweet. Always give it a quick taste before baking!
- Sauce Too Thin or Too Thick: If your sauce is too thin after baking, pop the dish back in the oven for a few more minutes, or next time, add a touch more cornstarch to the mixture. If it’s too thick, stir in a tablespoon of water or bourbon after baking to loosen it up.
Serving & Storage
These baked apple slices are incredibly versatile. Here’s how I love to serve and store them:
Serving Ideas
- Classic Desserts: Serve them piping hot with a generous scoop of rich vanilla ice cream, a cloud of homemade whipped cream, or for an extra indulgent touch, a drizzle of warm caramel sauce.
- Healthy Breakfast & Snacks: For a nutritious start to the day or a healthy snack, top your baked apples with a dollop of creamy Greek yogurt, mix them into your morning oatmeal (especially hearty Steel Cut Oats), or sprinkle them over crunchy granola. They’re a fantastic meal prep item!
- Beyond Dessert: Get creative! These apples make a delightful topping for fluffy French toast or a stack of warm pancakes. For a savory application, they’re a unique and flavorful side dish with pork.
- Creative Garnishes: Elevate your presentation with a sprinkle of toasted chopped nuts (pecans or walnuts), a dash of fresh cinnamon, or a vibrant sprig of mint.
Storage and Make-Ahead
- Refrigeration: Leftover baked apple slices store beautifully. Allow them to cool completely, then transfer them to an airtight storage container. They’ll keep well in the refrigerator for up to 3-4 days.
- Freezing: For longer storage, cooked apples can be frozen. Once cooled, place them in freezer-safe containers or heavy-duty freezer bags. They will keep for up to 3 months. Thaw them overnight in the refrigerator before reheating.
- Reheating Instructions: For a quick warm-up, use the microwave; this will result in a softer texture. For a warmer, slightly firmer result, reheat them in the oven at 300°F (150°C) for 10-15 minutes, or until heated through.
- Meal Prep Friendly: These baked apple slices are an excellent meal prep item. Make a batch on the weekend, and you’ll have delicious, healthy portions ready for grab-and-go snacks or breakfasts throughout the week.
Conclusion
And there you have it my absolute favorite recipe for baked apple slices, infused with that delightful, unexpected zing of ginger and black pepper. This dish is the epitome of cozy, sweet, and spiced goodness, offering an elevated flavor profile that truly sets it apart. It’s incredibly easy to make, remarkably versatile for any occasion or meal, whether you’re craving a healthy dessert, a simple sweet treat, or a comforting fall dessert. I encourage you to try this recipe in your own kitchen, experiment with the many serving ideas, and discover the magic of this unique twist. Don’t forget to share your experience and feedback in the comments—I love hearing from you!
FAQ
- Q: What are the best apples for baking, and should I peel them?
- A: I recommend using a mix of tart (like Granny Smith) and sweet-crisp (such as Honeycrisp or Gala) apples for the best balance of texture and flavor. Apple peels are optional; I leave them on for added fiber, vitamin C, antioxidants, and vibrant color.
- Q: How can I prevent my baked apple slices from becoming mushy?
- A: To prevent mushy apples, choose firm apple varieties, slice them to a consistent ¼-inch thick, and monitor your bake time carefully. They should be fork tender but not overcooked, retaining some structure.
- Q: What are some delicious and healthy serving suggestions for baked apple slices?
- A: For dessert, serve with vanilla ice cream or whipped cream. For a healthy breakfast or snack, top with Greek yogurt, mix into oatmeal, or sprinkle over granola.
- Q: Can I make these baked apple slices in an air fryer or slow cooker?
- A: Yes, you can! Please refer to the “Beyond the Oven: Air Fryer & Slow Cooker Baked Apples” section in the article for detailed timings and temperatures for both methods.
- Q: How do I store and reheat leftover baked apple slices?
- A: Store cooled baked apple slices in an airtight storage container in the refrigerator for up to 3-4 days. For longer storage, they can be frozen in freezer-safe containers for up to 3 months. Reheat in the microwave for a quick warm-up (softer texture) or in the oven (e.g., 300°F for 10-15 minutes) for a warmer, slightly firmer result.
- Q: What can I substitute for cornstarch or bourbon in this recipe?
- A: For cornstarch, you can use an equal amount of all-purpose flour or half the amount of arrowroot powder. For bourbon, I recommend using rum or simply water.
- Q: How thick should I slice apples for baking?
- A: I specify ¼-inch thick slices. This thickness is crucial for achieving the ideal balance of tenderness and structure, preventing mushy apples and ensuring an even bake time.
- Q: What are the nutritional benefits of baked apple slices?
- A: When made with whole ingredients, baked apple slices are a relatively healthy dessert. Apples are a good source of fiber, vitamin C, and antioxidants, especially when you leave the apple peels on.
- Q: Can I use baked apple slices as pie filling?
- A: While similar, for apple pie filling, you might want to slightly reduce the liquid content or bake them for a shorter time initially to allow for a second bake within the pie crust. However, the wonderfully spiced flavor profile is absolutely perfect for apple pie!
Baked Apple Slices: The Zesty Ginger & Black Pepper Twist
Ingredients
Equipment
Method
- Begin by preheating your oven to 350°F (175°C). While the oven heats, choose your preferred baking dish—a deep 9×9 inch pan or a similarly sized dish works wonderfully for this recipe.
- In a very large, microwave-safe mixing bowl, melt the butter (or coconut oil) in the microwave. If your bowl isn’t microwave-safe, you can melt the fat in a small microwave-safe bowl or a saucepan on the stovetop, then pour it into your larger mixing bowl.
- To that mixing bowl, add the prepared apple slices, honey (or maple syrup), cornstarch, cinnamon, allspice, kosher salt, the crucial freshly grated ginger, a whisper of finely ground black pepper, and your choice of bourbon or water. Stir everything thoroughly, ensuring every single apple slice is beautifully coated in this fragrant, spiced mixture. Take a moment to savor that inviting aroma!
- Carefully pour the apple mixture into your chosen deep 9×9 or similarly sized baking dish. Be sure to scrape out any liquid that has collected at the bottom of the mixing bowl and pour it over the top of the apples—this will become your delicious, jammy sauce.
- Bake the apples for 25 minutes. Keep an eye on them; they should emerge fork tender but still hold their shape, maintaining a delightful texture that’s jammy but not mushy. The edges of the apples might even show a lovely hint of caramelization.
- The best way to enjoy these spiced wonders is piping hot. Serve your baked apple slices immediately, perhaps with a generous scoop of creamy vanilla ice cream or a dollop of fluffy whipped cream, as desired. The warm, sweet, and spiced aroma alone is a treat!