

There’s a deep, primal satisfaction that comes from creating something truly nourishing with your own hands, and for me, making homemade sauerkraut embodies this perfectly. Beyond the incredible flavor, it’s a living food, teeming with beneficial probiotics that contribute immensely to gut health. If you’ve ever felt intimidated by fermentation, rest assured, this guide will walk you through every step to produce delicious, probiotic-rich homemade sauerkraut, complete with a special flavor profile that will make you wonder why you ever bought it from the store.
Why You’ll Love This Homemade Sauerkraut Recipe
In my kitchen, I’m always looking for ways to elevate classic recipes, and this homemade sauerkraut recipe is a shining example. What makes this version truly stand out is its unique twist: I’ve perfected a specific ratio of cabbage to salt, then introduced the aromatic dance of caraway seeds and juniper berries. This isn’t just for flavor; it’s about enhanced probiotic diversity and a more robust fermentation.
- Precise Salt Ratio for Perfection: The exact salt balance is crucial. It ensures optimal fermentation, inhibiting undesirable bacteria while fostering the growth of beneficial lactic acid bacteria. This means a consistently safe and delicious batch every time.
- Authentic Flavor Boost: Caraway seeds and juniper berries infuse the sauerkraut with a complex, slightly peppery and piney aroma that’s both traditional and deeply satisfying to the American palate. It’s a flavor profile that truly sings.
- Incredibly Gut-Healthy: Every bite is packed with living probiotics, essential for a thriving gut biome, aiding digestion, and boosting your immune system. This sauerkraut is a powerhouse of wellness.
- Surprisingly Easy to Make: Forget complicated steps. My method simplifies the process, making homemade sauerkraut accessible to even first-time fermenters. For another satisfyingly simple meal, consider making a one-pot sausage kale soup.
- Budget-Friendly: Making your own fermented foods is incredibly economical. A head of cabbage transforms into months of delicious, healthy goodness for pennies on the dollar.
Ingredients Needed

Gathering fresh, high-quality ingredients is the first step towards exceptional homemade sauerkraut. Here’s exactly what you’ll need:
- 2 lbs green cabbage, outer leaves removed, cored and finely shredded
- 1.5 tablespoons non-iodized sea salt (fine grain)
- 1 teaspoon caraway seeds
- 1/2 teaspoon juniper berries
Ingredient Notes & Substitutions
Using the right ingredients makes all the difference in successful fermentation:
- Cabbage: Green cabbage is the traditional choice for sauerkraut due to its crisp texture and high water content, which helps form plenty of brine. You can use red cabbage for a beautiful purple hue, but be aware it might result in a slightly softer texture and a milder flavor. Always choose fresh, firm heads. Organic produce is ideal for minimizing pesticide residue, especially when fermenting.
- Non-iodized Sea Salt: This is absolutely crucial! Iodine and anti-caking agents found in regular table salt can inhibit the beneficial lactic acid bacteria responsible for fermentation. Fine-grain non-iodized sea salt (or kosher salt without anti-caking agents) is best for dissolving quickly and distributing evenly.
- Caraway Seeds and Juniper Berries: These spices are my secret weapon for this recipe’s incredible depth of flavor. Caraway seeds provide a warm, slightly peppery, anise-like note, while juniper berries contribute a subtle piney, citrusy aroma. Together, they create an authentic, robust taste that complements the sourness of the sauerkraut beautifully and can also contribute to the diversity of beneficial compounds.

How to Make Homemade Sauerkraut
Making homemade sauerkraut is a rewarding process that largely involves patient observation. Follow these steps carefully for the best results:
Phase 1: Preparation – Shredding and Salting
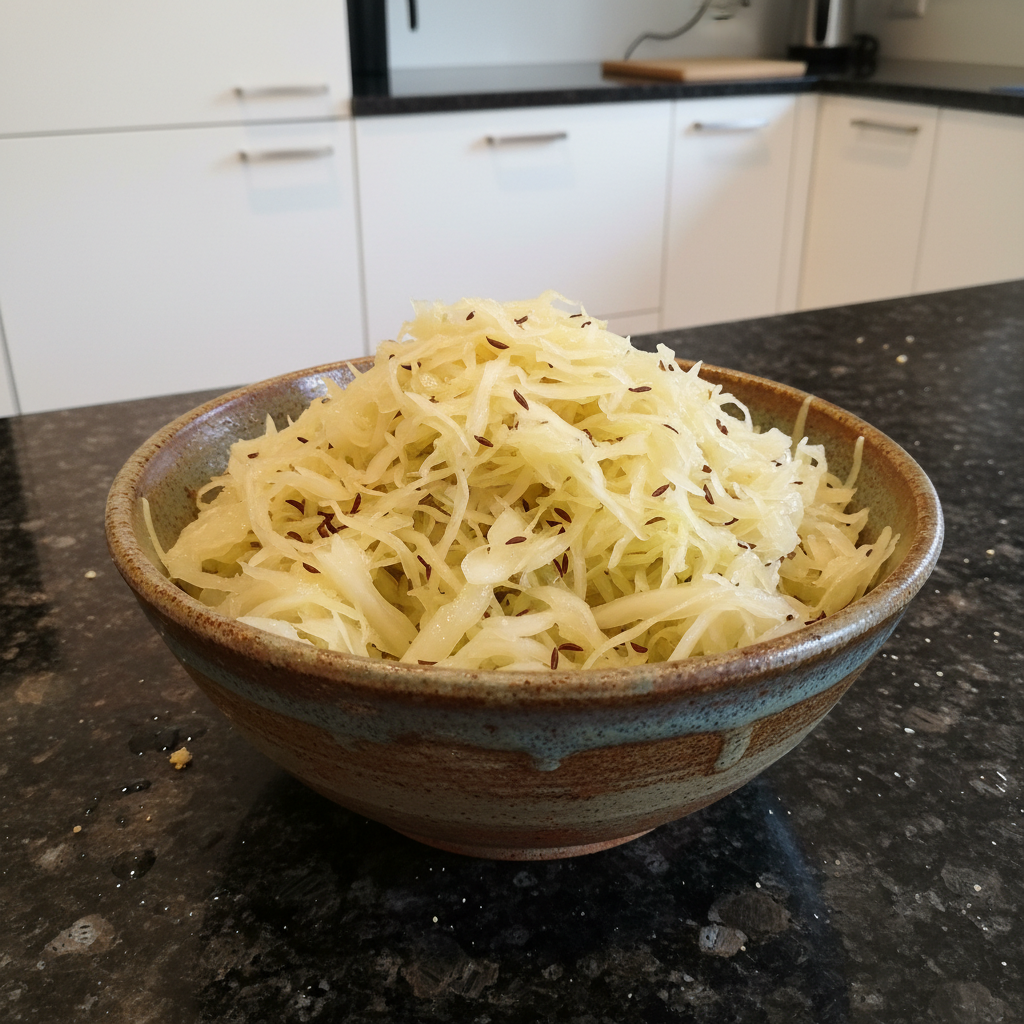
- Prepare the Cabbage: Remove any damaged outer leaves from the cabbage. Wash the cabbage head thoroughly. Using a sharp knife or mandoline, finely shred the cabbage into strips no wider than 1/8 inch. The finer the shred, the easier it will be to massage and the quicker the brine will form.
- Combine with Salt and Spices: Transfer the shredded cabbage to a large, sturdy mixing bowl. Add the non-iodized sea salt, caraway seeds, and juniper berries.
- Massage the Cabbage: Begin to vigorously massage the cabbage with your clean hands. Squeeze, squish, and knead the cabbage firmly. You’ll hear the crisp cabbage crunching and feel it start to soften. Continue this for about 5-10 minutes, or until a significant amount of liquid (your brine) has accumulated at the bottom of the bowl. The cabbage should be visibly wilted and glistening with brine. This step is critical for drawing out moisture and starting the fermentation process.
Phase 2: Packing and Weighing
- Pack into Jars: Take handfuls of the massaged cabbage and firmly pack them into clean Mason jars or a ceramic crock. Use your fist or a blunt instrument to press down hard on each layer, forcing out air bubbles and bringing the brine to the surface. It’s crucial that the cabbage is packed tightly.
- Ensure Submersion: Pour any remaining brine from the bowl over the packed cabbage in the jars. The goal is for the cabbage to be completely submerged under the brine. If there isn’t enough liquid to cover the cabbage, you can mix a small amount of additional salt water (1 teaspoon non-iodized salt per cup of filtered water) and add it until the cabbage is fully submerged. This prevents mold growth, as sauerkraut needs an anaerobic (oxygen-free) environment.
- Weigh Down the Cabbage: Place a fermentation weight (or a smaller, clean Mason jar filled with water) directly on top of the cabbage to keep it pressed firmly below the brine. Leave at least 1-2 inches of headspace from the top of the jar to allow for expansion during fermentation.
- Cover the Jars: Cover the jars with an airlock lid (my preference for worry-free fermentation) or a standard lid loosely to allow gases to escape. If using a standard lid, you will need to “burp” the jars daily by briefly opening them.
Phase 3: Fermentation and Storage
- Ferment: Place the jars in a cool, dark spot at a consistent room temperature, ideally between 65-72°F (18-22°C). Cooler temperatures will slow fermentation, warmer temperatures will speed it up and can lead to undesirable flavors. You will begin to see bubbles forming within a few days – this is a good sign that the lactic acid bacteria are hard at work!
- Monitor and Taste: Ferment for 2-4 weeks, or even longer, depending on your preference for sourness and the ambient temperature. After about 1 week, you can start tasting a small piece of cabbage daily. When it reaches your desired level of tanginess and crunch, it’s ready. The aroma should be pleasantly sour, not foul.
- Refrigerate: Once the sauerkraut has reached its peak flavor, remove the fermentation weight and secure the lid tightly. Transfer the jars to the refrigerator. The cold temperature will significantly slow down the fermentation process, preserving its flavor and texture for months.
Understanding Sauerkraut Fermentation Stages & Health Benefits
The magic of sauerkraut lies in its living transformation. Understanding what happens during fermentation helps you appreciate this food even more, and why it’s such a powerhouse for your health.
The Magic of Fermentation: Stages Explained
Sauerkraut fermentation is a beautiful example of lactic acid fermentation, a process driven by beneficial bacteria naturally present on cabbage. It proceeds in distinct stages:
- Stage 1: Initial Brine Formation (Day 1-2): After salting and massaging, the salt draws water out of the cabbage, creating a brine. The salt also begins to inhibit undesirable microbes, setting the stage for the beneficial ones. An anaerobic (oxygen-free) environment is crucial at this point.
- Stage 2: Leuconostoc Mesenteroides Dominance (Days 2-7): This bacterium initiates fermentation, converting sugars in the cabbage into lactic acid, acetic acid, ethanol, and carbon dioxide. You’ll notice vigorous bubbling and a slight increase in pressure in your jars. The brine will become cloudy, and the flavor will start to develop a mild sourness.
- Stage 3: Lactobacillus Plantarum & Brevis Take Over (Weeks 1-4+): As the acidity of the brine increases, Leuconostoc dies off, and more acid-tolerant bacteria like Lactobacillus plantarum and Lactobacillus brevis become dominant. These robust probiotics continue to convert sugars into lactic acid, steadily increasing the sourness and preserving the sauerkraut. Bubbling will slow down, and the flavor will deepen and become more complex. This is where the true character of your sauerkraut develops.
Unlocking the Health Power of Homemade Sauerkraut
Homemade sauerkraut isn’t just a tasty condiment; it’s a living superfood, rich in nutrients and incredible health benefits:
- Gut Health Champion: The abundance of live and active probiotics (beneficial bacteria) from lactic acid fermentation helps to balance your gut microbiome. A healthy gut is linked to improved digestion, reduced inflammation, and better nutrient absorption.
- Immune System Booster: A significant portion of your immune system resides in your gut. By supporting a diverse and healthy gut microbiome, fermented foods like sauerkraut can enhance your body’s natural defenses.
- Rich in Vitamins and Minerals: Cabbage itself is nutrient-dense, but fermentation can actually increase the bioavailability of certain vitamins, like Vitamin C and K, and B vitamins. It’s also a source of minerals like iron and manganese.
- Digestive Aid: The enzymes produced during fermentation can assist in breaking down food, making it easier for your body to digest and absorb nutrients.
- Why Homemade is Superior: Unlike many store-bought varieties that are often pasteurized (heat-treated), which kills off the beneficial probiotics, homemade sauerkraut remains raw and alive. This ensures you’re getting the full spectrum of its probiotic power.
Pro Tips & Troubleshooting for Perfect Sauerkraut
Even though homemade sauerkraut is forgiving, a few expert tips can guarantee success, and knowing how to troubleshoot common issues will save your batch!
Pro Tips for Success
- Always Use Non-Iodized Salt: As discussed, iodine can kill the beneficial bacteria needed for fermentation. Stick to pure sea salt or kosher salt without anti-caking agents.
- Weigh Cabbage and Salt Precisely: The specific ratio of cabbage to salt is key for safe and delicious fermentation, especially with my unique twist. Use a kitchen scale for accuracy.
- Keep Cabbage Submerged Under Brine: This is arguably the most important rule. Any cabbage exposed to air is vulnerable to undesirable molds and yeasts. Always use a weight to keep it covered.
- Ferment at Consistent Room Temperature: Aim for 65-72°F (18-22°C). Too cold, and fermentation will be excessively slow; too warm, and it can become mushy or develop off-flavors.
- Burp Jars If Not Using an Airlock: If you’re not using an airlock, remember to loosen the lid daily to release the carbon dioxide gases that build up.
- Taste Daily After 1 Week: Fermentation times vary. The best way to know your sauerkraut is ready is to taste it. Once it reaches your ideal level of sourness and crunch, it’s perfect!
Common Mistakes to Avoid
Don’t let these common pitfalls derail your sauerkraut journey:
- Not Enough Salt: This is a critical error that can lead to spoilage instead of safe fermentation. The salt prevents bad bacteria from taking hold.
- Too Much Salt: While some salt is good, excessive amounts can inhibit the beneficial lactic acid bacteria, slowing or even stopping fermentation entirely.
- Cabbage Exposed to Air: If your cabbage floats above the brine, it’s highly susceptible to mold growth, especially fuzzy, discolored patches. Always ensure full submersion.
- Too Warm/Cold Fermentation Temperature: Inconsistent or extreme temperatures can lead to undesirable flavors, textures, or even stalled fermentation.
- Using Iodized Salt: As mentioned, iodine is an antimicrobial and will hinder the growth of your desired probiotics.
- Not Cleaning Equipment Properly: While sauerkraut is generally robust, starting with dirty jars or tools can introduce unwanted bacteria or yeasts, leading to funky smells or mold.
- Confusing Kahm Yeast with Mold: Don’t panic if you see a thin, white film on the surface. This is likely kahm yeast, which is harmless, though it can impart an off-flavor. Simply skim it off. Mold, on the other hand, is usually fuzzy, green, black, or pink, and means the batch should be discarded.
Serving & Storage
Once your homemade sauerkraut is perfectly fermented, the fun truly begins: enjoying its tangy goodness!
Delicious Serving Ideas
The versatility of sauerkraut means it pairs beautifully with a wide array of dishes. Here are some of my favorite ways to enjoy it:
- Classic German Fare: Serve alongside grilled bratwurst, roasted pork knuckle, or a hearty pork roast. The tangy crunch cuts through the richness beautifully.
- Reuben Sandwich Staple: A must-have for any authentic Reuben. Pile it high with corned beef, Swiss cheese, and Russian dressing on rye bread.
- Elevate Your Hot Dogs: Forget plain relish! A spoonful of sauerkraut adds a vibrant, tangy kick to any hot dog or sausage.
- Mix into Potato Salad: For a delightful twist, add a few tablespoons to your next potato salad recipe for an unexpected burst of flavor and texture.
- Tangy Side Dish: Enjoy it simply on its own as a refreshing, probiotic-rich side with almost any meal.
- Pair with Smoked Sausage: The smoky flavors of kielbasa or other smoked sausages are a natural match for the bright sourness of homemade sauerkraut.
- Top Scrambled Eggs: For a surprisingly delicious and healthy breakfast, add a dollop to your morning eggs.
Storage and Make-Ahead Tips
Proper storage ensures your hard work lasts and continues to bring joy to your table.
- Refrigeration: Once your sauerkraut has reached your desired level of sourness, transfer the sealed jars to the refrigerator. The cold temperature will dramatically slow down the fermentation process, preserving its texture and flavor for several months, typically 3-6 months, or even longer if properly sealed and submerged in brine. Always ensure the cabbage remains submerged under the brine even in the fridge.
- Freezing: While technically possible, freezing sauerkraut is generally not recommended. The freezing and thawing process can significantly alter the texture, making it softer and less crisp, and can also reduce the viability of the beneficial probiotics. If you must freeze for very long-term storage (beyond 6 months) and texture isn’t your primary concern, it will remain safe to eat.
- Make-Ahead Benefits: Sauerkraut is the ultimate make-ahead food! Its flavor actually deepens and develops more complexity over time, making it a perfect pantry staple. Just remember to give it time to ferment before chilling.
Conclusion
And there you have it – the ultimate guide to creating exceptional homemade sauerkraut right in your own kitchen! From the careful selection of cabbage and non-iodized salt to the unique aromatic kick of caraway seeds and juniper berries, this recipe is designed for both ease and incredible flavor. I love showing people how simple it is to transform humble ingredients into a living, probiotic-rich superfood.
Don’t be afraid to dive into the world of fermentation. With this recipe, you’re not just making a condiment; you’re creating a health-boosting, flavor-packed masterpiece that will become a cherished staple. Once you’ve mastered this basic recipe, feel free to experiment with different spices or even add other vegetables. I encourage you to give this sauerkraut a try, share your creations, and taste the difference for yourself!
FAQ
- What is the ideal salt percentage for sauerkraut?
- For this sauerkraut recipe, I recommend approximately 2% salt by weight of the cabbage. This precise ratio ensures optimal conditions for lactic acid fermentation, inhibiting spoilage while allowing beneficial probiotics to thrive, which is critical for the best flavor and safety.
- How do I know if my sauerkraut is fermenting correctly?
- Signs of correct fermentation include visible bubbling in the jar (especially in the first week), a slight sour aroma, and the brine becoming cloudy. The cabbage should remain submerged and its texture should become tender-crisp as it sours.
- How long can homemade sauerkraut be stored?
- Once moved to the refrigerator and kept in a tightly sealed jar, homemade sauerkraut can be safely stored for 3-6 months or even longer. Ensure the cabbage always remains fully submerged under its brine for optimal preservation.
- What are the health benefits of homemade sauerkraut?
- Homemade sauerkraut is packed with live probiotics that support a healthy gut microbiome, which in turn aids digestion, boosts the immune system, and enhances nutrient absorption. It’s also a good source of vitamins C and K, and various minerals.
- What if I see mold on my sauerkraut?
- If you see fuzzy, discolored patches (green, black, pink, or blue) on your sauerkraut, especially if it’s above the brine line, it is likely mold. Unfortunately, a moldy batch should be discarded to avoid potential health risks. This usually happens if cabbage is exposed to air.
- What kind of salt should I use for making sauerkraut?
- Always use a non-iodized salt for making sauerkraut. Good options include fine-grain non-iodized sea salt or kosher salt without anti-caking agents. Iodine and other additives can inhibit the beneficial lactic acid bacteria necessary for proper fermentation.
- How long does sauerkraut fermentation typically take?
- Sauerkraut fermentation typically takes 2 to 4 weeks at a consistent room temperature (ideally 65-72°F / 18-22°C). The exact time depends on the temperature and your preference for sourness. You can start tasting it after about a week.
- Is it safe to eat sauerkraut if it smells funny?
- A properly fermented batch of sauerkraut should have a pleasant, sour, slightly pungent aroma. If it smells distinctly foul, rotten, or like sulfur or alcohol in an unpleasant way, it’s best to err on the side of caution and discard it, as this can be a sign of spoilage.
Homemade Sauerkraut: Your Ultimate Guide to Fermented Perfection
Ingredients
Equipment
Method
- Prepare the Cabbage: Remove any damaged outer leaves from the cabbage. Wash the cabbage head thoroughly. Using a sharp knife or mandoline, finely shred the cabbage into strips no wider than 1/8 inch. The finer the shred, the easier it will be to massage and the quicker the brine will form.
- Combine with Salt and Spices: Transfer the shredded cabbage to a large, sturdy mixing bowl. Add the non-iodized sea salt, caraway seeds, and juniper berries.
- Massage the Cabbage: Begin to vigorously massage the cabbage with your clean hands. Squeeze, squish, and knead the cabbage firmly. Continue this for about 5-10 minutes, or until a significant amount of liquid (your brine) has accumulated at the bottom of the bowl. The cabbage should be visibly wilted and glistening with brine. This step is critical for drawing out moisture and starting the fermentation process.
- Pack into Jars: Take handfuls of the massaged cabbage and firmly pack them into clean Mason jars or a ceramic crock. Use your fist or a blunt instrument to press down hard on each layer, forcing out air bubbles and bringing the brine to the surface. It’s crucial that the cabbage is packed tightly.
- Ensure Submersion: Pour any remaining brine from the bowl over the packed cabbage in the jars. The goal is for the cabbage to be completely submerged under the brine. If there isn’t enough liquid to cover the cabbage, you can mix a small amount of additional salt water (1 teaspoon non-iodized salt per cup of filtered water) and add it until the cabbage is fully submerged. This prevents mold growth, as sauerkraut needs an anaerobic (oxygen-free) environment.
- Weigh Down the Cabbage: Place a fermentation weight (or a smaller, clean Mason jar filled with water) directly on top of the cabbage to keep it pressed firmly below the brine. Leave at least 1-2 inches of headspace from the top of the jar to allow for expansion during fermentation.
- Cover the Jars: Cover the jars with an airlock lid or a standard lid loosely to allow gases to escape. If using a standard lid, you will need to “burp” the jars daily by briefly opening them.
- Ferment: Place the jars in a cool, dark spot at a consistent room temperature, ideally between 65-72°F (18-22°C). Cooler temperatures will slow fermentation, warmer temperatures will speed it up and can lead to undesirable flavors. You will begin to see bubbles forming within a few days – this is a good sign that the lactic acid bacteria are hard at work!
- Monitor and Taste: Ferment for 2-4 weeks, or even longer, depending on your preference for sourness and the ambient temperature. After about 1 week, you can start tasting a small piece of cabbage daily. When it reaches your desired level of tanginess and crunch, it’s ready. The aroma should be pleasantly sour, not foul.
- Refrigerate: Once the sauerkraut has reached its peak flavor, remove the fermentation weight and secure the lid tightly. Transfer the jars to the refrigerator. The cold temperature will significantly slow down the fermentation process, preserving its flavor and texture for months.