

Welcome to my kitchen, where we’re about to embark on a delightful journey to bake the most exquisite Red Velvet Cupcakes you’ve ever tasted. I know many of you are searching for that perfect balance of moist crumb, subtle cocoa, and tangy frosting, and I promise, this recipe delivers on all fronts. What makes my version truly stand out, turning a classic into an unforgettable gourmet experience, is the ingenious addition of a nutty Brown Butter Cream Cheese Frosting. Get ready to impress yourself and everyone around you with these stunning, utterly delicious treats!
Why You’ll Love This Recipe
This isn’t just another Red Velvet Cupcakes recipe; it’s an elevated classic that will completely captivate your taste buds.
The Brown Butter Cream Cheese Frosting Twist: The secret lies in browning a portion of the butter for our cream cheese frosting. This simple step unlocks a world of flavor through the Maillard reaction, infusing rich, nutty, and subtly caramelized notes into every spoonful. It transforms the familiar tangy Cream Cheese Frosting into a sophisticated complement that perfectly enhances the delicate cocoa and buttermilk flavors of the Red Velvet Cupcakes. This twist adds remarkable depth and complexity, making each bite more memorable without overshadowing the beloved red velvet essence.
Consistently Moist & Fluffy: Through careful technique and ingredient balance, I’ve ensured these cupcakes boast an incredibly moist texture and a beautifully soft, fluffy crumb every single time.
Gourmet Appeal: Master a timeless dessert with a gourmet touch that will undoubtedly impress, whether it’s for a special occasion or just a delightful weekend bake.
Perfectly Balanced Flavor: Enjoy the harmonious blend of subtle chocolate, vanilla, and tang, elevated by the sophisticated notes of brown butter. It’s pure joy in every perfectly balanced treat.
Ingredients Needed

Here’s everything you’ll need to create these spectacular Red Velvet Cupcakes. Precision in measuring, especially for baking, is key, so I recommend using a kitchen scale for the best results.
* 2 large eggs, room temperature and separated
* 1 and 1/3 cups (166g) all-purpose flour* (spooned & leveled)
* 1/4 cup (32g) cornstarch*
* 1/2 teaspoon baking soda
* 4 teaspoons (7g) natural unsweetened cocoa powder
* 1/4 teaspoon salt
* 1/4 cup (4 Tbsp; 56g) unsalted butter, softened to room temperature
* 1 cup (200g) granulated sugar
* 1/2 cup (120ml) canola or vegetable oil
* 2 teaspoons pure vanilla extract
* 1/2 teaspoon distilled white vinegar
* liquid or gel red food coloring*
* 1/2 cup (120ml) buttermilk, room temperature*
* cream cheese frosting for topping
Ingredient Notes & Substitutions
Getting your ingredients right is the first step to baking success. Here are some essential notes and handy substitutions for key elements in our Red Velvet Cupcakes.
Room Temperature Ingredients: This is a crucial step for optimal emulsification and a smooth, even batter. When ingredients like your Large Eggs, Unsalted Butter, and especially Buttermilk are between 68-72°F (20-22°C), they combine more readily, creating a homogeneous mixture that holds air better. This translates to a lighter, fluffier cupcake with a superior texture. To quickly bring eggs to room temperature, place them in a bowl of warm water for 5-10 minutes. For butter, cut it into small pieces and let it sit for about 15-20 minutes. Buttermilk can also be gently warmed in the microwave for 10-15 seconds, being careful not to heat it too much.
All-Purpose Flour & Cornstarch: The combination of All-Purpose Flour and Cornstarch in this recipe acts as a fantastic Cake Flour Substitute. Cornstarch helps to reduce gluten development, leading to a wonderfully lighter, more tender crumb. If you prefer, you can substitute this mixture directly with 1 and 2/3 cups (195g) of traditional cake flour for similar results.
Red Food Coloring: For a truly vibrant and deep red, I highly recommend using Gel Food Coloring over liquid varieties. Gel coloring is much more concentrated, allowing you to achieve a brilliant hue without adding excess moisture to your batter, which can impact texture. Look for high-quality brands like AmeriColor Super Red or Wilton No-Taste Red for the best intensity without any unwanted flavor.
Buttermilk: Buttermilk is absolutely essential for these Red Velvet Cupcakes. Its acidity plays a dual role: it reacts with the Baking Soda to provide lift and lightness (an Acid-Base Reaction), and it contributes significantly to the cupcakes’ moist texture and tangy flavor profile. If you don’t have buttermilk on hand, you can easily make a DIY Buttermilk Substitute. Simply measure 1/2 cup (120ml) of regular milk (dairy or non-dairy) and stir in 1/2 tablespoon of distilled white vinegar or lemon juice. Let it sit for 5-10 minutes until it slightly curdles, then stir and use as directed.
Vinegar: The distilled white vinegar enhances the acidity of the Buttermilk, ensuring a proper reaction with the Baking Soda for maximum rise and a tender crumb. If you’re out of distilled white vinegar, apple cider vinegar can be used as a suitable alternative.

How to Make Red Velvet Cupcakes
Baking these Red Velvet Cupcakes is a rewarding process. Follow these steps carefully, and you’ll be rewarded with perfect results.
1. Prepare Your Workspace
Preheat your oven to 350°F (177°C). Line a 12-count Muffin Pan with Cupcake Liners. Keep in mind this recipe yields approximately 14 cupcakes, so you’ll need to prepare for a second small batch or a separate tray for the remaining two.
2. Whip Egg Whites for Lightness
Using a handheld or stand mixer fitted with a Whisk Attachment, beat the 2 egg whites on high speed in a medium bowl until soft peaks form. This typically takes about 2-3 minutes. You’ll know they’re at `soft peaks` when the peaks hold their shape when the whisk is lifted but curl softly at the tip, rather than standing stiffly. Set the whipped egg whites aside gently.
3. Combine Dry Ingredients
In a separate medium bowl, sift the All-Purpose Flour and Cornstarch together to ensure they are thoroughly combined and to prevent any lumps, contributing to a Fluffy Texture. Then, whisk in the Baking Soda, Cocoa Powder, and Salt. This step is important for even distribution of leavening and flavor. Set this dry mixture aside.
4. Cream Butter & Sugar
In the bowl of your mixer, fitted with a Paddle Attachment, beat the softened Unsalted Butter on high speed until it’s smooth and creamy, which should take about 1 minute. Add the Granulated Sugar and continue beating on high for another 2 minutes until the mixture is light and fluffy – this process, known as Emulsification, incorporates air for a tender cupcake. Remember to scrape down the sides and bottom of the bowl with a Silicone Spatula as needed to ensure everything is evenly mixed.
5. Add Remaining Wet Ingredients
Add the Canola Oil or Vegetable Oil to the creamed butter and sugar mixture and beat on high speed for 2 minutes. Don’t be alarmed if the mixture appears a bit “piece-y” or slightly separated at this stage; this is normal and perfectly fine. Next, beat in the 2 egg yolks and Pure Vanilla Extract on medium-high speed until just combined, scraping the bowl as needed. Finally, beat in the Distilled White Vinegar and your chosen red food coloring until you achieve your desired vibrant red color. I typically use around 2 Tablespoons of gel food coloring for a deep hue.
6. Alternate Dry & Wet Additions
With your mixer on low speed, gradually add the dry ingredients mixture in three additions, alternating with the Buttermilk. Begin and end with the dry ingredients, mixing each addition just until incorporated. It’s crucial not to overmix the batter at this stage, as overmixing can lead to excess Gluten Development, resulting in tough cupcakes. Our goal is a Soft Crumb.
7. Fold in Egg Whites
Gently fold the whipped egg whites into the cupcake batter using a Rubber Spatula or Wooden Spoon. Use a delicate hand to maintain the lightness and Fluffy Texture that the egg whites provide. The finished batter will be silky and slightly thick. If you notice any small pieces of unmixed butter, don’t worry—they will melt during baking and only enhance the buttery flavor.
8. Bake Your Cupcakes
Spoon the batter evenly into the prepared Cupcake Liners, filling each 1/2 to 2/3 full. Bake for 20-21 minutes, or until the tops of the cupcakes spring back when gently touched and a Toothpick Inserted in the Center Comes Out Clean. Be careful not to overbake, as this is the primary cause of dry cupcakes.
9. Cool Completely
Allow the cupcakes to cool in the Muffin Pan for 5 minutes. Then, carefully transfer them to a Cooling Rack to cool completely before you even think about frosting them. Frosting warm cupcakes will only lead to a melted mess!
10. Frost and Serve
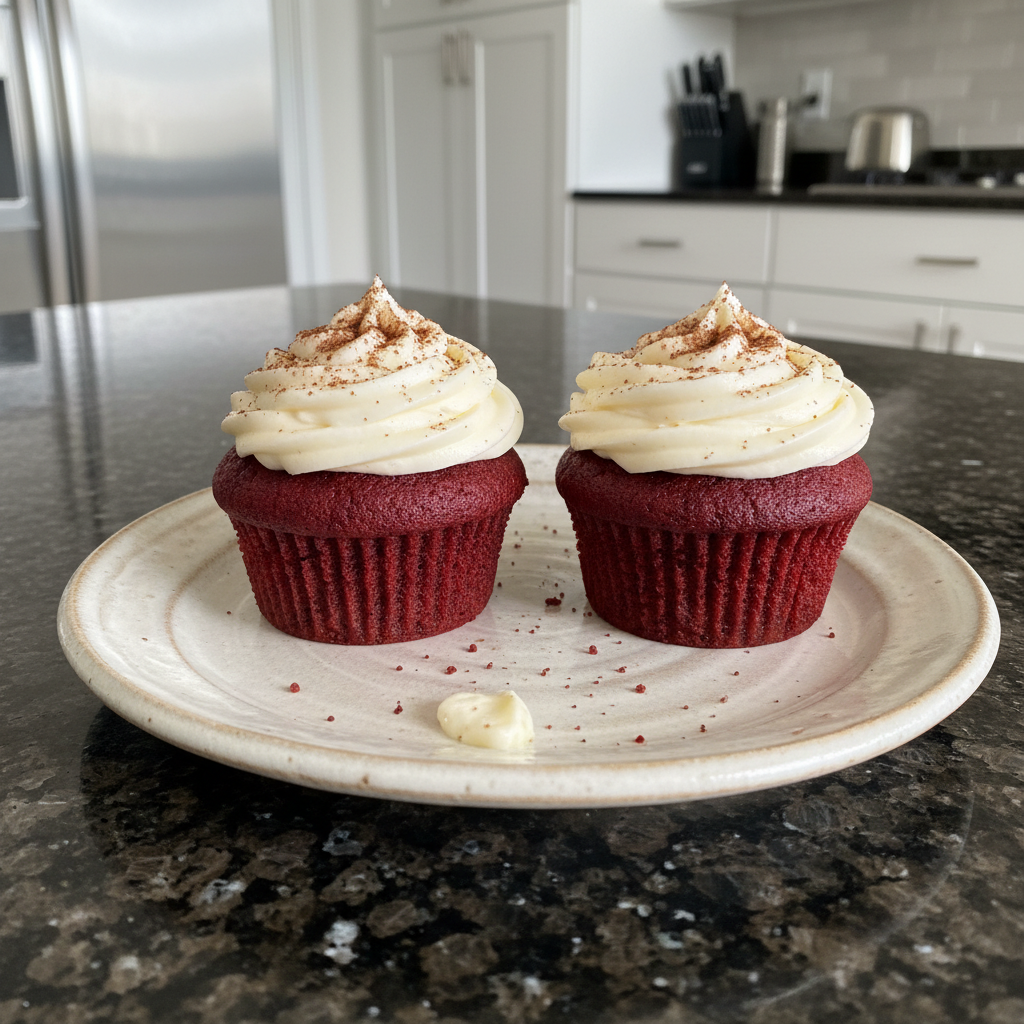
Once your Red Velvet Cupcakes are completely cooled, prepare the Brown Butter Cream Cheese Frosting (details on browning butter provided in the pro tips!). Frost your cooled cupcakes immediately before serving. I used a Wilton #12 Tip for a smooth, elegant swirl; this frosting is a little too thin for a star tip.
Mastering the Perfect Red Velvet Hue & Preventing Common Cupcake Flops
Achieving that iconic deep red and a flawless texture is easier than you think with a few expert insights.
Achieving a Truly Deep Red Color
The key to that signature, vibrant red velvet color lies in your choice of food coloring. For color saturation without adding unwanted moisture to your batter, gel food coloring is vastly superior to liquid dyes. High-quality gel brands like AmeriColor Super Red or Wilton No-Taste Red offer intense pigment, allowing you to achieve a deep, rich red that truly pops. Add the gel coloring gradually, a teaspoon at a time, until you reach your desired intensity. Remember, the true color of Red Velvet is about a beautiful, rich red, not just a hint.
Troubleshooting Common Cupcake Issues
Even experienced bakers run into snags. Here’s how to tackle common problems:
Collapsing Centers & Sinking: If your cupcakes are sinking in the middle or their centers collapse, several factors could be at play. Underbaking is a frequent culprit; always ensure a toothpick comes out clean. Opening the oven door too early during baking can cause a sudden temperature drop, leading to collapse. Expired leavening agents (like Baking Soda) won’t provide enough lift, and even over-whipping egg whites can sometimes contribute to a less stable structure once baked.
Crumbly Texture & Hard Tops: A crumbly texture or hard tops typically points to overbaking or overmixing the batter. Overbaking removes too much moisture, leaving you with dry cupcakes. To avoid this, always check for doneness at the minimum Baking Time and remove them as soon as they pass the toothpick test. Overmixing the batter develops the gluten too much, creating tough cupcakes rather than a tender, Soft Crumb. Ensuring your Oven Temperature is accurate with an oven thermometer can also prevent these issues.
Pro Tips & Troubleshooting
Baking is an art and a science, and these expert tips from my kitchen will help you achieve Red Velvet Cupcakes perfection, while knowing what to avoid.
Pro Tips for Perfect Red Velvet
- Room Temperature is Key: I cannot stress enough the importance of using Room Temperature Ingredients. This ensures optimal Emulsification, creating a smooth, cohesive batter that traps air efficiently, resulting in a delightfully Fluffy Texture and a pillowy Soft Crumb.
- DIY Cake Flour: Remember, sifting All-Purpose Flour and Cornstarch together is your secret weapon, acting as an excellent Cake Flour Substitute. This simple trick yields a significantly lighter and more tender cupcake than using all-purpose flour alone.
- Vibrant Color: For that iconic, deep red hue, always opt for Gel Food Coloring. It provides a brighter, more vibrant red without diluting your batter or impacting its consistency, unlike liquid dyes.
- Buttermilk Magic: Buttermilk (or its DIY substitute) is essential for moisture and for activating the Baking Soda in an Acid-Base Reaction, which gives these cupcakes their perfect rise and tender texture. Don’t skip it!
- Gentle Folding: When incorporating the whipped egg whites, be gentle. Gently folding whipped egg whites into the batter maintains their lightness and airiness, contributing directly to the overall Fluffy Texture of your Red Velvet Cupcakes.
- Perfect Doneness: Bake only until the tops of the cupcakes spring back when lightly touched and a toothpick inserted in the center comes out clean. This is the sweet spot to avoid dryness and ensure a perfectly Moist Texture.
- Brown Butter Technique: For our unique frosting, browning the butter is a game-changer. Use a light-colored pan over medium heat, swirling occasionally. Watch for amber flecks to appear at the bottom of the pan and a wonderfully nutty aroma—this is the Maillard Reaction at work. Immediately remove from heat and transfer to a heat-safe bowl to stop cooking. Crucially, allow the brown butter to cool completely and solidify slightly before you begin making your Cream Cheese Frosting, to prevent it from melting other ingredients.
Common Mistakes to Avoid
- Overmixing the Batter: This is a cardinal sin in cupcake baking! Overmixing develops the gluten in the flour too much, leading to tough cupcakes instead of a delicate, Soft Crumb. Mix only until the ingredients are just combined.
- Overbaking: The quickest route to dry cupcakes and hard tops is overbaking. Keep a close eye on your Baking Time and trust the toothpick test. A minute or two too long can make all the difference.
- Over-whipping Egg Whites: While you want soft peaks, over-whipping egg whites can introduce too much air, which can lead to hard tops and an uneven rise in your cupcakes.
- Doubling the Recipe in One Batch: Resist the urge to double this recipe in a single batch, especially if you have a standard home mixer. Overfilling your mixer can lead to poor Emulsification and uneven mixing. For consistent results, I recommend baking two separate batches.
- Using Only Oil: While oil provides moisture, a butter-oil combination is preferred for Red Velvet Cupcakes. The Unsalted Butter offers a superior flavor profile, while the oil ensures a Moist Texture. Using only oil sacrifices that rich, buttery taste.
Serving & Storage
Once your gorgeous Red Velvet Cupcakes are baked and frosted, here’s how to best enjoy and preserve them.
Serving Ideas
I always recommend frosting your completely cooled cupcakes immediately before serving with the luxurious Brown Butter Cream Cheese Frosting for the freshest look and best texture. For an elegant presentation, consider simple garnishes like a dusting of Cocoa Powder, a sprinkle of reserved red velvet crumbs, or a fresh raspberry or strawberry on top. These beautiful Red Velvet Cupcakes pair wonderfully with a warm cup of coffee, a glass of cold milk, or even a sparkling rosé for a truly sophisticated treat.
Storage and Make-Ahead
Proper Storage is key to enjoying your cupcakes for days.
Frosted Cupcakes: Due to the Cream Cheese Frosting, frosted Red Velvet Cupcakes must be stored in an airtight container in the refrigerator. They will keep beautifully for up to 3-4 days. Allow them to come to room temperature for about 15-20 minutes before serving for the best flavor and frosting consistency.
Unfrosted Cupcakes: If you’re not frosting them right away, unfrosted cupcakes can be stored in an airtight container at Room Temperature for 2-3 days.
Freezing Instructions: These cupcakes are fantastic for Make-Ahead preparation and Freezing. To freeze unfrosted cupcakes, wrap each cooled cupcake tightly in plastic wrap, then an additional layer of aluminum foil. Place them in a freezer-safe bag or container and freeze for up to 2-3 months. To thaw, simply transfer them to the refrigerator overnight, then bring them to room temperature before frosting and serving.
Make-Ahead Frosting: The Brown Butter Cream Cheese Frosting itself can be made a day or two in advance. Store it in an airtight container in the refrigerator, then whip it again briefly with a stand mixer or hand mixer until light and fluffy before piping onto your cupcakes.
Conclusion
There you have it – my ultimate recipe for Red Velvet Cupcakes, elevated by the exquisite, nutty notes of Brown Butter Cream Cheese Frosting. I truly believe this recipe offers the perfect balance of classic charm and gourmet sophistication. With all the detailed instructions, ingredient notes, and troubleshooting tips I’ve shared, you’re now equipped to achieve professional-quality results right in your own kitchen. I encourage you to try this recipe, experiment with your own serving ideas, and share your beautiful creations with friends and family. Happy baking, and don’t forget to explore more delightful recipes here on the blog!
FAQ
Can I halve this red velvet cupcake recipe?
Yes, you can absolutely halve this recipe. Simply divide all ingredient quantities by two. The baking time should remain similar, but keep a close eye on them as they might bake slightly faster.
How do I prevent my red velvet cupcakes from sinking or getting hard tops?
To prevent sinking, ensure your oven temperature is accurate (use an oven thermometer!), avoid opening the oven door during the first 15 minutes of baking, and make sure your leavening agents (like Baking Soda) aren’t expired. Hard tops and dryness are typically caused by overbaking, so remove the cupcakes as soon as a toothpick inserted into the center comes out clean.
What’s the difference between liquid and gel food coloring for red velvet?
Liquid food coloring is water-based and less concentrated, requiring more product to achieve a vibrant color, which can thin out your batter. Gel Food Coloring is highly concentrated and delivers a much more intense, vibrant red with less product, preserving the desired consistency of your Red Velvet Cupcakes batter.
Can I make my own buttermilk substitute for this recipe?
Yes! To make a DIY Buttermilk Substitute, simply pour 1/2 tablespoon of distilled white vinegar or lemon juice into a liquid measuring cup, then fill it the rest of the way up to 1/2 cup (120ml) with regular milk. Stir and let it sit for 5-10 minutes until it slightly curdles before using.
How can I adjust this recipe to make a red velvet layer cake or mini cupcakes?
For a Red Velvet Layer Cake, you can typically divide the batter between two 8-inch round cake pans or three 6-inch pans, baking for 25-30 minutes for an 8-inch or 20-25 minutes for a 6-inch, or until a toothpick comes out clean. For mini cupcakes, line a mini muffin pan and fill liners 1/2 full. Bake for approximately 10-14 minutes, or until the tops spring back.
What are the best storage and freezing instructions for red velvet cupcakes?
Frosted Red Velvet Cupcakes with Cream Cheese Frosting should be stored in an airtight container in the refrigerator for up to 3-4 days. Unfrosted cupcakes can be stored at room temperature for 2-3 days or frozen. To freeze, wrap unfrosted, cooled cupcakes tightly in plastic wrap, then foil, and place in a freezer-safe bag for up to 2-3 months. Thaw overnight in the refrigerator, then bring to room temperature before frosting.
Can I use cake flour instead of all-purpose flour and cornstarch?
Yes, you can! The combination of All-Purpose Flour and Cornstarch is designed to mimic cake flour. If you have cake flour on hand, you can substitute 1 and 2/3 cups (195g) of cake flour directly for the 1 and 1/3 cups (166g) all-purpose flour and 1/4 cup (32g) cornstarch blend.
Can I make red velvet cake pops from this recipe?
Absolutely! This Red Velvet Cupcakes recipe makes a wonderfully moist and flavorful base for cake pops. Once your cupcakes are baked and cooled, simply crumble them, mix with a bit of the Brown Butter Cream Cheese Frosting to bind, shape into balls, chill, and then dip in melted chocolate or candy melts.
The Ultimate Red Velvet Cupcakes with Brown Butter Cream Cheese Frosting
Ingredients
Equipment
Method
- Preheat your oven to 350°F (177°C). Line a 12-count Muffin Pan with Cupcake Liners. Note that this recipe yields approximately 14 cupcakes, so you’ll need to prepare for a second small batch or a separate tray for the remaining two.
- Using a handheld or stand mixer fitted with a Whisk Attachment, beat the 2 egg whites on high speed in a medium bowl until soft peaks form (about 2-3 minutes). Set the whipped egg whites aside gently.
- In a separate medium bowl, sift the All-Purpose Flour and Cornstarch together. Then, whisk in the Baking Soda, Cocoa Powder, and Salt. Set this dry mixture aside.
- In the bowl of your mixer, fitted with a Paddle Attachment, beat the softened Unsalted Butter on high speed until smooth and creamy (about 1 minute). Add the Granulated Sugar and continue beating on high for another 2 minutes until the mixture is light and fluffy. Scrape down the sides and bottom of the bowl as needed.
- Add the Canola Oil or Vegetable Oil to the creamed butter and sugar mixture and beat on high speed for 2 minutes. Next, beat in the 2 egg yolks and Pure Vanilla Extract on medium-high speed until just combined, scraping the bowl as needed. Finally, beat in the Distilled White Vinegar and your chosen red food coloring until you achieve your desired vibrant red color (approximately 2 Tablespoons of gel food coloring for a deep hue).
- With your mixer on low speed, gradually add the dry ingredients mixture in three additions, alternating with the Buttermilk. Begin and end with the dry ingredients, mixing each addition just until incorporated. Do not overmix the batter.
- Gently fold the whipped egg whites into the cupcake batter using a Rubber Spatula or Wooden Spoon. Use a delicate hand to maintain lightness and fluffy texture. The finished batter will be silky and slightly thick.
- Spoon the batter evenly into the prepared Cupcake Liners, filling each 1/2 to 2/3 full. Bake for 20-21 minutes, or until the tops of the cupcakes spring back when gently touched and a Toothpick Inserted in the Center Comes Out Clean. Do not overbake.
- Allow the cupcakes to cool in the Muffin Pan for 5 minutes. Then, carefully transfer them to a Cooling Rack to cool completely before frosting.
- Once your Red Velvet Cupcakes are completely cooled, prepare the Brown Butter Cream Cheese Frosting (ensure brown butter has cooled completely and solidified slightly before use). Frost your cooled cupcakes immediately before serving. A Wilton #12 Tip can be used for a smooth swirl.