

Welcome to my kitchen, where simple ingredients transform into culinary magic! Today, I’m thrilled to share one of my favorite and most vibrant creations: **Fermented Onions**. If you’ve ever wanted to dive into the world of probiotics and gut-healthy goodness with incredible flavor, you’re in the right place. This easy-to-follow recipe will not only show you how to make delicious, tangy fermented onions, but also unlock the science behind lacto-fermentation, introduce a unique flavor twist, and provide all my expert tips for success. Get ready to elevate your meals and boost your wellness with this vibrant condiment!
Why You’ll Love This Spicy Fermented Onions Recipe
I am always looking for ways to add an extra layer of flavor and health benefits to my dishes, and that’s exactly what my unique twist on **Fermented Onions** delivers. Instead of plain fermented onions, I introduce a touch of gochugaru (Korean chili flakes) or red pepper flakes, alongside the salt, to create a truly special condiment you’ll adore.
- Subtle Heat & Balanced Flavor: The small amount of gochugaru introduces a gentle, complex warmth that beautifully balances the bright, tangy, and sour notes of the fermented onions. The fermentation process itself mellows the chili’s raw bite, integrating the flavors smoothly for a more sophisticated profile.
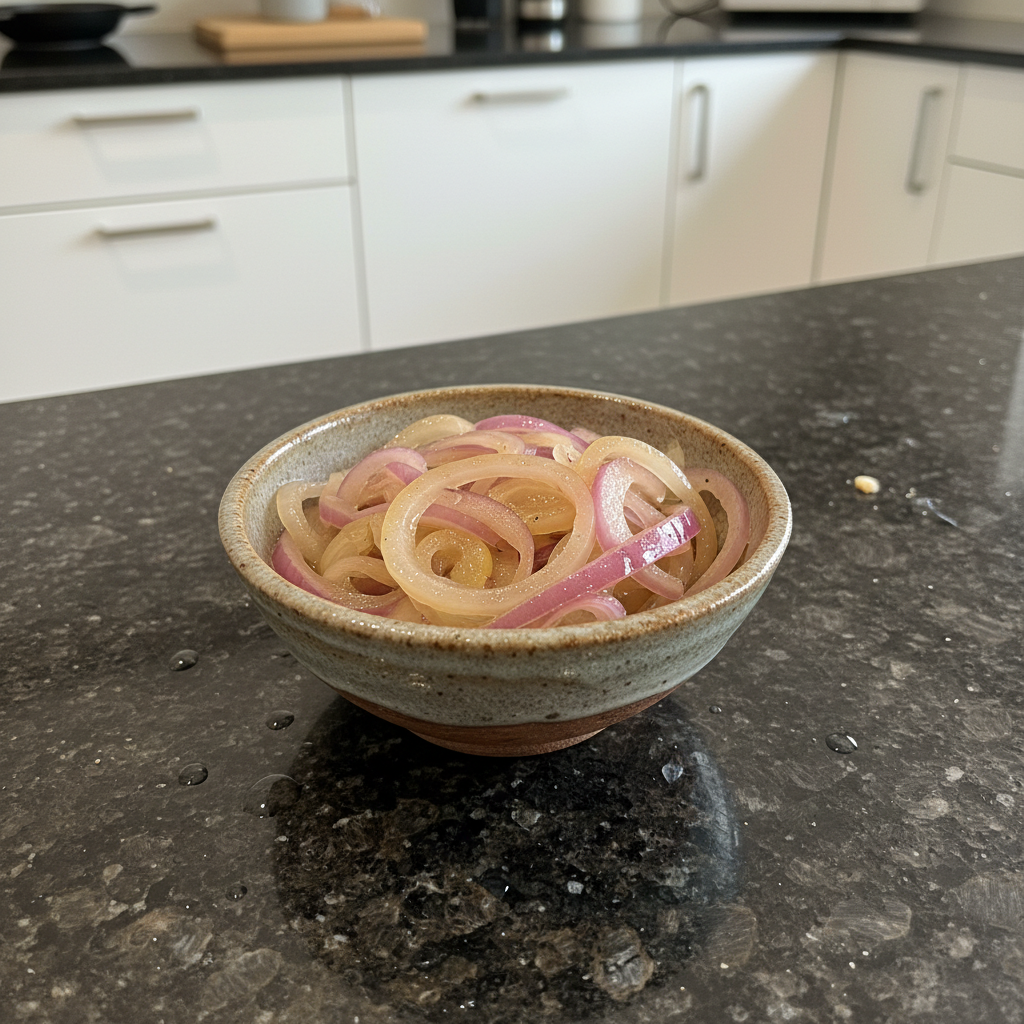
- Visually Stunning: This twist imparts a beautiful, vibrant pink hue to your onions that deepens wonderfully as they ferment. It’s a feast for the eyes as much as the palate, adding gorgeous color to any plate.
- Boosted Nutrition: Beyond the **probiotics** and **enzymes** inherent in **lacto-fermentation**, gochugaru contributes valuable antioxidants, enhancing the overall **gut health** benefits of this recipe.
- Incredibly Versatile: The complex flavor profile and vibrant color make these **fermented onions** an exceptionally versatile condiment, ready to brighten a myriad of dishes.
- Effortless & Hands-Off: Despite the gourmet result, the process of making these **fermented onions** is remarkably simple and mostly hands-off, making it accessible for even beginner fermenters.
Ingredients Needed

- 1 large onion
- distilled water (weight to be determined)
- sea salt or pickling salt (weight to be determined)
Ingredient Notes & Substitutions
Choosing the right ingredients is key to successful **lacto-fermentation**. Let me guide you through the essentials for your delicious **fermented onions**.
- Onion Types: While you can use any variety, **red onion** is my go-to for its beautiful color and crisp texture even after fermenting. **White onion** or **yellow onion** will yield a milder flavor, while **sweet onion** varieties will produce a slightly sweeter, less pungent ferment. Always use fresh, firm onions for the best results.
- Salt: For **lacto-fermentation**, it’s crucial to use **sea salt** or **pickling salt** that is non-iodized and free of anti-caking agents. Iodine can inhibit the beneficial lactic acid bacteria, and anti-caking agents can make your brine cloudy. I always recommend using a **kitchen scale** to ensure precise salt measurements for a consistent 2% **brine**, which is essential for safe and successful fermentation.
- Water Quality: **Distilled water** is ideal as it’s free from **chlorine** and other chemicals that can interfere with the beneficial bacteria. If you only have **tap water**, don’t fret! You can boil tap water in advance and then cool it completely to **room temperature** before using. Boiling effectively removes the chlorine, making your water suitable for fermentation.
- The Gochugaru Twist: For that signature Korean kick and vibrant color, add about 1/4 teaspoon of **gochugaru** or red pepper flakes per jar alongside your measured salt. This will ensure it dissolves and disperses evenly throughout the **brine**, imparting both flavor and that gorgeous pink hue.

How to Make Spicy Fermented Onions
Making **fermented onions** is a rewarding journey. Follow these simple steps for a truly delicious and gut-healthy condiment.
Preparation: Setting Up for Success
- Choose a **mason jar** that is the appropriate size to fit the sliced onion. I used a 16 oz wide mouth style **mason jar**. Place the **mason jar** on your **kitchen scale** and press tare to zero out the weight of the jar. This ensures you’re only measuring the ingredients, not the container itself.
Brine Calculation: The Heart of Fermentation
- Fit the sliced onion into the **mason jar** and pour in enough water to cover the onions. Take note of the total weight in grams of the onion and water combined. Accurate weighing here is crucial for successful and safe fermentation.
- To determine the amount of salt you need to add in grams, multiply that number by .02. For example, if the weight of the onion and water combined is 800 grams, then you will multiply 800 by .02 and get 16. I would add 16 grams of salt to my jar. Always double-check your calculations!
Mixing & Infusing: Adding the Twist
- Tare the scale again and add the amount of **sea salt** in grams that you determined in the above step. This is also where we add our unique twist! Add 1/4 teaspoon of **gochugaru** or red pepper flakes to the jar. Put on the lid and shake well to dissolve both the salt and distribute the chili flakes for even color and flavor throughout the **brine**.
Submergence & Environment: Crucial Steps
- It’s very important to keep the onions totally **submerged**. To do this, you can use **fermentation weights**, small ceramic pinch bowls, a smaller **mason jar** that fits inside, or even a glass shot glass. Do not use plastic bags or Tupperware directly touching your onions, as they can leach microplastics. Maintaining an **anaerobic environment** is critical to prevent mold and encourage the growth of beneficial lactic acid bacteria.
- Leave your ferment at **room temperature**, ideally between 65-75°F (18-24°C), and away from **direct sunlight** for 4-7 days. The temperature will affect the speed of the **fermentation process**—warmer temperatures speed it up, cooler ones slow it down. Check it once a day to make sure the onions are still **submerged**. You’ll likely see tiny **carbon dioxide** **bubbles** beginning to rise, indicating activity. Open the lid slightly on a daily basis (this is called **burping jars**) to release any built-up **pressure buildup** from the carbon dioxide. Close it again tightly.
Completion & Storage: Enjoying Your Creation
- Once your **fermented onions** have reached the desired flavor—they should be delightfully **tangy**, **sour**, and less pungent than raw onions—place the jar in the fridge. This will effectively halt the **fermentation process**. Your **fermented onions** will now keep for a very long time, becoming a wonderful, **shelf-stable** (in the fridge) condiment. Enjoy!
Mastering Fermentation: Essential Tools & Cues for Success
Lacto-fermentation is a beautiful blend of art and science. Understanding the nuances, from choosing the right onion to recognizing successful fermentation, will empower you to create fantastic results every time.
Choosing Your Onions & Essential Tools
When diving into the world of **fermented onions**, a few key choices and tools make all the difference.
- Onion Selection: While all onions can be fermented, some yield superior results. **Red onion** offers a vibrant color and a robust, slightly sweet flavor that softens beautifully. **White onion** and **yellow onion** create milder, crisper ferments. **Sweet onion** varieties result in a ferment with less pungency and a naturally sweeter profile. Always choose fresh, firm onions without any soft spots or blemishes for optimal texture and flavor. This relates directly to choosing the best onions for fermenting, ensuring you start with quality.
- Fermentation Tools: You don’t need a lot of fancy equipment, but a few items are essential. Good quality **mason jars** are a must. A precise **kitchen scale** is non-negotiable for accurate salt measurements, critical for a safe 2% **brine**. For truly effortless fermentation, I highly recommend specialized **fermentation weights** to keep your onions **submerged** and an **airlock lid**. These tools are invaluable for maintaining an **anaerobic environment**, preventing spoilage and allowing gases to escape without letting oxygen in, simplifying the process and ensuring safety.
Identifying Successful Fermentation: Visual, Aromatic & Taste Cues
Knowing when your **fermented onions** are just right is part of the fun! Here’s how to tell.
- Ideal Temperature: The `ideal fermentation temperature range` for “room temperature” is typically between 65-75°F (18-24°C). Temperatures within this range encourage robust lactic acid bacteria activity, leading to proper **fermentation speed** and balanced **flavor development**. Too cold, and it will be sluggish; too warm, and it might go too fast or encourage unwanted bacteria.
- Visual Cues: During the **fermentation process**, you’ll observe tiny **carbon dioxide** **bubbles** rising to the surface, especially when you gently jostle the jar. The **brine** might develop a slight cloudiness, which is perfectly normal and a sign of active bacteria. And thanks to our unique twist, you’ll see a beautiful pink hue from the **gochugaru** infusing into the onions and liquid, deepening over time.
- Aromatic Cues: A successfully fermented jar will emit a pleasant, clean, **tangy**, and **sour** smell, reminiscent of **sauerkraut** or traditional **pickled onions**. It should never smell putrid, rotten, or foul.
- Taste Cues: The ultimate test! Your **fermented onions** should be delightfully **tangy** and **sour**, with a satisfying crunch or slight tenderness, depending on your preference. The initial **pungency** of raw onions will have mellowed significantly, and you’ll notice a pleasant, mild background heat from the **gochugaru** that enhances the overall flavor.
Pro Tips & Troubleshooting
Even seasoned fermenters face questions now and then. Here are my top pro tips and common troubleshooting advice to ensure your **fermented onions** are always a success.
Pro Tips for Perfect Fermented Onions
- Salt Accuracy is Paramount: Always use a **kitchen scale** for precise measurements of **sea salt** or **pickling salt**. Aiming for a 2% **brine** ratio is foundational for successful and safe **lacto-fermentation**. It prevents spoilage while allowing beneficial bacteria to thrive.
- Submergence is Key: Keeping your onions fully **submerged** in the **brine** at all times is non-negotiable. This maintains the essential **anaerobic environment** and prevents oxygen-loving mold from growing on your precious ferment.
- Temperature & Light Control: Store your ferment within the optimal **room temperature** range (65-75°F or 18-24°C) and always out of **direct sunlight**. Consistent temperature promotes an even **fermentation process**, and darkness helps preserve beneficial compounds.
- Don’t Forget to Burp Your Jars: Daily **burping jars** (opening the lid briefly to release gas) is crucial to prevent dangerous **pressure buildup** from the **carbon dioxide** produced by the fermenting bacteria.
- Mind Your Water Quality: To avoid inhibiting your beneficial lactic acid bacteria, either use **distilled water** or **boil tap water** in advance to remove **chlorine**, then cool it completely to **room temperature** before adding it to your jar.
- Embrace the Twist: Feel free to slightly adjust the amount of **gochugaru** or red pepper flakes to suit your preferred heat intensity. Remember that the **fermentation process** will naturally mellow the spice, making it more integrated.
Common Mistakes to Avoid
- Mold vs. Kahm Yeast: Do not panic if you see a film! Differentiate between fuzzy, black, green, or brightly colored **mold** (always discard the entire ferment if this appears) and thin, white, opaque **Kahm yeast**. Kahm yeast is usually harmless and can be skimmed off, though it can sometimes impart an off-flavor. When in doubt, trust your nose.
- Awful Smells: Your ferment should smell pleasantly **tangy** and **sour**. If it smells truly awful, putrid, like sulfur, or anything unequivocally bad, **discard the ferment if it smells really awful**. It’s better to be safe than sorry.
- Unboiled Tap Water: Using **unboiled tap water** directly can introduce **chlorine**, which is designed to kill bacteria. This will inhibit the beneficial **lactic acid** bacteria necessary for **lacto-fermentation**, leading to a stalled ferment or spoilage.
- Improper Weights: Avoid using **plastic bags** or **Tupperware** directly touching your onions for submerging. Onions can absorb microplastics, and it’s simply not ideal for an otherwise healthy, natural process. Stick to glass or ceramic weights.
- Not Bubbling/Too Salty: If your ferment isn’t bubbling, it might be too cold, not have enough sugar (unlikely with onions, but possible with other ferments), or harmful bacteria may have taken over. If it’s too salty, your salt measurement was likely imprecise. Taste your brine; if it’s unpleasantly salty, you might need to adjust your ratio next time.
Serving & Storage
Once your **spicy fermented onions** are ready, a world of culinary possibilities opens up! Here’s how to best enjoy and store them.
Creative Serving Ideas
These **fermented onions** are more than just a side; they’re a flavor powerhouse ready to transform your meals. Their **tangy**, **sour** flavor, combined with the subtle kick from **gochugaru**, adds essential **acidity** and **brightness** to virtually any dish.
- Versatile Condiment: Think of them as a vibrant, probiotic-rich **condiment** that can elevate everyday meals. The beautiful pink color also adds an aesthetic appeal that **adds color and nutrition to your plate**.
- Meal Pairings: I love to pile them high on burgers or sausage for an incredible tang. Mix them into fresh **salads** for a zesty crunch, stir them into hot **stir-fries** right before serving, or even use them to top scrambled eggs or an **omelette** for a gourmet breakfast.
- Global Flavor Boost: Due to their unique **gochugaru** kick, they pair wonderfully with various **cuisines**. Try them with Mexican tacos, Mediterranean bowls, or alongside your favorite Korean BBQ.
- Flavor Variations: Don’t be afraid to experiment! In addition to the **gochugaru**, you can add whole **garlic** cloves, **peppercorns**, fresh **dill**, or other **herbs** to the jar at the start of fermentation for different flavor profiles.
Storage and Longevity
Proper storage is essential to maintain the quality and extend the **shelf life** of your homemade ferments.
- Refrigeration is Key: Once your **fermented onions** have reached your desired flavor, simply move the **mason jar** to the **refrigerator**. The cold temperature will effectively **halt the fermentation process**, preventing the onions from becoming too sour or mushy.
- Extended Shelf Life: Properly stored **fermented onions** can last for several months (typically 3-6+ months, and sometimes even longer) in the fridge. Their flavor often continues to improve and deepen over time, becoming more complex.
- Submergence in the Fridge: While less critical than during active fermentation, it’s still best practice to keep your onions **submerged** even in the fridge. This maintains optimal quality and longevity, although the need for a strict **anaerobic environment** is reduced once cold.
- Shelf-Stability & Alcohol: **Lacto-fermented** foods like these are typically not truly **shelf-stable** outside of refrigeration, as the live cultures are still active, albeit slowed. Commercial “shelf-stable” ferments are usually canned or pasteurized, which kills the beneficial **probiotics**. As for **trace alcohol content**, **lacto-fermentation** produces only negligible amounts (far less than 0.5%), making it generally considered non-alcoholic and suitable for almost all audiences.
Conclusion: Your Fermentation Journey Begins Now
There’s immense satisfaction in transforming simple onions into this vibrant, gut-healthy condiment. My **spicy fermented onions** offer a truly unique experience, boasting a complex **tangy** flavor with a delightful spicy kick from the **gochugaru**. You’ll not only enjoy the incredible taste but also reap the significant gut health benefits provided by the **probiotics** and **enzymes**. **Lacto-fermentation** is an accessible and incredibly rewarding process, and with these tips, you’re well-equipped to achieve delicious results every time. I encourage you to try this recipe, experiment with different **variations**, and perhaps explore other **fermented foods** like **sourdough bread** or **sauerkraut**. Happy fermenting!
Frequently Asked Questions About Fermented Onions
What is lacto-fermentation and how does it benefit my health?
**Lacto-fermentation** is an ancient food preservation technique where beneficial **lactic acid** bacteria convert sugars into lactic acid. This process creates **probiotics** and **enzymes**, which are fantastic for your **gut health**, supporting digestion, and enhancing nutrient absorption. It transforms the food into a **tangy**, **sour** condiment with increased **digestion**.
What kind of salt and water should I use for fermenting onions?
Always use non-iodized **sea salt** or **pickling salt** free from anti-caking agents. Iodine and anti-caking agents can hinder the **fermentation process**. For water, **distilled water** is best. If using **tap water**, make sure to boil it first and let it cool completely to **room temperature** to remove **chlorine**, which can inhibit beneficial bacteria.
How do I know if my fermented onions are safe to eat, or if they’ve gone bad?
Look for **visual cues** like small **carbon dioxide** **bubbles** and a beautiful pink hue from the **gochugaru**. The aroma should be pleasantly **tangy** and **sour**, like **pickled onions** or **sauerkraut**, not foul or putrid. A thin, white film (which is often harmless **Kahm yeast**) can be skimmed off, but fuzzy, black, or brightly colored **mold** means you should **discard the ferment if it smells really awful** and start over.
How long do fermented onions last, and what’s the best way to store them?
Once moved to the **refrigerator**, your **fermented onions** will last for several months, typically 3-6+, often improving in flavor. The cold temperatures effectively **halts the fermentation process**. It’s best practice to keep them **submerged** in their **brine** even in the fridge for optimal quality, though the strict **anaerobic environment** is less critical than during active fermentation.
Can I use different types of onions or add other flavorings?
Absolutely! **Red onion** provides beautiful color and robust flavor, while **white onion**, **yellow onion**, or **sweet onion** offer milder profiles. Feel free to experiment with **variations** by adding **garlic** cloves, whole **peppercorns**, fresh **dill**, or other complementary **herbs** to the jar along with your gochugaru to create unique flavor profiles.
What is the ideal temperature for fermenting onions and how does it affect the process?
The **ideal fermentation temperature range** for **fermented onions** is typically **room temperature**, between 65-75°F (18-24°C). This temperature range promotes optimal activity of the lactic acid bacteria. Warmer temperatures will speed up the **fermentation process**, potentially resulting in a softer texture and quicker souring, while cooler temperatures will slow it down, often leading to a crisper texture and more nuanced flavor development.
Does lacto-fermentation produce alcohol?
**Lacto-fermentation** produces only negligible **trace alcohol content**, typically far less than 0.5%. This amount is generally considered non-alcoholic and makes **lacto-fermented** foods like these spicy **fermented onions** suitable for almost all audiences, including children and those avoiding alcohol.
Spicy Fermented Onions
Ingredients
Equipment
Method
- Choose an appropriate-sized mason jar (e.g., 16 oz wide mouth style) to fit the sliced onion. Place the mason jar on your kitchen scale and tare it to zero out the weight.
- Fit the sliced onion into the mason jar and pour in enough water to cover the onions. Note the total combined weight in grams of the onion and water.
- To determine the salt needed, multiply the combined onion and water weight by 0.02. For example, 800 grams combined weight requires 16 grams of salt (800 x 0.02 = 16).
- Tare the scale again and add the calculated amount of sea salt in grams. Add 1/4 teaspoon of gochugaru or red pepper flakes to the jar. Secure the lid and shake well to dissolve the salt and distribute the chili flakes evenly.
- Ensure the onions are completely submerged using fermentation weights, small ceramic bowls, a smaller mason jar, or a glass shot glass. Avoid using plastic bags or Tupperware.
- Leave the ferment at room temperature (65-75°F / 18-24°C) away from direct sunlight for 4-7 days. Check daily to ensure submergence and gently open the lid (burp the jar) to release built-up carbon dioxide pressure, then close tightly.
- Once the onions are delightfully tangy and sour, transfer the jar to the refrigerator. This halts the fermentation process, and your fermented onions will keep for a very long time.