

There’s something uniquely comforting about a classic hot dog piled high with a rich, savory chili. It’s the taste of summer barbecues, ball games, and pure American nostalgia. If you’ve been searching for the ultimate hot dog chili recipe that consistently delivers a deep, satisfying flavor, you’ve come to the right place. Today, I’m sharing my kitchen’s secret to an incredibly flavorful, easy-to-make chili that will elevate your next hot dog from good to unforgettable. Get ready to discover a reliable recipe, along with my best tips for serving, storing, and making this chili a staple in your culinary repertoire!
Why You’ll Love This Recipe
In my kitchen, flavor is paramount, and this recipe features a special twist that makes all the difference. My secret to unlocking truly deep, complex flavor in this classic **hot dog chili** is the addition of just 1 tablespoon of Worcestershire sauce and a pinch of smoked paprika during the simmering stage.
* **Flavor Depth**: The Worcestershire sauce delivers an incredible fermented umami, savory depth, and a subtle tang that beautifully enhances the **ground beef** and **tomato sauce** base. Coupled with the smoked paprika, which introduces a gentle, earthy smoky complexity, this chili gains a gourmet touch that tastes like it’s been simmering for hours. It’s pure **flavor development** magic!
* **Ease & Speed**: Despite its rich taste, this chili is surprisingly quick to prepare. It’s perfect for a weeknight dinner, allowing you to enjoy gourmet flavors without spending all evening in the kitchen.
* **Versatility**: This chili isn’t just for hot dogs! It’s fantastic for building an impressive **hot dog bar**, topping nachos, or as a hearty addition to game day spreads. It’s easily scaled up for larger gatherings.
* **Meal Prep Friendly**: Not only is it delicious fresh, but this chili also makes an excellent **meal prep** option. It can be made ahead, refrigerated, or frozen, and often tastes even better the next day as the flavors meld.
Ingredients Needed

Here’s what you’ll need to create this incredibly flavorful **hot dog chili**:
- 1 lb. ground beef (73/27 or 80/20)
- 1 cup water
- 1 small yellow onion, (about ¾ cup finely diced)
- ½ cup ketchup
- 1 -15 oz. can tomato sauce
- 1 -1 oz. Chili Seasoning Mix
- 1 teaspoon sugar
- 1 tablespoon Worcestershire sauce (my special twist!)
- 1 pinch smoked paprika (my special twist!)
Ingredient Notes & Substitutions
Choosing the right ingredients is key to achieving that perfect **sauce-like texture** and incredible flavor. For more tips on making a rich, meaty base, explore The Best Ground Beef Chili Recipe.
* Ground Beef: I highly recommend using **73/27 ground beef** or **80/20 ground beef**. The higher **fat content** is crucial here because it renders down, creating a tender, rich, and truly **sauce-like texture**. Lean ground beef, while healthier for some dishes, will result in a rubbery, dry chili that won’t give you the desired mouthfeel. Browning the beef properly also contributes to the **Maillard reaction**, building savory **umami** notes.
* Onion: A small **yellow onion**, finely diced, provides a subtle sweetness and aromatic base without being overtly chunky. Its fine dice ensures it practically melts into the chili.
* Chili Seasoning Mix: This recipe calls for a **Chili Seasoning Mix**, which is a balanced blend of spices. This is different from pure **chili powder**, which is typically just ground chiles. I always look for reputable brands like Williams or McCormick where salt isn’t the first ingredient, ensuring a more balanced spice profile.
* Worcestershire Sauce & Smoked Paprika: These are the stars of my unique twist! The Worcestershire sauce brings that essential **umami** and tang, while the smoked paprika adds depth and complexity, truly elevating the **flavor development** during **simmering**. Don’t skip them!
* Dietary Considerations: To make this recipe gluten-free, always check the label on your **Chili Seasoning Mix** as some brands may contain wheat. This recipe is naturally dairy-free.

How to Make the Best Hot Dog Chili
Let’s get cooking! Follow these simple steps for a truly incredible **hot dog chili recipe**.
Browning the Beef for Flavor
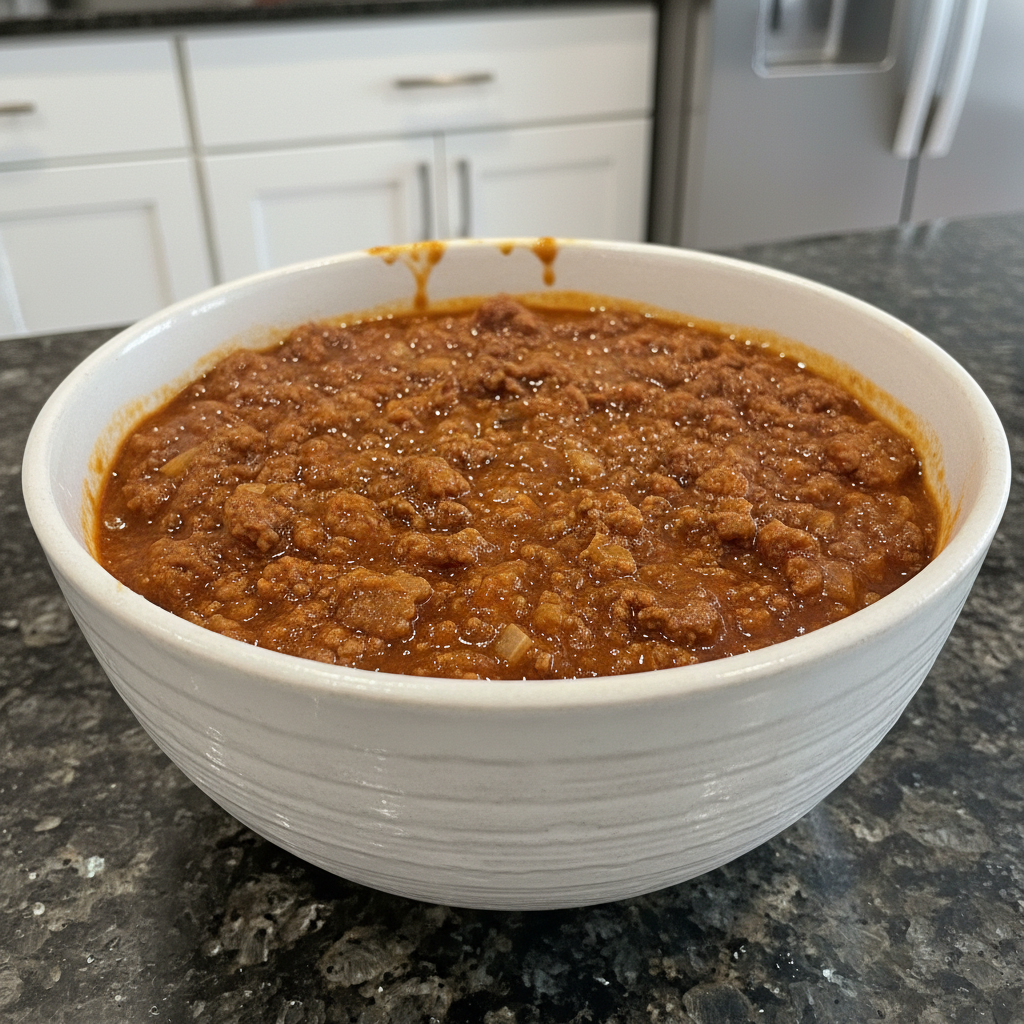
First, add your **ground beef** (73/27 or 80/20 is best) and 1 cup of water to a large **non-stick skillet**. Place the skillet over medium-high heat. As the beef begins to sizzle and cook, use a sturdy **wooden spoon** to break it down into very fine crumbles. We’re aiming for a loose, fine texture, almost like a thick sauce, not large chunks. Once the meat is no longer pink, typically after 7-10 minutes, remove it from the heat. Drain the cooked beef thoroughly in a **strainer** or **colander** to remove excess fat, then set it aside. This step is crucial for a less greasy chili with the ideal **sauce-like texture**.
Building the Aromatic Base
Reduce the heat to medium and return the large skillet pan to the stove. Add your finely **diced onion** to the pan and sauté, stirring occasionally, until it becomes translucent and fragrant, usually about 5-7 minutes. The sweet aroma filling your kitchen signals the perfect base for our chili.
Simmering to Perfection with Our Secret Twist
Return the drained, cooked meat back to the skillet with the translucent onions. With your **wooden spoon**, stir in the rest of the ingredients: the ketchup, **tomato sauce**, **Chili Seasoning Mix**, and **sugar**. This is also where you’ll add our secret twist – the 1 tablespoon of Worcestershire sauce and the pinch of smoked paprika. Stir everything together until well combined. Bring the mixture to a gentle bubble over medium heat, stirring for about 5 minutes. Then, reduce the heat to low and let it **simmer** until you’re ready to serve. As it simmers, the flavors will meld and deepen beautifully. The chili will naturally thicken as it cools; if it becomes too thick for your desired **sauce-like texture**, simply add a little bit of the reserved broth from draining the beef, or a splash of water, stirring until it reaches your preferred consistency.
Essential Equipment & Customization Notes
Having the right tools and knowing how to adapt your chili can make all the difference.
Essential Equipment for Perfect Hot Dog Chili
- Skillet: A large (10-12 inch) **non-stick skillet** is ideal for evenly browning the ground beef and simmering the chili without sticking.
- Strainer/Colander: An absolute must for efficiently draining the fat from the cooked **ground beef**, ensuring a less greasy chili.
- Wooden Spoon: Perfect for breaking up the meat and stirring without scratching your non-stick surfaces.
- Optional: Crock-Pot or Slow Cooker: If you’re hosting a hot dog bar or serving a crowd, a crock-pot or slow cooker is fantastic for keeping the chili warm and ready to serve, perfect for making a large batch of chili for a crowd.
Hot Dog Chili Variations & Dietary Notes
This recipe is a fantastic canvas for your own culinary creativity.
- Spicier Version: For those who love a kick, add a pinch of cayenne pepper or a dash of your favorite hot sauce during the simmering stage.
- Alternative Tomato Products: While I prefer **tomato sauce** for its smooth consistency, you could use finely crushed diced tomatoes for a chunkier chili. A tablespoon of tomato paste, browned with the onions, can also add deeper flavor, just reduce the ketchup slightly.
- Flavor Boosts: For an even richer flavor profile, try adding a tiny bit of unsweetened cocoa powder (about ½ teaspoon) or a very small dash of coffee during simmering. These additions enhance the savory notes without making the chili taste like chocolate or coffee.
- Nutritional Information: While exact nutritional information can vary based on ingredients and portion sizes, this recipe, featuring **ground beef**, is a good source of protein. If precise values are needed, I recommend using an online nutritional calculator with your specific ingredients. Remember that the **fat content** from the beef contributes to the richness.
Pro Tips & Troubleshooting
Even seasoned chefs encounter culinary challenges. Here are my expert insights to ensure your **hot dog chili** is perfect every time.
Pro Tips for the Best Chili
- Choose the Right Meat: As I mentioned, using high-**fat ground beef** (73/27 or 80/20) is non-negotiable for superior flavor and a truly **sauce-like texture**. It’s the foundation of a great **hot dog chili**.
- Drain Thoroughly: Don’t skimp on draining the fat after browning the beef. While some fat contributes to **flavor development**, too much will result in a greasy chili.
- Simmer for Flavor: Allowing the chili to **simmer** on low heat for an extended period (even just 30 minutes) significantly develops deeper, more complex flavors and achieves that perfect consistency. Patience pays off!
- Taste and Adjust: Always taste your chili before serving! This is where you can truly make it your own. Adjust salt, sugar, or add more of our unique twist ingredients to perfect that **umami** balance.
- Crock-Pot Serving: For parties or a **hot dog bar**, transfer your finished chili to a **crock-pot** or **slow cooker** set to “warm” to keep it at the ideal serving temperature without overcooking.
Common Mistakes to Avoid
- Using Lean Ground Beef: This is the most common mistake! It will result in a dry, crumbly, and rubbery texture that simply isn’t what we want for a delicious **hot dog chili**.
- Too Many Ingredients: Hot dog chili should be simple and focused on the rich **meat** and **tomato** flavors. Avoid adding too many extra ingredients that can muddy the taste profile.
- Not Draining Fat: Forgetting to drain the fat will leave you with an overly greasy chili that isn’t as enjoyable.
- Chili Too Salty/Not Spicy Enough: If your chili is too salty, you can add a raw potato slice during the last 15 minutes of simmering (remove before serving), or stir in a little more **tomato sauce** or water to dilute it. If it’s not spicy enough, a dash of hot sauce or a pinch of cayenne powder will easily fix it.
Serving & Storage
Once you’ve mastered this amazing **hot dog chili recipe**, you’ll want to know the best ways to enjoy and store it.
Serving Ideas: Beyond the Bun
Of course, this chili is destined for hot dogs, but don’t limit yourself!
- Classic Toppings: For traditionalists, nothing beats a generous spoonful of chili topped with fresh **diced onion**, a zigzag of yellow **mustard**, and a sprinkle of shredded **cheddar cheese** for a classic Chili Cheese Dog. Don’t forget **pickle relish** or even **banana peppers** and **sauerkraut** for extra zing!
- Regional Delights: Recreate the famous **Coney Dog** style (often associated with Detroit), featuring our meaty, beanless chili sauce, **diced onions**, and yellow **mustard**. For another beloved classic, try our Copycat Wendy’s Chili Recipe. Or, try a **Carolina slaw dog** with chili, **mustard**, onions, and a scoop of creamy **coleslaw**.
- Creative Alternatives: This versatile chili is fantastic on crispy **fries** (hello, chili cheese fries!), loaded onto **nachos**, dolloped over baked potatoes, or even piled high on **burgers** for an epic chili cheeseburger.
- Side Dishes: To balance the richness, serve with simple sides like classic potato chips or a light, refreshing green salad.
Storage and Make-Ahead Tips
This **hot dog chili** is an absolute champion for **meal prep**!
- Make-Ahead: The flavors of this chili actually improve overnight, making it perfect for preparing a day or two in advance of your event or meal.
- Refrigeration: Once cooled completely, transfer your chili to an airtight container and store it in the refrigerator for up to 3-4 days. Always follow good **food safety guidelines** to ensure freshness.
- Freezing: This chili **freezes** beautifully! Allow it to cool completely, then transfer to freezer-safe bags or containers. I like to portion it into single or double servings for convenience. It will keep well in the freezer for up to 3 months.
- Reheating: When you’re ready to enjoy, follow these **reheating** methods:
- Stovetop: Gently reheat the chili in a saucepan over low heat, stirring occasionally. As chili thickens upon cooling, you’ll likely need to add a little water or beef broth to achieve your desired **sauce-like texture**.
- Microwave: Reheat smaller portions in short intervals (1-2 minutes), stirring often, and adding a splash of water as needed to adjust consistency.
- Slow Cooker: For larger batches, you can reheat the chili on low in a **slow cooker**, stirring every 30-60 minutes, and adding liquid to restore its perfect **sauce-like texture**.
Conclusion
And there you have it – my ultimate **hot dog chili recipe**, elevated with that secret **umami**-rich, subtly **smoky flavor** twist! I truly believe this recipe will become your go-to for its incredible depth of flavor and ease of preparation. Whether you’re a seasoned chef or a beginner in the kitchen, this chili is approachable, forgiving, and consistently delicious.
I encourage you to try the different serving suggestions, from the classic **Coney Dog** to chili cheese fries, and even experiment with customizing the spice level to your taste. I can’t wait to see your creations! Please share your thoughts, rate the recipe, or explore my other fantastic **hot dog toppings** and **meal prep** ideas on the blog. Happy cooking!
FAQ
What is the best type of ground beef for hot dog chili?
Answer: **73/27 ground beef** or **80/20 ground beef** is ideal. The higher **fat content** renders down, creating a tender, **sauce-like texture** and rich flavor, preventing the chili from being rubbery and dry.
What is the difference between chili powder and chili seasoning mix?
Answer: **Chili powder** is typically a single spice made from ground, dried chiles. A **Chili Seasoning Mix**, which our recipe uses, is a blend of various spices, often including chili powder, cumin, garlic powder, onion powder, and salt. It offers a more convenient and balanced flavor profile for this recipe.
Can hot dog chili be made ahead and stored for later?
Answer: Absolutely! This **hot dog chili** is excellent for **meal prep**. It can be refrigerated for 3-4 days or frozen for up to 3 months. Follow our detailed storage and **reheating** guidelines for best results.
What are some popular regional hot dog chili topping combinations?
Answer: Popular options include the **Coney Dog** (chili, yellow **mustard**, and **diced onion**) and the **Carolina slaw dog** (chili, **mustard**, onions, and **coleslaw**). Don’t forget classic shredded **cheddar cheese** and **pickle relish**!
How is hot dog chili different from regular chili?
Answer: **Hot dog chili** is typically a thinner, **sauce-like texture** topping, focused on seasoned **ground beef** and a **tomato sauce** base, often without beans. Regular chili is usually thicker, heartier, and often includes beans, designed to be a main meal.
How can I adjust the consistency of my hot dog chili?
Answer: If it’s too thick, stir in a small amount of water or beef broth until your desired **sauce-like texture** is reached. If it’s too thin, simmer uncovered for a bit longer to allow it to reduce and thicken.
What are some alternative serving suggestions beyond hot dogs?
Answer: This versatile chili is fantastic on **fries** (chili cheese fries), **nachos**, **burgers**, or even baked potatoes for a hearty and flavorful meal.
Best Hot Dog Chili Recipe: Our Secret Umami-Rich Twist!
Ingredients
Equipment
Method
- Add your ground beef (73/27 or 80/20) and 1 cup of water to a large non-stick skillet. Place the skillet over medium-high heat. Use a sturdy wooden spoon to break the beef into very fine crumbles, aiming for a loose, fine texture.
- Cook for 7-10 minutes until the meat is no longer pink. Remove from heat and drain thoroughly in a strainer or colander to remove excess fat. Set aside.
- Reduce the heat to medium and return the skillet to the stove. Add the finely diced onion and sauté, stirring occasionally, for about 5-7 minutes until translucent and fragrant.
- Return the drained, cooked meat to the skillet with the translucent onions.
- Stir in the ketchup, tomato sauce, Chili Seasoning Mix, sugar, 1 tablespoon of Worcestershire sauce, and a pinch of smoked paprika until well combined.
- Bring the mixture to a gentle bubble over medium heat, stirring for about 5 minutes. Then, reduce the heat to low and let it simmer until you are ready to serve. The flavors will meld and deepen beautifully.
- If the chili becomes too thick as it cools, add a little reserved broth from draining the beef or a splash of water, stirring until it reaches your preferred sauce-like consistency.