

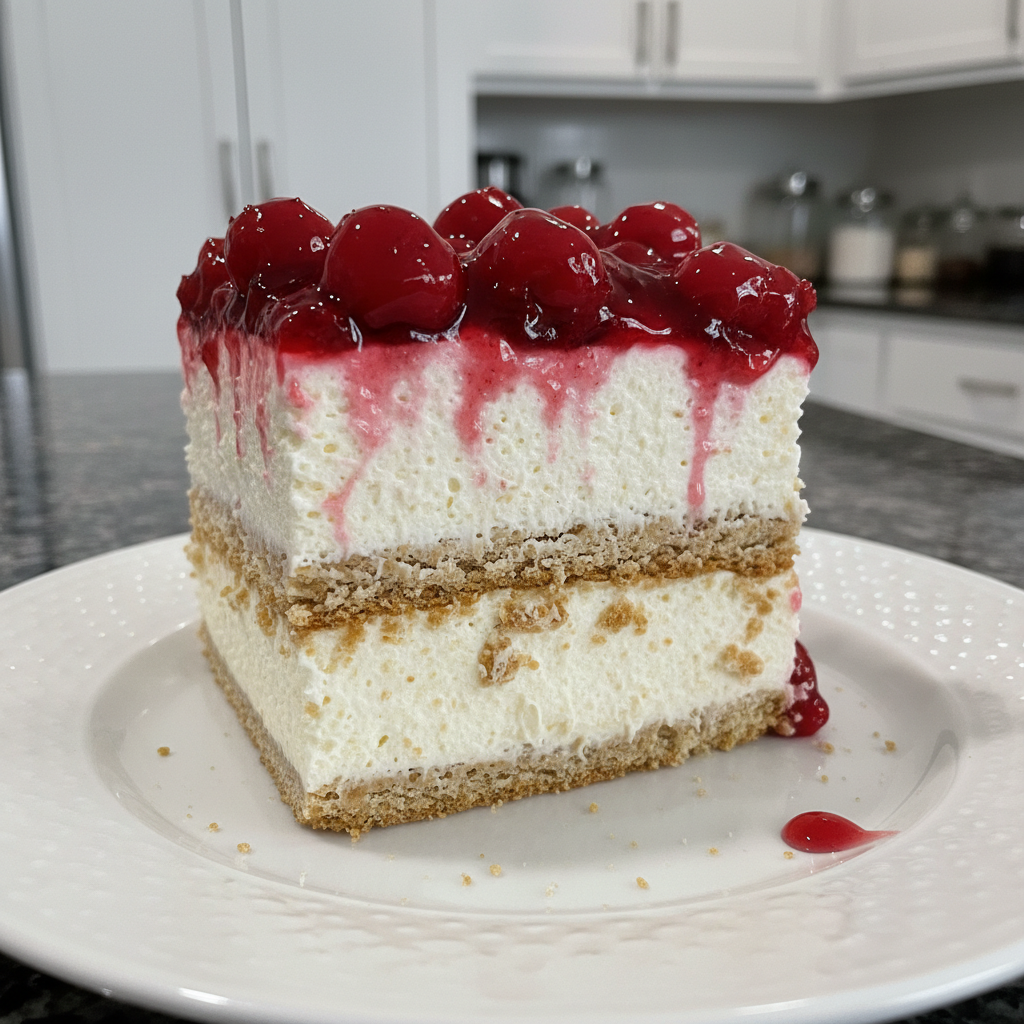
Are you searching for that perfect dessert that screams summer joy, requires no oven, and tastes utterly divine? Look no further! As a professional chef and devoted home cook, I’ve perfected the ultimate Cherry Cheesecake Icebox Cake, a no-bake delight that combines the creamy tang of cheesecake with luscious cherries and tender graham crackers.
This isn’t just another icebox cake recipe; it’s a guide to creating a show-stopping, make-ahead dessert that will impress everyone. I’m sharing my secret twist and all my expert tips to ensure your cake is perfectly set, beautifully layered, and bursting with balanced flavor. Get ready to create a new favorite!
Why You’ll Love This Recipe
My kitchen is all about flavor, and this Cherry Cheesecake Icebox Cake truly shines, thanks to a unique twist that elevates it beyond the ordinary. Here’s why this recipe will become your go-to:
- Our Secret Tangy Twist: I incorporate 1 teaspoon of fresh lemon zest and 2 tablespoons of full-fat sour cream into the creamy cheesecake filling. The lemon zest provides a bright, aromatic counterpoint to the sweetness of the cherries and powdered sugar, truly enhancing the overall flavor complexity. The sour cream adds a subtle, pleasant tanginess and richness, which beautifully mimics the characteristic acidity and silky mouthfeel often found in traditional baked cheesecakes, making our no-bake dessert taste incredibly authentic and far less one-dimensional. This simple addition ensures a perfect sweetness balance.
- Effortless Elegance: This is the quintessential no-bake dessert. You won’t need to turn on your oven, making it absolutely perfect for warm weather or when you’re short on time. It’s incredibly easy to assemble, requiring minimal effort for maximum impact. For more culinary inspiration, explore various recipes and cooking techniques on Food Network.
- The Perfect Make-Ahead Treat: An icebox cake only gets better with time! This is a fantastic make-ahead dessert, allowing the graham crackers to soften to a delightful cake-like texture while the flavors meld beautifully. Prepare it the day before your event and reduce last-minute stress.
- A Crowd-Pleasing Summer Star: With its cool, creamy, and fruity nature, this chilled dessert is ideal for summer entertaining, backyard barbecues, or any potluck. It’s a delightful change from traditional cakes and pies, offering a refreshing end to any meal.
Ingredients Needed

Here are the precise ingredients you’ll need to create this divine Cherry Cheesecake Icebox Cake. I recommend gathering everything before you begin! For more in-depth information on ingredients and their uses, check out Epicurious.
- 4 Cups heavy whipping cream (cold)
- 2 Cups powdered sugar
- 24 Ounces cream cheese (at room temperature)
- 2 Teaspoons vanilla extract
- 1 Box graham crackers
- 3 Cans cherry pie filling (21-Ounce cans )
Ingredient Notes & Substitutions
Understanding your ingredients is key to success, and sometimes, a little knowledge goes a long way!
- Heavy Whipping Cream: Always use cold heavy whipping cream for the best results when creating fluffy, stable whipped cream. Look for cream with at least 36% milk fat for optimal stiff peaks.
- Cream Cheese: It is absolutely crucial for your cream cheese to be at room temperature. This is the secret to a smooth, lump-free cheesecake filling. Cold cream cheese will result in a clumpy mixture, which we definitely want to avoid!
- Graham Crackers: Classic honey graham crackers are my go-to, but feel free to experiment! Chocolate graham crackers would add a richer flavor, or you could opt for Nilla wafers or even crushed Oreos for a different spin. For a gluten-free option, simply use gluten-free cookies like gluten-free graham crackers.
- Cherry Pie Filling: While I use convenient canned cherry pie filling for ease, you could certainly make your own. This recipe is also fantastic for flavor variations – try strawberry, blueberry, or even lemon fruit pie filling for a different taste experience.
- Lemon Zest & Sour Cream (Our Twist): These two ingredients are integral to our unique flavor profile. The lemon zest brightens, while the sour cream adds that desirable tang and creamy texture, balancing the overall sweetness. Don’t skip them!
- Essential Kitchen Tools: You’ll want an electric mixer (stand or hand-held), a sturdy baking pan (a 9×13 inch pan is perfect for this recipe), and an offset spatula for smooth layering.

How to Make Cherry Cheesecake Icebox Cake
Let’s get cooking! Follow these simple steps to create a beautiful and delicious Cherry Cheesecake Icebox Cake. Pay close attention to the details, and you’ll have a perfect dessert every time.
Phase 1: Whipping the Cream
- In a large, chilled bowl, combine the cold heavy whipping cream and 1 cup of the powdered sugar. Using an electric mixer, whip the mixture for 7 to 8 minutes, or until it becomes thick and stiff. You’re looking for firm peaks that hold their shape beautifully when you lift the beaters. Set this fluffy whipped cream aside.
Phase 2: Crafting the Cheesecake Filling
- In a separate large bowl, use your electric mixer again to beat the cream cheese (remember, at room temperature!), the remaining 1 cup of powdered sugar, vanilla extract, 1 teaspoon fresh lemon zest, and 2 tablespoons full-fat sour cream until the mixture is completely smooth and free of any lumps. This is your luscious cheesecake filling base.
- Carefully fold or mix the reserved whipped cream into the cream cheese mixture at low speed until everything is just combined. Be gentle to avoid deflating the whipped cream and keep your filling light and airy.
Phase 3: Assembling Your Layers
- Now, it’s time to assemble this stunning no-bake dessert! Lay out a single layer of graham crackers along the bottom of an ungreased 9 x 13-inch baking pan or dish. Break some crackers as needed to fill in any gaps for a solid base.
- Spread a thin, even layer of the creamy cheesecake filling over the graham crackers. An offset spatula works wonders for this. Then, spoon out one can of the sweet cherry pie filling evenly over the cheesecake layer.
- Carefully spread another thin layer of the cheesecake filling over the cherry pie filling. Take your time to cover the fruit. Then, place another single layer of graham crackers on top, pressing down gently.
- Repeat this layering step one more time: cheesecake filling, cherry pie filling, then another layer of cheesecake filling, followed by graham crackers.
- After you add the last layer of graham crackers from the previous step, spread the remaining cheesecake filling on top, ensuring an even, smooth finish. Wrap the dessert tightly with plastic wrap to prevent freezer burn and keep it fresh, and refrigerate for at least 3 hours. Chilling is crucial for the crackers to soften and the cake to set properly.
Phase 4: The Grand Finale
- When you are ready to serve this glorious chilled dessert, unwrap it and spoon the last can of cherry pie filling generously on top for a vibrant, fruity finish. Serve chilled for optimal enjoyment!
Mastering Your Layers & Optimal Texture
Achieving the perfect Cherry Cheesecake Icebox Cake is all about thoughtful execution. Here’s how to ensure your layers are impeccable and your crackers reach that ideal cake-like softness.
Choosing Your Baking Dish & Graham Cracker Count
I highly recommend using a glass baking pan for your icebox cake. Not only does it allow you to admire your beautiful layers, but it also conducts cold efficiently, aiding in the chilling process. For a standard 9×13 inch pan, you’ll typically need 12-14 full sheets of graham crackers per layer. Don’t hesitate to break some to fit snugly into any gaps; a continuous base and middle layer are crucial for stability and even softening. This careful layering technique ensures every bite has that delightful graham cracker element.
Ensuring Graham Cracker Texture: No More Soggy Bottoms!
The magic of an icebox cake lies in the graham crackers softening to a tender, cake-like texture. Proper chilling time (at least 3 hours, ideally overnight) allows the moisture from the cheesecake filling to transform them without making them mushy. To ensure they don’t become excessively soggy if stored longer than 24 hours, make sure your filling layers are spread evenly and generously. This creates a protective barrier, preventing the fruit filling’s direct liquid contact from over-saturating the crackers. Avoid over-chilling *before* the initial minimum setting time, as this can hinder the softening process.
Tips for Clean Slicing and Presentation
A beautifully made dessert deserves a beautiful slice! For clean cuts, always ensure your Cherry Cheesecake Icebox Cake is thoroughly chilled dessert. Use a sharp, thin-bladed knife, and wipe the blade clean with a damp cloth between each slice. For an extra polished look, you can even dip your knife in warm water before each cut. Present your slices garnished with a dollop of extra cherry pie filling, a sprig of fresh mint, or a sprinkle of finely grated chocolate shavings for an elegant touch.
Pro Tips & Troubleshooting
Even seasoned chefs encounter minor challenges, but with these pro tips and common mistake warnings, you’ll sail through making your Cherry Cheesecake Icebox Cake!
Pro Tips
- Chill Your Tools: For faster, stiffer whipped cream, pop your mixing bowl and beater attachments into the freezer for 10-15 minutes before whipping.
- Room Temperature Cream Cheese is Key: I cannot stress this enough! Make sure your cream cheese at room temperature for at least an hour before mixing. This ensures a perfectly smooth, lump-free cheesecake filling.
- Beat Cream Cheese First: Before combining it with other ingredients, beat the cream cheese on its own until it’s smooth and creamy. This further prevents lumps.
- The Mighty Offset Spatula: An offset spatula is your best friend for spreading the layers evenly and gently. It makes achieving that professional, smooth finish a breeze.
- Don’t Skimp on Chilling: While 3 hours is the minimum, an overnight chill is ideal. This allows the graham crackers to fully soften and the cake to set perfectly, creating that wonderful cake-like texture.
- Embrace the Twist: Remember, the lemon zest and sour cream are game-changers! They introduce a complexity and tang that perfectly balances the sweetness, elevating the entire flavor profile of your cheesecake filling.
Common Mistakes to Avoid
- Lumpy Filling: The most common culprit? Not allowing your cream cheese to come to room temperature. This leads to a textured (and not in a good way) filling.
- Deflated Filling: Be gentle when folding the whipped cream into the cream cheese mixture. Overmixing can deflate the whipped cream, resulting in a less airy and fluffy filling.
- Crunchy Crackers: If your cake isn’t chilled long enough, the graham crackers won’t have time to soften, leaving them crunchy instead of delightfully cake-like. Patience is a virtue here!
- Runny Whipped Cream: If your heavy cream isn’t cold enough or your bowl/beaters are warm, your whipped cream might not stiffen properly. If this happens, try chilling the mixture and tools again, then re-whipping.
- Overly Sweet Dessert: While delicious, many icebox cakes can be one-dimensionally sweet. Our twist helps combat this, but avoid adding extra sugar to the filling or using overly sweetened graham crackers.
Serving & Storage
Once your glorious Cherry Cheesecake Icebox Cake is perfectly chilled, it’s time to enjoy it! Here’s how to serve it and keep it fresh.
Serving Ideas
This chilled dessert is a star on its own, but a few simple additions can make it even more special. Serve generous slices with an extra dollop of cherry pie filling on top, a sprig of fresh mint, or a light dusting of powdered sugar. For a truly indulgent experience, consider adding some delicate chocolate shavings for a Black Forest twist, or a sprinkle of chopped pecans for a delightful crunch. It’s a perfect summer dessert, an impressive potluck dessert, or a sweet finish to any family meal. For a lovely pairing, I suggest a crisp sparkling wine, a light herbal tea, or even a homemade lemonade to complement the fruity flavors.
Storage and Make-Ahead
This is truly an excellent make-ahead dessert! For optimal texture and freshness, store any leftovers of your cherry cheesecake icebox cake tightly covered with plastic wrap in the refrigerator. It will remain fresh and delicious for 3-4 days. To prevent graham crackers from becoming excessively soggy if stored longer than 24 hours, ensure your filling layers fully encapsulate the crackers, forming a protective barrier.
For longer storage, yes, you can freeze this cake! Wrap individual slices or the entire cake tightly in plastic wrap, then an additional layer of aluminum foil. This double wrapping is key to preventing freezer burn and maintaining texture when freezing. It can be frozen for up to 1 month. To thaw, simply transfer the frozen cake to the refrigerator and let it thaw overnight. Slice and serve chilled, and you’ll be amazed at how well it holds up!
Conclusion
There you have it – my tried-and-true recipe for the most divine Cherry Cheesecake Icebox Cake you’ll ever make! With its effortless preparation, luscious creamy layers, and that irresistible tangy kick from the lemon zest and sour cream, this no-bake dessert promises to be a memorable treat. It’s perfect for any occasion, especially as a refreshing chilled dessert on a warm day.
Whether you stick to the classic cherry or venture into other fruit pie filling flavors or crust alternatives, these instructions will ensure a show-stopping result. So go ahead, whip up this amazing cake, and let the compliments roll in! I’d love to hear how your cake turns out – feel free to share your creations and experiences in the comments below, and explore my other delicious no-bake recipes!
FAQ
Here are answers to some common questions about making and enjoying your Cherry Cheesecake Icebox Cake.
Q: How do graham crackers soften in a cherry cheesecake icebox cake, and what texture should I expect?
The graham crackers soften by absorbing moisture from the creamy cheesecake filling and cherry pie filling during the chilling period. After adequate refrigeration (at least 3 hours, ideally overnight), they will transform from crispy to a tender, cake-like texture, much like a sponge cake.
Q: Can store-bought whipped topping like Cool Whip be substituted for homemade whipped cream?
While you can use store-bought whipped topping like Cool Whip for convenience, I highly recommend homemade whipped cream for the best flavor profile and texture. Homemade whipped cream provides a richer, less artificial taste and a superior mouthfeel that truly enhances the cheesecake filling.
Q: What is the best way to store cherry cheesecake icebox cake for maximum freshness, and can it be frozen?
Store the cherry cheesecake icebox cake tightly covered with plastic wrap in the refrigerator for 3-4 days. Yes, it can be frozen! For best results and to prevent freezer burn and maintaining texture when freezing, wrap individual slices or the entire cake tightly in plastic wrap, then in aluminum foil. It will keep for up to 1 month. Thaw overnight in the refrigerator before serving.
Q: What are some popular variations or ingredient substitutions for this no-bake dessert?
This recipe is highly versatile! You can swap cherry pie filling for other fruit pie filling flavors like strawberry, blueberry, or even a lemon curd. For the “crust,” instead of graham crackers, try Nilla wafers, chocolate graham crackers, or even crushed Oreos. You can also add chocolate shavings to the filling or top, or sprinkle chopped pecans for a nutty crunch.
Q: What are essential tips for achieving a smooth, creamy cheesecake filling and perfectly set layers?
For a smooth cheesecake filling, ensure your cream cheese is at room temperature and beat it thoroughly on its own before adding other ingredients. When incorporating the whipped cream, mix it in gently at low speed to avoid deflation. For perfectly set layers, spread each layer evenly with an offset spatula and ensure you refrigerate the cake for at least the recommended time (3+ hours) to allow flavors to meld and crackers to soften.
Q: How can I adjust the sweetness or add extra flavors like chocolate to my icebox cake?
This recipe’s lemon zest and sour cream already provide a great sweetness balance. If you prefer it less sweet, you can slightly reduce the powdered sugar (though I don’t recommend reducing by more than 1/4 cup). To add chocolate, you can use chocolate graham crackers, mix mini chocolate shavings into the cheesecake filling, or drizzle melted chocolate over the top before serving.
Q: What tools do I need to make this dessert?
You’ll need a large mixing bowl (preferably chilled for the whipped cream), an electric mixer (handheld or stand mixer), a 9×13 inch baking pan, and an offset spatula for smooth spreading. Measuring cups and spoons are also essential.
Q: Is this a good make-ahead dessert for parties?
Absolutely! This Cherry Cheesecake Icebox Cake is an excellent make-ahead dessert. In fact, it tastes even better the next day after the flavors have melded and the graham crackers have softened to that perfect cake-like consistency. It’s a fantastic choice for parties, potlucks, and special occasions, allowing you to prepare it in advance and free up time on the day of your event.
Divine Cherry Cheesecake Icebox Cake: Our Tangy Lemon Twist No-Bake Recipe
Ingredients
Equipment
Method
- In a large, chilled bowl, combine the cold heavy whipping cream and 1 cup of the powdered sugar. Using an electric mixer, whip until thick and stiff (7-8 minutes), forming firm peaks. Set aside.
- In a separate large bowl, beat the room temperature cream cheese, remaining 1 cup powdered sugar, vanilla extract, 1 teaspoon fresh lemon zest, and 2 tablespoons full-fat sour cream with an electric mixer until completely smooth and lump-free.
- Gently fold or mix the reserved whipped cream into the cream cheese mixture at low speed until just combined, being careful not to deflate the whipped cream.
- Lay a single layer of graham crackers on the bottom of an ungreased 9 x 13-inch baking pan, breaking crackers as needed to fill gaps.
- Spread a thin, even layer of the cheesecake filling over the graham crackers, then spoon one can of cherry pie filling evenly on top.
- Carefully spread another thin layer of cheesecake filling over the cherry pie, then place another single layer of graham crackers on top, pressing gently.
- Repeat the previous layering step once more: cheesecake filling, cherry pie filling, cheesecake filling, then graham crackers.
- Spread the remaining cheesecake filling evenly over the last layer of graham crackers. Wrap tightly with plastic wrap and refrigerate for at least 3 hours (ideally overnight) for crackers to soften and cake to set.
- When ready to serve, unwrap the cake and spoon the last can of cherry pie filling generously on top. Serve chilled.