

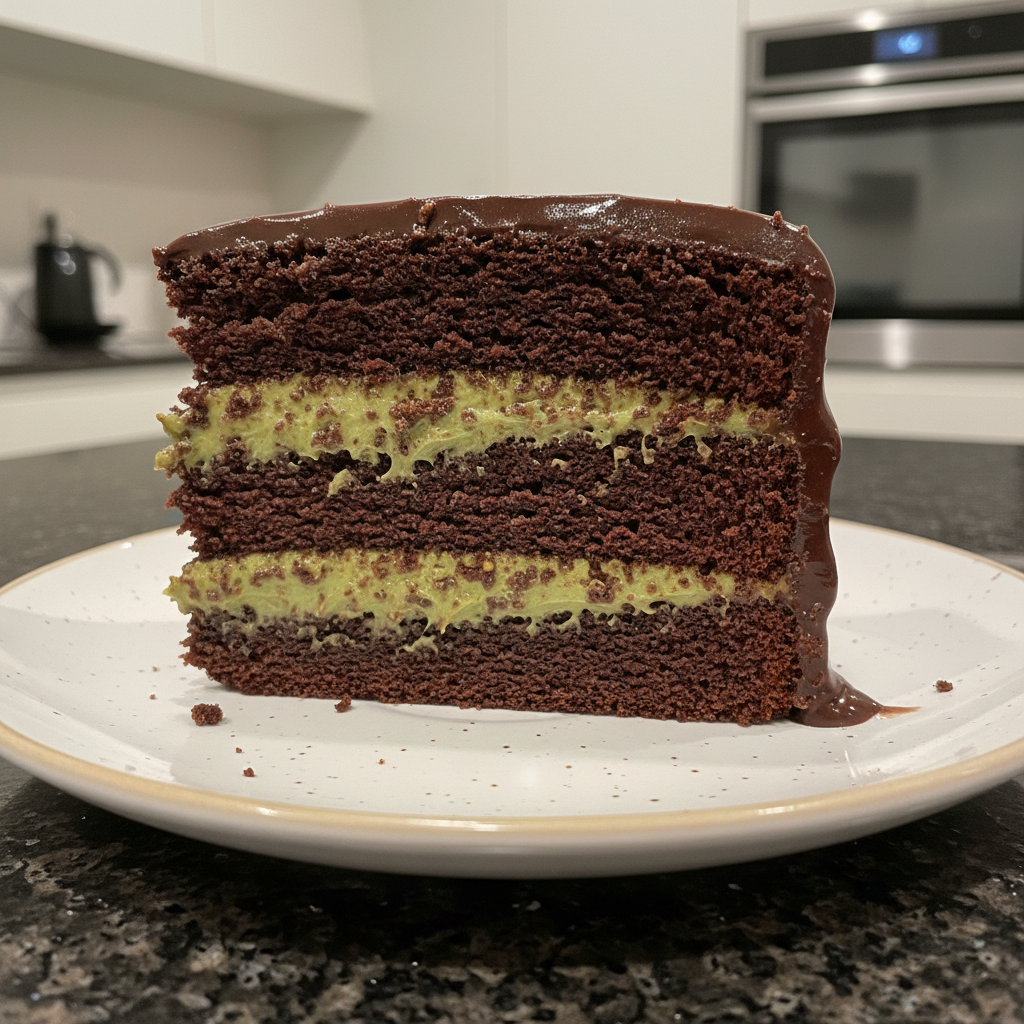
Ah, the allure of Dubai! It’s not just about towering skylines and shimmering deserts; it’s about unparalleled luxury, often found on a dessert plate. Today, I’m thrilled to share my ultimate recipe for a **Dubai Chocolate Cake** a showstopping creation that marries rich, moist chocolate with exotic, creamy pistachio, and an unexpected, delightful crunch. This isn’t just a cake; it’s an experience, a symphony of sweet, complex flavors and varied textures that will transport your senses. Whether you’re a seasoned baker or simply looking to impress, I promise you’ll find every step meticulously detailed, along with expert tips and troubleshooting, to master this truly decadent dessert.
Why You’ll Love This Dubai Chocolate Cake Recipe
I believe every exceptional dessert has a story, a unique twist that elevates it beyond the ordinary. For my **Dubai Chocolate Cake**, it’s a harmonious blend of classic Middle Eastern aromas and a clever technique to ensure every bite is perfection. You’ll absolutely adore this recipe for these reasons:
- Aromatic Pistachio Filling: What makes this cake truly “Dubai” is the luscious pistachio filling. I infuse it with a delicate touch of **rosewater** and a hint of finely ground **cardamom**. This creates an aromatic depth that is both sophisticated and incredibly inviting, a Middle Eastern flavor profile that complements the rich chocolate beautifully without ever overwhelming it.
- Ever-Crispy Kataifi: The bane of many layered cakes with crispy elements is sogginess. My secret? After toasting the kataifi threads to a golden crunch, I coat them in a thin, ethereal layer of **white chocolate**. This ingenious step creates a natural **moisture barrier**, scientifically preventing the kataifi from softening. The result is a delightful, lasting crispness that provides an incredible textural contrast, while the subtle sweetness of white chocolate perfectly bridges the dark chocolate and pistachio layers.
- A Showstopper & Make-Ahead Marvel: This cake is designed to impress! It’s a true **party cake** or a spectacular Christmas dessert, yet it’s surprisingly **make-ahead friendly**. Most components can be prepared in advance, allowing you to assemble it with ease and enjoy a luxurious taste experience that feels gourmet but is entirely achievable in your home kitchen.
Ingredients Needed for Your Dubai Chocolate Cake

Gathering high-quality ingredients is the first step to creating this magnificent **Dubai Chocolate Cake**. Here’s precisely what you’ll need:
For the Chocolate Cake:
- 1/2 cup/120 milliliters canola or grapeseed oil, plus more for the pan
- 1 1/3 cups/170 grams all-purpose flour
- 1 1/2 cups/300 grams granulated sugar
- 3/4 cup/75 grams Dutch-process cocoa powder
- 1 teaspoon baking powder
- 1 teaspoon baking soda
- 1 teaspoon kosher salt (such as Diamond Crystal)
- 2/3 cup/150 grams sour cream
- 2 large eggs
- 2 teaspoons vanilla extract
- 2/3 cup/158 milliliters hot coffee
For the Pistachio Filling:
- 1 1/4 cups/280 grams unsalted butter, softened to room temperature, divided
- 7 ounces/200 grams thawed frozen kataifi, clumps separated if needed, roughly chopped (about 3 lightly packed cups), see Tip
- 1 1/4 cups/170 grams shelled raw pistachios
- 2 tablespoons canola or grapeseed oil
- 2 cups/240 grams powdered sugar
- 1 teaspoon vanilla extract
- 1/4 teaspoon kosher salt (such as Diamond Crystal)
- 1 teaspoon rosewater (for the unique twist)
- 1/4 teaspoon finely ground cardamom (for the unique twist)
- 2 ounces/56 grams white chocolate, melted and cooled slightly (for the unique twist)
For the Chocolate Ganache:
- 1 1/2 cups/360 milliliters heavy cream
- 8 ounces/225 grams bittersweet chocolate chips
- 1 teaspoon vanilla extract
- Large pinch kosher salt (such as Diamond Crystal)
Ingredient Notes & Substitutions
Understanding your ingredients is key to successful baking. Here’s a little more insight into some of the stars of this Dessert recipe:
Pistachios: For that truly vibrant green color and unparalleled flavor in your **Pistachio Filling**, I always recommend using raw, unsalted, high-quality pistachios. If you can find them, Sicilian Bronte pistachios are a premium choice that will make your filling absolutely sing.
Kataifi: This delicate shredded phyllo dough, also known as shredded phyllo dough, is usually found in the freezer section of Middle Eastern markets or specialty grocery stores, often alongside phyllo dough. I’ve specified **frozen kataifi** because its texture is generally superior to dried for this recipe, offering a finer, more tender thread when thawed. If you absolutely cannot find it, you can carefully shred thin phyllo dough sheets or even use finely crushed **corn flakes** or **shredded wheat** for a similar textural crunch, though the flavor will be different. Remember, the white chocolate coating is crucial for maintaining crispness regardless of your choice!
Dutch-process Cocoa Powder: This isn’t just any cocoa. **Dutch-process cocoa powder** is treated to be less acidic, resulting in a **Chocolate Cake** with a deep, rich, almost black hue and a mellow, intense chocolate flavor. It reacts differently with leavening agents than natural cocoa, contributing to that perfect tender crumb.
Sour Cream: Don’t skip the **sour cream**! Its acidity helps activate the baking soda, contributing to a wonderfully moist and tender cake crumb. It also adds a subtle tang that balances the sweetness of the chocolate.
Hot Coffee: Believe it or not, the **hot coffee** in the cake batter doesn’t make your cake taste like coffee. Instead, it magically deepens and intensifies the chocolate flavor, making it incredibly rich and complex. It also adds necessary moisture.
Rosewater & Cardamom: These are the unique aromatic heartbeats of our **Pistachio Filling**. High-quality **rosewater** can be found in specialty food stores or Middle Eastern groceries, along with whole or ground **cardamom**. They are essential for achieving that authentic “Dubai” essence.
White Chocolate: Beyond its subtle sweetness, the **white chocolate** plays a critical scientific role here. It creates a robust **moisture barrier** around the toasted kataifi, ensuring it stays beautifully crisp within the creamy pistachio filling for much longer.
Pistachio Butter/Paste: While homemade **pistachio butter** is unbeatable for freshness and control, you can use good quality store-bought pistachio paste or butter. If it’s unsweetened, you may need to adjust the powdered sugar in the filling to taste. If it’s very thick, a touch more **canola oil** or **grapeseed oil** might be needed to achieve the right consistency.
Dietary Adaptations: For those with dietary restrictions, non-dairy sour cream and heavy cream alternatives can be used for the cake and ganache, though the texture might vary slightly. Ensure your white chocolate for the kataifi is dairy-free if needed.

How to Make Your Dubai Chocolate Cake
Creating this magnificent **Dubai Chocolate Cake** is a labor of love, but every step is immensely rewarding. Follow my detailed instructions for a truly spectacular result.
Preparing the Moist Chocolate Cake
- Set a rack in the center of your oven and preheat to 350 degrees F (175 C). Generously grease a 9-inch round cake pan with oil and line the bottom with parchment paper. This ensures your beautiful **Chocolate Cake** releases effortlessly.
- In a large bowl, combine the **all-purpose flour**, **granulated sugar**, **Dutch-process cocoa powder**, **baking powder**, **baking soda**, and **kosher salt**. Whisk these dry ingredients until they are perfectly combined and no lumps remain.
- In a large measuring cup with a spout, whisk together the **canola oil**, **sour cream**, **large eggs**, and **vanilla extract**.
- Pour the wet sour cream mixture into the dry ingredients. Using an **electric mixer**, mix on low speed until the dry ingredients are just moistened. Then, increase the mixer speed to medium-high and beat for 2 minutes, making sure to scrape the bottom and sides of the bowl halfway through.
- Carefully add the **hot coffee** to the batter. Using a flexible spatula, fold it in by dragging the spatula under and over the batter, scraping the sides and bottom of the bowl as you go, until the mixture is mostly homogenous and beautifully velvety.
- Transfer the rich **chocolate cake** batter to your prepared pan and gently tap it on the counter a few times to release any large air bubbles.
- Bake for 35 to 45 minutes, or until the cake is puffed and a toothpick inserted into the center comes out clean. Be careful not to overbake, as this can lead to a dry cake.
- Set the pan on a **wire rack** and let the cake cool for about 20 minutes. Run a thin knife around the edge of the pan, then carefully turn the cake out onto the rack to cool completely. You might need to gently tap the pan on the rack to help release the cake.
Crafting the Aromatic Pistachio & Ever-Crispy Kataifi Filling
- While the cake is baking and cooling, let’s prepare our incredible **Pistachio Filling** and **Kataifi Cake** component. Melt 4 tablespoons of the unsalted butter in a large skillet over medium heat.
- Add the thawed, roughly chopped **frozen kataifi** to the melted butter and stir to combine, ensuring every strand is coated.
- Toast the kataifi, stirring frequently, until it turns a beautiful golden brown and becomes wonderfully crisp. This usually takes about 15 minutes. Transfer the fragrant, golden **kataifi** to a plate to cool completely.
- Now for the star flavor! Add the **shelled raw pistachios** to the bowl of a **food processor**. Blend the pistachios until they are finely ground. Reserve about ¼ cup of these ground pistachios for our garnish later.
- Add the **canola oil** to the food processor and continue to blend until the pistachios are smooth and creamy, like a luscious **pistachio butter**. This takes about 5 to 8 minutes, and you’ll want to stop the processor a few times to scrape the bottom and sides of the bowl to ensure an even consistency. This is where our unique twist truly blossoms: add 1 teaspoon of **rosewater** and ¼ teaspoon of finely ground **cardamom** to the food processor and pulse briefly to incorporate, infusing the butter with exotic Middle Eastern notes.
- Add the remaining softened butter, **powdered sugar**, **vanilla extract**, and **kosher salt** to the food processor bowl. Pulse a few times until the mixture is incredibly smooth and fluffy. Transfer this creamy pistachio mixture to a large bowl.
- When the kataifi is completely cool, and you’re ready to decorate, here’s my secret for lasting crunch: gently fold the cooled, toasted kataifi into the slightly melted **white chocolate** until thinly coated. This creates that crucial **moisture barrier**. Now, reserve ¼ cup of this white chocolate-coated kataifi for garnish, then add the rest to the pistachio mixture and fold to combine, ensuring the crispy bits are evenly distributed throughout the creamy filling.
Making the Silky Chocolate Ganache
- When you are ready to assemble your cake, it’s time for the glossy **Chocolate Ganache**. Add the **heavy cream** to a saucepan and set it over medium-high heat. Place the **bittersweet chocolate chips** in a large, heatproof bowl.
- Warm the cream until it just begins to simmer around the edges, then immediately pour the hot cream over the chocolate chips.
- Add the **vanilla extract** and a large pinch of **kosher salt**. Let it sit for a minute or two, then whisk until the ganache is shiny and completely smooth.
- Transfer the ganache to the fridge and chill, stirring occasionally, for about 20 minutes, or until it reaches a thickened but still pourable consistency. This helps prevent the ganache from being too runny or too stiff.
Assembling Your Luxurious Dubai Chocolate Cake
- Once the **Chocolate Cake** is completely cool, you may need to trim the top flat using a **serrated knife** to ensure perfectly level layers. This creates a professional foundation for your filling.
- Top the cake with the prepared **Pistachio Filling** (with the white chocolate-coated kataifi). Use an **offset spatula** to evenly cover the cake all the way to the edges, ensuring it’s flush with the cake’s perimeter without spilling over.
- Place the cake in the refrigerator while you allow the ganache to firm up slightly.
- Transfer the chilled ganache to a vessel with a spout for easier pouring. Place the cake on a **wire rack** set over a baking sheet (to catch any drips).
- Pour about half of the ganache over the cake. If necessary, use your **offset spatula** to gently help ease the ganache over the top and sides of the cake to cover it completely. Refrigerate for 15 to 20 minutes, just until the ganache has set slightly.
- Pour the remaining ganache over the top, creating a beautiful, even layer. Immediately sprinkle the reserved white chocolate-coated kataifi and ground pistachios around the edge of the cake for a stunning finish.
- Let the assembled **Dubai Chocolate Cake** sit at a cool room temperature until the ganache has fully set, about 30 minutes. The ganache will retain its shine but won’t look wet once set.
- Carefully use a large spatula to transfer the cake to a serving plate. Serve at room temperature for optimal cake and filling texture. For the tidiest slices, use a warm, dry knife, wiping it clean between each cut.
Mastering the Details: Cake Layers, Pistachio Filling & Ganache
Creating a truly magnificent **Dubai Chocolate Cake** means paying attention to the nuanced techniques for each component. Here are my in-depth tips to perfect every detail.
Achieving Perfectly Level Cake Layers
A professional-looking cake starts with a level base. For perfectly even cake layers, I recommend using either a long **serrated knife** or a dedicated cake leveler. If using a knife, hold it parallel to your counter, positioning the cake on a flat surface. Use a gentle sawing motion, rotating the cake as you go, to slice off the domed top. To minimize crumbs, ensure your cake is completely cool before attempting to level. This simple step ensures your filling and ganache sit beautifully flat, contributing to a polished presentation.
Homemade Pistachio Butter Troubleshooting
Crafting smooth, creamy homemade **pistachio butter** is crucial for our **Pistachio Filling**. If you find your pistachio butter becoming hard, seizing, or separating, don’t fret! The key is patience with your **food processor**. Ensure you’re using raw, high-quality pistachios (like the vibrant Sicilian Bronte) for the best results. Blend, scrape, and blend again. If it separates and looks oily, continue blending; often, it just needs more time for the natural oils to fully emulsify. A tiny drizzle of additional neutral oil (like **canola oil** or **grapeseed oil**) can sometimes help kickstart the process, aiding in re-emulsification. The goal is an ultra-smooth, creamy consistency akin to a thick nut butter, which makes for a truly luxurious filling.
Flawless Ganache Drips and Spreads
The **Chocolate Ganache** on this cake is more than just a topping; it’s part of the visual spectacle. Achieving a professional-looking drip or a smooth spread hinges on consistency. For a smooth, pourable ganache that creates elegant drips, I aim for a consistency that flows off a spoon slowly but steadily. If it’s too thick, gently warm it over a double boiler. If it’s too thin, a few more minutes in the fridge with intermittent stirring will help. When spreading, an **offset spatula** is your best friend. Start by pouring ganache in the center, then gently guide it outwards and over the edges. For a thicker, more even coating, apply it in two stages with a brief chill in between. This helps achieve that glossy, flawless finish.
The Science of a Superior Cake: Why This Recipe Works
Baking is as much an art as it is a science. Understanding the “why” behind each ingredient and step empowers you to create extraordinary desserts like this **Dubai Chocolate Cake**.
The Magic of Sour Cream and Hot Coffee
In our **Chocolate Cake**, **sour cream** and **hot coffee** are a dynamic duo working behind the scenes. The acidity in the sour cream reacts with the **baking soda**, creating carbon dioxide bubbles that contribute to a wonderfully tender, moist crumb. This chemical reaction results in a lighter texture. Meanwhile, the hot coffee doesn’t make your cake taste like coffee at all! Instead, its warmth helps dissolve the **cocoa powder**, intensifying the depth and richness of the **chocolate cake** flavor through a process that aids in the Maillard reaction, enhancing all those complex, desirable notes we associate with delicious chocolate.
The Secret to Ever-Crisp Kataifi
The **crispness** of the kataifi is one of the defining textures of this cake, and I’ve gone the extra mile to ensure it lasts. The white chocolate coating is not just for flavor; it’s a brilliant scientific hack. This thin layer of **white chocolate** creates an impenetrable **moisture barrier** around each delicate kataifi strand. Moisture is the enemy of crispness, causing things to become soggy. By coating the toasted kataifi, we protect it from the moisture in the **Pistachio Filling** and the surrounding air, ensuring it stays delightfully crunchy for days. For optimal crispness, always toast the kataifi until it’s deeply golden brown, and handle it gently. While **frozen kataifi** generally yields a better, crisper texture than dried, this white chocolate coating technique is your best defense against sogginess, regardless of the type you use.
Pro Tips & Troubleshooting for Your Dubai Chocolate Cake
Even for experienced bakers, a multi-component **Layer cake** like this can present challenges. Here are my most valuable insights to ensure your **Dubai Chocolate Cake** is an absolute triumph!
Pro Tips for Success
- Quality Pistachios are Key: Always use raw, high-quality pistachios for the most vibrant green color and best flavor in your **Pistachio Filling**.
- Proper Kataifi Thawing: Thaw **frozen kataifi** in the refrigerator overnight. This allows for optimal separation and easier handling, preventing it from sticking together.
- Plan Ahead: This is a fantastic **make-ahead dessert**. I highly recommend making the **Chocolate Cake** layers, toasting the kataifi, and blending the pistachio cream a day in advance. Store components separately until assembly.
- Assemble in Advance: For the flavors to truly meld and deepen, assemble the cake a day before serving. Store it at cool room temperature (or refrigerate if your kitchen is warm).
- Serve at Room Temperature: For the optimal cake and filling texture, allow the assembled cake to come to room temperature for at least 30-60 minutes before serving.
- Perfect Slices: To achieve beautifully tidy slices, use a warm, dry **serrated knife**. Dip your knife in hot water, wipe it clean, and then make your cut. Repeat for each slice.
- Chilling is Crucial: Ensure proper **chilling** intervals for both the **Chocolate Ganache** and the assembled cake. This allows the ganache to achieve the right pourable consistency and the cake to firm up for easier decorating and clean cuts.
- Use the Right Tools: An **electric mixer** for the cake batter and a **food processor** for the pistachio butter will yield the best, most consistent results.
Common Mistakes to Avoid
- Pistachio Butter Separation: Don’t under-blend your pistachios. Patience is key. If your **pistachio butter** becomes hard or separates, continue blending in the food processor, perhaps adding a tiny bit more oil, until it re-emulsifies and becomes smooth.
- Soggy Kataifi: This is a common pitfall! Underscore the importance of the **white chocolate** coating as a **moisture barrier** and proper toasting until uniformly golden brown to prevent the **kataifi** from losing its desired crispness.
- Dry Chocolate Cake: Overbaking is the culprit for a dry cake. Stick to precise baking times and always use the toothpick test for doneness. Better slightly underbaked than overbaked for a moist crumb.
- Runny or Stiff Ganache: Achieving the ideal **Chocolate Ganache** consistency requires attention. Too runny means it wasn’t chilled enough or too much cream was used. Too stiff means it was over-chilled or not enough cream. Follow chilling and stirring intervals closely.
- Underestimating Prep Time: This isn’t a quick bake! Acknowledge that the ‘hands-on’ time for this multi-component dessert is longer than simple recipes. Set aside ample time for an enjoyable, stress-free baking experience.
Serving & Storage Suggestions
You’ve put in the effort, now let’s ensure your **Dubai Chocolate Cake** shines and lasts!
Elegant Serving Ideas
This **Dubai Chocolate Cake** is a masterpiece that deserves an equally elegant presentation. I love garnishing it with the reserved toasted kataifi and a sprinkle of finely ground pistachios for visual appeal and textural contrast – it really highlights the key elements of the cake. Serve slices at room temperature to ensure the cake is moist, the **Pistachio Filling** creamy, and the ganache perfectly soft. For pairings, a strong cup of coffee, traditional Middle Eastern tea, or even a delicate dessert wine would be delightful. It’s truly an ideal **party cake**, a magnificent **Christmas dessert**, or a romantic **Valentine’s Day dessert** that will leave a lasting impression.
Make-Ahead & Storage Solutions
This make-ahead dessert is perfect for entertaining! You can manage this beautiful creation with ease:
- Room Temperature Storage: The assembled cake can be stored, loosely covered, at a cool room temperature for up to 2-3 days. This actually allows the flavors to meld beautifully.
- Refrigeration: For longer storage, you can refrigerate the cake, covered tightly, for up to 5 days. Be aware that the ganache will firm up and the cake might become slightly denser when chilled. Allow it to come to room temperature before serving for the best texture.
- Freezing Components: You can absolutely freeze individual components! Baked **Chocolate Cake** layers (wrapped tightly in plastic wrap and then foil) can last for 1-2 months. The **Pistachio Filling** (in an airtight container) and **Chocolate Ganache** (in an airtight container) can also be frozen for up to a month. Thaw all components in the refrigerator overnight before use.
- Freezing Assembled Cake: To freeze the fully assembled cake, flash freeze it uncovered until firm, then wrap it tightly in several layers of plastic wrap and foil. It can be stored for up to 1 month. Thaw in the refrigerator overnight, then bring to room temperature before serving.
Adaptations for Special Occasions
This versatile Layer cake can be adapted to fit any occasion. For smaller gatherings, consider halving the recipe and baking it in two 6-inch round pans. You can also easily transform it into a two-layer cake by baking one thicker layer and slicing it horizontally for better flavor distribution of the **Pistachio Filling**. The beauty of this recipe lies in its adaptability!
Conclusion: Your Decadent Dubai Chocolate Cake Awaits
Embarking on the journey to create this **Dubai Chocolate Cake** is an experience in itself, culminating in a dessert that truly embodies luxury. The interplay of rich, deep chocolate, the creamy, aromatic pistachio infused with rosewater and cardamom, and the unparalleled crunch of the white chocolate-coated kataifi creates a masterpiece of flavor and texture. While it presents an impressive façade, rest assured that with my detailed instructions and expert tips, this showstopper is entirely achievable in your home kitchen. I encourage you to set aside the time, savor the process, and then delight in every single bite of this exquisite, Middle Eastern-inspired treat. Your decadent **Dubai Chocolate Cake** awaits!
Frequently Asked Questions (FAQ)
How can I ensure my homemade pistachio filling is smooth and stays creamy, preventing hardening or oil separation?
The secret to a smooth, creamy pistachio filling lies in using raw pistachios and patient, thorough blending in a food processor until it reaches an ultra-smooth consistency, like a thick butter. Incorporating the correct amounts of oil and softened butter is also key. If separation occurs, don’t worry! Continue blending and scraping down the sides; sometimes adding a tiny touch more neutral oil can help re-emulsify it. Refer to my “Homemade Pistachio Butter Troubleshooting” section for more detailed guidance.
What are the best alternatives to fresh kataifi dough, and how can I keep them crisp for the Dubai Chocolate Cake?
While frozen kataifi is ideal, if it’s hard to find, you can use thinly sliced phyllo dough or even crushed shredded wheat or corn flakes for a crunchy element. Note that the texture will be different. The most crucial step to keep any of these crisp in the filling is the unique white chocolate coating. This creates an essential moisture barrier, preventing sogginess from the creamy pistachio filling. Toast any alternative until golden before coating.
Can I make components of the Dubai Chocolate Cake in advance, and what are the best storage tips?
Absolutely! This is a fantastic make-ahead dessert. You can bake the cake layers up to 2-3 days in advance (wrap tightly at room temperature or freeze), toast the kataifi (store airtight), and prepare the pistachio cream (refrigerate in an airtight container). I actually recommend assembling the cake a day before serving to allow the flavors to meld. For detailed storage, including freezing individual components or the fully assembled cake, please see my “Make-Ahead & Storage Solutions” section.
How can I prevent my chocolate cake from drying out, and how do I achieve a perfectly smooth ganache?
To prevent a dry chocolate cake, focus on precise baking times and rely on the toothpick test for doneness – remove the cake from the oven as soon as the toothpick comes out clean. For a perfectly smooth and shiny ganache, ensure you use the correct cream-to-chocolate ratio, and don’t rush the chilling process. Allow it to chill in the fridge, stirring intermittently, until it reaches a thickened but still pourable consistency. My “Flawless Ganache Drips and Spreads” section provides more specific techniques.
What’s the most accurate preparation time for this intricate Dubai Chocolate Cake recipe?
While it’s difficult to give a single “hands-on” time due to varying kitchen speeds, this is a multi-component recipe that benefits from a relaxed approach. Expect the active preparation time to be around 2-3 hours, not including cooling and chilling times. I recommend breaking down tasks over two days – bake the cake and prepare the filling components on day one, then assemble and ganache on day two. This makes the process much more enjoyable.
Can this recipe be modified to create a traditional layered cake with the pistachio filling?
Yes, certainly! This recipe is adaptable. You can easily modify it to create a more traditional layer cake. Simply bake the chocolate cake in two thinner 9-inch pans, or bake one thicker layer and carefully slice it horizontally into two even layers once cooled. Then, spread the pistachio filling between the layers for a classic **Layer cake** format.
What specific type of raw pistachios should I use for optimal color and flavor?
For the most vibrant natural green color and superior flavor in your pistachio filling, I highly recommend using raw, unsalted, high-quality pistachios. If you can source them, Sicilian Bronte pistachios are a premium choice renowned for their intense flavor and beautiful green hue.
How does hot coffee affect the chocolate cake’s flavor and texture?
The hot coffee in the chocolate cake batter is a fantastic secret ingredient! It doesn’t make the cake taste like coffee; instead, it significantly enhances the depth and richness of the chocolate flavor, making it more intense and complex. Additionally, the hot liquid contributes to the cake’s overall moistness and tender crumb.
The Ultimate Dubai Chocolate Cake: Pistachio, Rose & Crispy Kataifi
Ingredients
Equipment
Method
- Set a rack in the center of your oven and preheat to 350 degrees F (175 C). Generously grease a 9-inch round cake pan with oil and line the bottom with parchment paper. This ensures your beautiful Chocolate Cake releases effortlessly.
- In a large bowl, combine the all-purpose flour, granulated sugar, Dutch-process cocoa powder, baking powder, baking soda, and kosher salt. Whisk these dry ingredients until they are perfectly combined and no lumps remain.
- In a large measuring cup with a spout, whisk together the canola oil, sour cream, large eggs, and vanilla extract.
- Pour the wet sour cream mixture into the dry ingredients. Using an electric mixer, mix on low speed until the dry ingredients are just moistened. Then, increase the mixer speed to medium-high and beat for 2 minutes, making sure to scrape the bottom and sides of the bowl halfway through.
- Carefully add the hot coffee to the batter. Using a flexible spatula, fold it in by dragging the spatula under and over the batter, scraping the sides and bottom of the bowl as you go, until the mixture is mostly homogenous and beautifully velvety.
- Transfer the rich chocolate cake batter to your prepared pan and gently tap it on the counter a few times to release any large air bubbles.
- Bake for 35 to 45 minutes, or until the cake is puffed and a toothpick inserted into the center comes out clean. Be careful not to overbake, as this can lead to a dry cake.
- Set the pan on a wire rack and let the cake cool for about 20 minutes. Run a thin knife around the edge of the pan, then carefully turn the cake out onto the rack to cool completely. You might need to gently tap the pan on the rack to help release the cake.
- While the cake is baking and cooling, let’s prepare our incredible Pistachio Filling and Kataifi Cake component. Melt 4 tablespoons of the unsalted butter in a large skillet over medium heat.
- Add the thawed, roughly chopped frozen kataifi to the melted butter and stir to combine, ensuring every strand is coated.
- Toast the kataifi, stirring frequently, until it turns a beautiful golden brown and becomes wonderfully crisp. This usually takes about 15 minutes. Transfer the fragrant, golden kataifi to a plate to cool completely.
- Now for the star flavor! Add the shelled raw pistachios to the bowl of a food processor. Blend the pistachios until they are finely ground. Reserve about ¼ cup of these ground pistachios for our garnish later.
- Add the canola oil to the food processor and continue to blend until the pistachios are smooth and creamy, like a luscious pistachio butter. This takes about 5 to 8 minutes, and you’ll want to stop the processor a few times to scrape the bottom and sides of the bowl to ensure an even consistency. This is where our unique twist truly blossoms: add 1 teaspoon of rosewater and ¼ teaspoon of finely ground cardamom to the food processor and pulse briefly to incorporate, infusing the butter with exotic Middle Eastern notes.
- Add the remaining softened butter, powdered sugar, vanilla extract, and kosher salt to the food processor bowl. Pulse a few times until the mixture is incredibly smooth and fluffy. Transfer this creamy pistachio mixture to a large bowl.
- When the kataifi is completely cool, and you’re ready to decorate, here’s my secret for lasting crunch: gently fold the cooled, toasted kataifi into the slightly melted white chocolate until thinly coated. This creates that crucial moisture barrier. Now, reserve ¼ cup of this white chocolate-coated kataifi for garnish, then add the rest to the pistachio mixture and fold to combine, ensuring the crispy bits are evenly distributed throughout the creamy filling.
- When you are ready to assemble your cake, it’s time for the glossy Chocolate Ganache. Add the heavy cream to a saucepan and set it over medium-high heat. Place the bittersweet chocolate chips in a large, heatproof bowl.
- Warm the cream until it just begins to simmer around the edges, then immediately pour the hot cream over the chocolate chips.
- Add the vanilla extract and a large pinch of kosher salt. Let it sit for a minute or two, then whisk until the ganache is shiny and completely smooth.
- Transfer the ganache to the fridge and chill, stirring occasionally, for about 20 minutes, or until it reaches a thickened but still pourable consistency. This helps prevent the ganache from being too runny or too stiff.
- Once the Chocolate Cake is completely cool, you may need to trim the top flat using a serrated knife to ensure perfectly level layers. This creates a professional foundation for your filling.
- Top the cake with the prepared Pistachio Filling (with the white chocolate-coated kataifi). Use an offset spatula to evenly cover the cake all the way to the edges, ensuring it’s flush with the cake’s perimeter without spilling over.
- Place the cake in the refrigerator while you allow the ganache to firm up slightly.
- Transfer the chilled ganache to a vessel with a spout for easier pouring. Place the cake on a wire rack set over a baking sheet (to catch any drips).
- Pour about half of the ganache over the cake. If necessary, use your offset spatula to gently help ease the ganache over the top and sides of the cake to cover it completely. Refrigerate for 15 to 20 minutes, just until the ganache has set slightly.
- Pour the remaining ganache over the top, creating a beautiful, even layer. Immediately sprinkle the reserved white chocolate-coated kataifi and ground pistachios around the edge of the cake for a stunning finish.
- Let the assembled Dubai Chocolate Cake sit at a cool room temperature until the ganache has fully set, about 30 minutes. The ganache will retain its shine but won’t look wet once set.
- Carefully use a large spatula to transfer the cake to a serving plate. Serve at room temperature for optimal cake and filling texture. For the tidiest slices, use a warm, dry knife, wiping it clean between each cut.