

There’s nothing quite like the comforting embrace of a hearty, warming chili, especially when the crisp air of autumn settles in or the big game is on. As a chef, I’ve spent years perfecting the ultimate **spicy chili recipe**, one that promises not just a kick, but a profound depth of flavor that will make your kitchen the envy of the neighborhood. This isn’t just a recipe; it’s a journey to mastering a classic ground beef chili, ensuring every spoonful is rich, satisfying, and utterly unforgettable.
Why You’ll Love This Spicy Chili Recipe
My kitchen philosophy centers around elevating familiar dishes, and this **spicy chili recipe** is no testament to that. I’ve incorporated a unique twist that will transform your chili from great to extraordinary, proving that a little culinary finesse can go a long way.
The Secret to Unrivaled Depth: The magic lies in adding 1 tablespoon of unsweetened cocoa powder and 1/2 teaspoon of espresso powder with the dry spices. No, your chili won’t taste like chocolate or coffee! Instead, the cocoa powder introduces a deep, earthy, and profound umami complexity that perfectly complements the ground beef and classic chili spices. The espresso powder amplifies these rich, savory notes, making the entire **flavor profile** more robust and intriguing. Then, just before serving, a splash of 1 tablespoon of apple cider vinegar brightens everything up, cutting through the richness and preventing any flatness, ensuring a vibrant finish.
Experience Restaurant-Quality Flavor: This simple addition delivers a complex, restaurant-quality depth that is surprisingly easy to achieve at home.
Truly Satisfying Comfort: Prepare for a truly satisfying and comforting **main course**, perfect for cozy family dinners or lively entertaining.
Excellent for Meal Prep: This chili adapts beautifully for **meal prep** and often tastes even better the next day, making delicious leftovers a guarantee.
Budget-Friendly & Accessible: Using readily available ingredients, this recipe offers incredible flavor without breaking the bank.
Prepare for a truly **hearty, savory, spicy** experience with a luscious texture and a warming kick that will have everyone asking for your secret!
Ingredients Needed for the Best Spicy Chili

Gather your ingredients, and let’s get ready to build layers of incredible flavor for this amazing **spicy chili recipe**:
- 2 pounds ground beef
- 1 large onion (diced)
- 4 cloves garlic (minced)
- 1 green bell pepper (diced)
- 1 red bell pepper (diced)
- 2 jalapeño peppers (seeded and minced)
- 3 tablespoons chili powder
- 1 teaspoon ground cumin
- 1 teaspoon smoked paprika
- 1/2 teaspoon cayenne pepper
- 1 can (28 ounces crushed tomatoes)
- 1 can (15 ounces kidney beans, drained and rinsed)
- 1 can (15 ounces black beans, drained and rinsed)
- 2 cups beef broth
- Salt and pepper to taste
- Shredded cheddar cheese (for serving)
- Sour cream (for serving)
- Chopped green onions (for garnish)
Ingredient Notes & Substitutions
Choosing the right ingredients makes all the difference in your ultimate chili:
Ground Beef: I recommend using 80/20 or 85/15 **ground beef** for the best balance of flavor and richness. The fat renders down, contributing to a savory base. If you prefer a leaner option, or are looking to try different meat options, explore our best ground turkey chili recipe. Always brown thoroughly for maximum flavor development.
Spices: This recipe features the ultimate chili spice blend: **chili powder**, **ground cumin**, **smoked paprika**, and **cayenne pepper**. These combine to create a warm, earthy, and subtly smoky **flavor profile**. Feel free to adjust the **cayenne pepper** to suit your preferred heat level.
Beans: We’re using a classic combination of **kidney beans** and **black beans** for texture and heartiness. If you like, pinto beans are another excellent alternative or addition.
Broth: Opt for low-sodium **beef broth** to give you better control over the overall saltiness of your chili.
Jalapeños: The **jalapeño peppers** bring a fresh, vibrant heat. For a milder chili, remove all seeds and membranes. For extra spice, leave some or all of the seeds in!
Adaptations: For a gluten-free chili, simply ensure your **beef broth** is certified gluten-free. To make it dairy-free, omit the cheese and sour cream, or use your favorite dairy-free alternatives for topping.

How to Make Your Signature Spicy Chili (Step-by-Step)
Let’s get cooking! Follow these steps closely to create a chili that’s bursting with flavor and the perfect **texture**.
Phase 1: Building the Flavor Foundation
- In a **large pot** or Dutch oven, brown the **ground beef** over **medium heat** until it’s no longer pink and beautifully caramelized. This crucial step creates deep flavor. Once done, **drain excess grease** thoroughly for a cleaner, richer chili.
- Add the diced **onion**, minced **garlic**, diced **green bell pepper**, diced **red bell pepper**, and minced **jalapeño peppers** to the pot with the beef. Sauté until the vegetables are softened and fragrant, about 5 minutes. You’ll love the sweet aroma filling your kitchen!
Phase 2: Blooming the Spices & Adding the Twist
- Stir in the **chili powder**, **ground cumin**, **smoked paprika**, and **cayenne pepper**, along with **1 tablespoon of unsweetened cocoa powder** and **1/2 teaspoon of espresso powder**. Cook for another 2 minutes, stirring constantly. This “blooming” process is vital; it toasts the spices and releases their full, aromatic flavors, which is key to a complex chili.
- Pour in the **crushed tomatoes** and **beef broth**. Bring the mixture to a gentle **simmer**.
Phase 3: The Slow Simmer & Final Touches
- Add the **kidney beans** and **black beans**. Season with **salt and pepper** to taste. Reduce the heat to low and let the chili **simmer**, uncovered, for 1 hour 30 minutes, stirring occasionally. This long, slow simmer allows the flavors to meld beautifully and the chili to thicken to the perfect consistency.
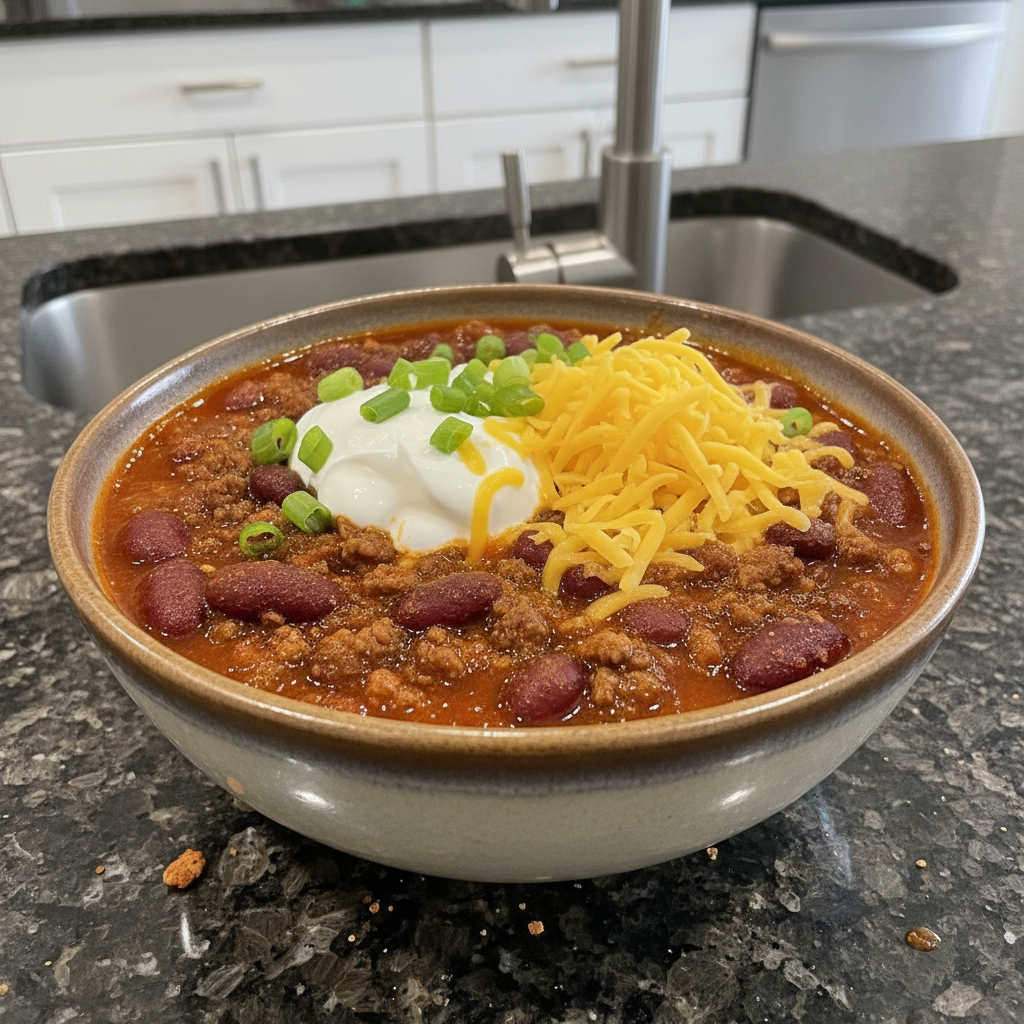
- Serve hot, garnished with **shredded cheddar cheese**, a dollop of **sour cream**, and chopped **green onions**. Just before serving, stir in 1 tablespoon of apple cider vinegar for a bright finish that truly elevates the dish!
Mastering Your Chili: Adjusting Heat & Texture
One of the best things about making chili from scratch is the ability to truly make it your own. Here’s how to fine-tune your batch to perfection.
How to Customize Your Chili’s Spice Level
This recipe provides a wonderfully robust, balanced kick, but I understand that everyone has their own spice preference. It’s easy to adjust!
- To make it hotter: For a fierier bowl, consider adding an extra pinch or two of **cayenne pepper** during the spice blooming stage. You can also leave the seeds and membranes in one or both of the **jalapeño peppers**, or even add a third. For a quick boost, a dash of your favorite hot sauce or a sprinkle of red pepper flakes right before serving works wonders.
- To make it milder: If you prefer a gentler heat, simply reduce the amount of **cayenne pepper** to 1/4 teaspoon or omit it entirely. Be sure to remove all seeds and membranes from the **jalapeño peppers** as well, as they hold most of the capsaicin. Serving with extra dollops of dairy like **sour cream** or a generous sprinkle of **cheddar cheese** can also help balance the heat on your palate.
Troubleshooting Common Chili Problems
Even seasoned chefs encounter a hiccup now and then. Here are solutions to common chili dilemmas:
- Chili too watery: The key to a thick, luscious chili is allowing it to **simmer** *uncovered* for the full **1 hour 30 minutes**. This allows for natural evaporation, which concentrates the flavors and thickens the chili. If after the recommended time it’s still too thin, simply let it continue to **simmer** uncovered for another 15-30 minutes, stirring occasionally, until it reaches your desired consistency.
- Chili too thick: If your chili gets too thick for your liking, don’t fret! Just add a splash more **beef broth** or even a little water, a quarter cup at a time, until you reach your preferred **texture**.
- Chili too bland: Flavor development is everything! First, ensure you’ve properly seasoned with **salt and pepper** to taste. Revisit the importance of “blooming spices” (**chili powder**, **cumin**, **smoked paprika**, **cayenne pepper**) and, of course, the **Unique Twist** of cocoa, espresso, and apple cider vinegar, which are crucial for that deep **umami** and balanced **flavor profile**.
- Overly Salty Chili: Accidentally added too much salt? Try adding a peeled, quartered potato to the chili during the last 30 minutes of simmering; it will absorb some of the excess salt (remember to remove it before serving). A small amount of sugar or an acid like additional apple cider vinegar or a squeeze of fresh lime juice can also help balance the saltiness.
Pro Tips & Common Mistakes to Avoid
Years in the kitchen have taught me that success often comes down to a few key techniques and knowing what to steer clear of. Here are my top insights for the best chili every time.
Pro Tips for the Best Spicy Chili
Follow these expert tips to ensure your **spicy chili recipe** is a showstopper:
- Bloom Your Spices: Don’t just dump the **chili powder**, **ground cumin**, **smoked paprika**, and **cayenne pepper** into liquid. Cooking them with the aromatics for at least **2 minutes** before adding liquids wakes up their flavors, creating a richer, more complex taste.
- Drain the Grease: After browning your **ground beef**, always **drain the grease**. This prevents your chili from becoming oily and ensures a cleaner, more intense flavor.
- Slow Simmer is Key: Patience is rewarded! A gentle, uncovered **simmer** for **1 hour 30 minutes** is non-negotiable. This allows the flavors to truly meld and develop, and the chili to thicken naturally through evaporation.
- Don’t Forget the Twist: That combination of **cocoa powder**, **espresso powder**, and the final splash of **apple cider vinegar** is the secret weapon for an incredible **flavor profile** and deep **umami**. It makes all the difference!
- Taste and Adjust: Always taste your chili before serving. Adjust **salt and pepper** as needed. A final splash of acid, whether it’s the suggested vinegar or even a squeeze of fresh lime juice, can brighten the entire dish and prevent it from tasting flat after long cooking.
Common Mistakes to Avoid
Even seasoned cooks can fall into these traps. Learn from them to perfect your chili:
- Not Draining Grease: This is a big one! Failing to **drain grease** from the **ground beef** can leave your chili tasting heavy and greasy.
- Skipping Spice Blooming: Adding spices directly to liquids without toasting them first means missing out on a huge opportunity for intensely developed flavor.
- Boiling Instead of Simmering: A hard boil can break down ingredients too much, or even cause scorching at the bottom of the pot. Always maintain a gentle **simmer** for even cooking and optimal flavor development.
- Rushing Simmer Time: The **1 hour 30 minutes** of **simmering** isn’t arbitrary. Flavors need this time to marry and deepen. Rushing this step will result in a less flavorful chili.
- Forgetting the Final Acid: Neglecting the **apple cider vinegar** or a squeeze of lime juice at the end can leave your chili tasting good, but not great. That touch of acid is what makes the whole **flavor profile** sing, cutting through richness and adding a vibrant finish.
Serving & Storage
Once your masterpiece is complete, it’s time to enjoy it! And if you’re lucky enough to have leftovers, here’s how to handle them like a pro.
Delicious Serving Ideas for Your Spicy Chili
This **spicy chili recipe** is a fantastic **main course** on its own, but it truly shines with the right accompaniments:
- Classic Toppings: A generous handful of **shredded cheddar cheese**, a cool dollop of **sour cream**, and a sprinkle of chopped **green onions** are my go-to garnishes.
- Creative Ways to Serve: Think beyond the bowl! Spoon your chili over fluffy baked potatoes, load it onto hot dogs for a gourmet upgrade, or layer it over tortilla chips for epic nachos. It even makes a fantastic **chili sandwich** on a soft bun, or you could try an ultimate leftover chili cornbread pie for another exciting meal.
- Perfect Pairings: For sides, I love serving this chili with classic **cornbread** or a simple crisp green salad provides a refreshing counterpoint.
- Palate Cleansers: To finish a hearty meal, my Guilt-Free Lemon Meringue Cups offer a light, bright dessert.
Storage and Make-Ahead Tips
One of the beauties of chili is how well it stores and often tastes even better the next day, making it perfect for **meal prep** and entertaining!
- Refrigerator Storage: Allow any leftover chili to cool completely, then transfer it to an airtight container. It will keep safely in the refrigerator for 3-4 days.
- Freezing Instructions: This **spicy chili recipe** freezes beautifully! Portion cooled chili into freezer-safe containers or heavy-duty freezer bags. It can be frozen for up to 3 months. For best results, thaw overnight in the refrigerator before reheating.
- Thawing and Reheating: To reheat, simply transfer thawed chili to a saucepan and warm over medium-low heat, stirring occasionally, until it’s piping hot throughout. You can also reheat individual portions in the microwave. Always ensure the chili reaches a safe internal temperature to maintain **food safety**.
- Make-Ahead Benefits: Making chili ahead of time allows the flavors to deepen and meld, resulting in an even more complex and delicious meal. It’s a fantastic option for busy weeks or feeding a crowd!
Conclusion
This **spicy chili recipe** is more than just a meal; it’s a celebration of deep flavors, comforting warmth, and the simple joy of cooking. The unique twist of cocoa, espresso, and apple cider vinegar elevates this classic comfort food like chili to new heights, creating a **flavor profile** that is both familiar and excitingly complex. Whether you’re a seasoned chef or just starting your culinary journey, these tips and clear instructions will empower you to create a truly fantastic **main course**.
I encourage you to try this recipe, experiment with your favorite toppings, and share your delicious creations with friends and family. Enjoy the rich aromas and the warming kick that only a perfectly crafted chili can provide!
Frequently Asked Questions About Spicy Chili
I get a lot of questions about making the perfect chili, so I’ve compiled some common queries to help you on your culinary adventure.
Q: How do you store leftover spicy chili?
A: Store leftover chili in an airtight container in the refrigerator for up to 3-4 days. Ensure it’s cooled completely before storing.
Q: Can I freeze this spicy chili recipe?
A: Absolutely! This chili freezes beautifully. Store it in freezer-safe containers or bags for up to 3 months. Thaw overnight in the refrigerator before reheating gently on the stovetop or in the microwave.
Q: What are the best toppings for spicy chili?
A: Classic toppings include shredded **cheddar cheese**, a dollop of **sour cream**, and a sprinkle of chopped **green onions**. You can also get creative with sliced avocado, pickled jalapeños, crumbled cornbread, or a sprinkle of fresh cilantro.
Q: How can I adjust the spice level in this chili?
A: To make it hotter, add more **cayenne pepper** or leave some seeds in your **jalapeño peppers**. For a milder chili, reduce the **cayenne pepper** and ensure all seeds and membranes are removed from the **jalapeños**.
Q: What are common mistakes when making chili?
A: Common mistakes include not fully draining the grease from **ground beef**, skipping the “blooming” of spices, boiling the chili instead of gently simmering, and rushing the crucial **simmer time** for flavor development.
Q: What can I serve alongside spicy chili?
A: Classic pairings include warm **cornbread** or cornbread muffins, a fresh green salad, or crusty bread. For something unique, try my Mini Corn Dog Muffins or Garlic Parmesan Grilled Corn.
Q: How long does spicy chili take to cook from scratch?
A: This **spicy chili recipe** has a **prep time** of approximately 20-30 minutes and a **cook time** of about 1 hour 45 minutes (including browning, sautéing, and the crucial 1 hour 30 minute simmer). So, plan for an overall time of roughly 2 hours to 2 hours 15 minutes.
Q: What kind of ground beef is best for chili?
A: I recommend using 80/20 or 85/15 **ground beef**. The fat content contributes significantly to the chili’s rich flavor. If you prefer leaner, 90/10 works well, but you might need a touch of oil for browning.
Ultimate Spicy Chili Recipe: Deep Flavor, Warming Kick & Secret Twist
Ingredients
Equipment
Method
- In a large pot or Dutch oven, brown the ground beef over medium heat until it’s no longer pink and beautifully caramelized. Drain excess grease thoroughly.
- Add the diced onion, minced garlic, diced green bell pepper, diced red bell pepper, and minced jalapeño peppers to the pot with the beef. Sauté until the vegetables are softened and fragrant, about 5 minutes.
- Stir in the chili powder, ground cumin, smoked paprika, cayenne pepper, unsweetened cocoa powder, and espresso powder. Cook for another 2 minutes, stirring constantly, to toast the spices and release their full aromatic flavors.
- Pour in the crushed tomatoes and beef broth. Bring the mixture to a gentle simmer.
- Add the kidney beans and black beans. Season with salt and pepper to taste. Reduce the heat to low and let the chili simmer, uncovered, for 1 hour 30 minutes, stirring occasionally. This allows the flavors to meld and the chili to thicken.
- Serve hot, garnished with shredded cheddar cheese, a dollop of sour cream, and chopped green onions. Just before serving, stir in 1 tablespoon of apple cider vinegar for a bright finish.