

Easter brings such a wonderful opportunity for sweet, festive treats, and nothing captures that joy quite like a homemade White Chocolate Easter Bark. I love how simple yet incredibly impressive bark can be, transforming a few ingredients into a vibrant, edible masterpiece. This recipe is designed to bring that festive spirit right into your kitchen, promising not just a delicious dessert but a visually stunning one that’s perfect for gifting or gracing your Easter table. We’re going to dive into a secret technique that ensures your bark has a beautiful, glossy finish and a satisfying snap, avoiding those common issues of dullness or a waxy texture. Get ready to create impressive results, no matter your skill level!
Why You’ll Love This White Chocolate Easter Bark Recipe
My kitchen philosophy is all about making delicious food accessible and enjoyable, and this White Chocolate Easter Bark truly embodies that. What makes this recipe a standout is my unique “Secret Bloom-Free Melt” technique.
This method involves precise double-boiler temperature control and a clever touch of refined coconut oil. This combination is key to achieving that extra snap and brilliant shine, ensuring your bark is free from any grayish streaks often seen in homemade chocolate. The scientific logic here is simple: controlled, gentle heat prevents the cocoa butter from separating and re-crystallizing improperly, which is what causes bloom. The coconut oil further stabilizes the chocolate and provides a superior, crisp texture when cooled.
Beyond the perfect finish, you will find several wonderful benefits in this recipe:
Quick & Easy: This is the ideal treat for busy Easter preparations or when you need a spontaneous, impressive dessert.
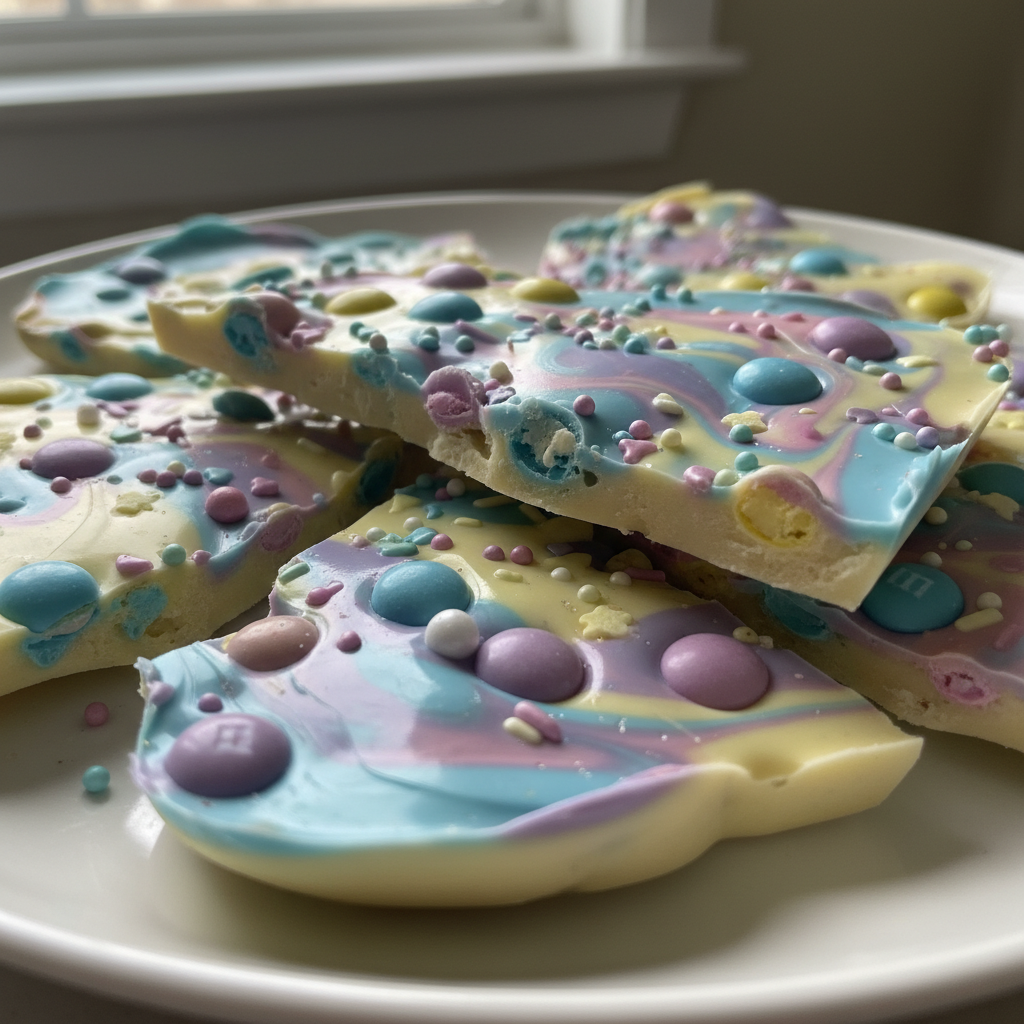
Visually Stunning: You will achieve a bakery-quality appearance with vibrant pastel colors and playful Easter sprinkles, making it perfect for gifting or a show-stopping dessert table centerpiece.
Family-Friendly & Fun: This is a fantastic project for involving kids in the kitchen, letting them unleash their creativity with decorating.
Reliable Results: My method guarantees a consistent, delicious, and beautiful outcome every single time.
Ingredients Needed

- 18 ounces (about 3 cups) high-quality white chocolate chips or finely chopped bars
- 1 teaspoon refined coconut oil (optional, for extra shine and snap)
- Gel food coloring in pastel shades (pink, blue, yellow, green)
- 1/2 cup assorted Easter sprinkles
- Optional: Mini chocolate eggs, M&Ms, or other small candies for topping
Ingredient Notes & Substitutions
White Chocolate: The foundation of this White Chocolate Easter Bark is, of course, the white chocolate itself. I always recommend using high-quality white chocolate chips or chopped bars. These typically contain more cocoa butter, which results in a smoother melt and a much better flavor and texture compared to “candy melts.” For those in the US, good brands are readily available in most grocery stores.
Coconut Oil: This is my secret weapon for the “bloom-free melt.” The refined coconut oil helps create that extra shine and satisfying snap. Make sure to use *refined* coconut oil to avoid any prominent coconut flavor that might interfere with your other ingredients.
Food Coloring: When adding color, always opt for gel food coloring over liquid. Liquid food coloring contains water, which can cause your white chocolate to seize and become lumpy. Gels are highly concentrated and won’t introduce excess moisture.
Allergy-Friendly Swaps: You can absolutely make this recipe suitable for various dietary needs. For a “dairy-free” version, look for certified dairy-free white chocolate chips, which are increasingly available in specialty stores or online. To make it “nut-free,” ensure your chosen white chocolate and all your fun Easter sprinkles are certified nut-free. Always check labels carefully for cross-contamination warnings.

How to Make White Chocolate Easter Bark
Making this bark is a delightful process, and with my bloom-free melting technique, you will achieve professional-looking results every time.
Prepare Your Workspace
First, line a large baking sheet, roughly 9×13 inches, with parchment paper. This non-stick surface is crucial for easily removing your finished bark.
Master the Bloom-Free Melt
Next, set up your double boiler. Fill a saucepan with about an inch of water and bring it to a gentle simmer. Place a heatproof bowl on top of the saucepan, making absolutely sure the bottom of the bowl does not touch the simmering water. This creates gentle, indirect heat, which is essential for our unique bloom-free melt. Add your white chocolate chips or chopped bars and the refined coconut oil (if using) to the bowl. Stir continuously with a rubber spatula, watching as the chocolate slowly transforms into a silky, smooth liquid. It’s important to melt the chocolate slowly and carefully to prevent scorching or seizing. A critical expert tip: keep any water or steam from getting into your chocolate, as even a tiny drop can cause it to seize.
Color and Swirl Your Bark
Once your white chocolate is completely melted and beautifully smooth, remove the bowl from the heat. Pour about two-thirds of this gorgeous melted white chocolate onto your prepared baking sheet. Using an offset spatula or the back of a spoon, spread it into a thin, even layer, aiming for about 1/4 inch thick. Now, divide the remaining melted white chocolate into small bowls, one for each “pastel gel food coloring” shade you plan to use. Add just a tiny drop of gel food coloring to each bowl and stir gently until the color is vibrant and evenly distributed. Drizzle these colored chocolates randomly over the white chocolate base on your baking sheet. Then, take a skewer or a butter knife and gently swirl the colors together, creating a beautiful marbled effect. Be careful not to overmix, as you want distinct swirls rather than muddy colors.
Add Sprinkles and Chill
This is where the fun really happens! Immediately sprinkle your “Easter sprinkles” and any other desired toppings over the wet chocolate. Gently press them down to ensure they adhere well before the chocolate starts to set. Once decorated, transfer the baking sheet to the refrigerator and chill for at least 1-2 hours, or until the bark is completely firm and set. This chilling time is vital for achieving that satisfying snap.
Break and Enjoy
After your bark is fully set, take it out of the refrigerator. Gently peel it off the parchment paper. You can then break the bark into irregular, delicious pieces using your hands or a sharp knife. Store your beautiful bark in an airtight container until you are ready to serve.
Gap-Filling Section: Mastering Your White Chocolate & Allergy Swaps
Even with the simplest recipes, a few expert insights can elevate your results. Let’s dive into perfecting your chocolate technique and making sure everyone can enjoy this festive treat.
A. Preventing Chocolate Seizing and Achieving Perfect Texture
Chocolate seizing is a common pitfall, and it’s mainly caused by moisture, overheating, or a sudden temperature shock. When even a tiny drop of water comes into contact with melting chocolate, the sugar crystals seize up, turning your smooth chocolate into a grainy, clumpy mess. Overheating can also cause the cocoa solids to burn, leading to a thick, unworkable texture.
To prevent this, always use a dry, clean bowl and utensils when working with chocolate. My preferred “double boiler” method provides a gentle, controlled heat, minimizing the risk of overheating. Ensure the water in your saucepan is simmering, not boiling vigorously, and that the bowl containing the chocolate does not touch the water. The refined coconut oil in this recipe acts as a safeguard, adding a bit of fat that can help prevent seizing and contributes to that desired “snap” and glossy finish.
B. Creative Decorating & Allergy-Friendly Options
Decorating Easter bark is one of the most enjoyable parts, and you do not need professional tools to create stunning results. Besides the traditional “Easter sprinkles,” you can get creative with mini chocolate eggs, pastel-colored M&Ms, or even edible glitter for extra sparkle. To create simple patterns, you can drizzle additional melted colored chocolate over the bark in zigzags or use a toothpick to create swirled designs. The key is to add your decorations while the chocolate is still wet so they adhere properly.
Making this recipe suitable for “food allergies & substitutions” is also straightforward. For “dairy-free” options, several brands now offer dairy-free white chocolate chips that perform beautifully in this recipe. Similarly, if you need a “nut-free” version, be vigilant about checking the ingredient labels on both your chocolate and sprinkles to ensure they are certified free from nuts and any cross-contamination warnings. For nut-free alternative toppings, consider chopped dried fruit, mini marshmallows, or even crushed pretzels for a salty crunch.
Pro Tips & Troubleshooting for Perfect Bark
Even the simplest recipes benefit from a few expert insights. Here are my top recommendations and common pitfalls to avoid for flawlessly delicious bark every time.
Pro Tips for Success
Always use high-quality “white chocolate” for the best flavor and melting properties. It truly makes a difference in the final texture and taste.
Remember my unique twist: the importance of slow, controlled melting over the “double boiler” cannot be overstated. The “coconut oil” is your ally for bloom prevention and achieving that ideal texture and shine.
For even more visual depth, try layering your colors instead of just swirling them all at once. For pastel shades, a tiny drop of white food coloring can make the colors pop even more vividly.
Have all your “sprinkles” and other decorations measured out and ready *before* you start melting the chocolate. White chocolate sets relatively quickly, so you will want to move swiftly once it’s poured.
Ensure the bark is completely firm and set before attempting to break it. This will give you clean, crisp edges and prevent any messy crumbling.
Common Mistakes to Avoid
Overheating: Scorching or seizing chocolate is a common mistake. Melt slowly over a gentle simmer; never let the water boil furiously or touch the bottom of your bowl.
Water Contamination: This is perhaps the most critical warning. Even a single drop of water or condensation can cause your chocolate to seize. Keep your bowl and tools completely dry and prevent steam from rising into the chocolate.
Impatience: Do not rush the chilling process. If you try to break the bark before it is fully set, it will be soft, messy, and lose its satisfying snap.
Using Low-Quality Ingredients: Cheap chocolate often contains less cocoa butter and more emulsifiers, leading to a waxy texture and dull appearance. Invest in good quality for the best results.
Breaking Too Early: Resist the urge to break the bark until it is absolutely firm. This ensures clean, appealing pieces.
Serving & Storage
Once you have created your beautiful White Chocolate Easter Bark, here is how to best enjoy and preserve it.
Serving Ideas
This “White Chocolate Easter Bark” is as versatile as it is pretty! Arrange the colorful pieces on a decorative platter for a festive centerpiece alongside other Easter dessert recipes. It is a delightful sweet complement to coffee or tea, especially after an Easter brunch. For homemade gift ideas, place pieces into clear cellophane bags tied with a pretty ribbon to give to neighbors, teachers, or as a thoughtful host gift. You can also get creative by crumbling it over vanilla ice cream or adding it as a sweet crunch to cupcakes.
Storage and Make-Ahead
Proper storage is key to maintaining the freshness and perfect snap of your chocolate bark. Store it in an airtight container at cool room temperature (around 68-72°F / 20-22°C) for up to 2 weeks. If your home is warmer, or if you prefer a firmer bark, you can store it in the refrigerator for up to 3-4 weeks. Just be sure the container is truly airtight to prevent any odors from being absorbed by the chocolate. For longer storage, you can freeze chocolate bark for up to 3 months. Wrap it tightly in plastic wrap, then place it in an airtight freezer-safe bag or container. Thaw overnight in the refrigerator before serving. This bark is excellent for “meal prep” for holidays, as it can be made well in advance.
Adaptations for Other Occasions
The beauty of this bark recipe is its adaptability. You can easily transform it for any holiday candy or special occasion. Simply swap out the “Easter sprinkles” and pastel colors for different themes. Think red and green for Christmas, orange and black for Halloween, or even team colors for a game day party. The possibilities are endless!
Conclusion
I hope you are as excited as I am to make this incredibly easy and utterly delightful White Chocolate Easter Bark! It is a recipe that truly delivers on its promise: a visually appealing, delicious, and wonderfully snappy treat that captures the essence of spring and the joy of Easter. My “Unique Twist” – the bloom-free melt technique – ensures your bark will always come out glossy and perfect, giving you results you can be proud of, even if you are new to working with chocolate. So, gather your ingredients, have fun with the decorating, and enjoy creating something truly special. I would love to see your creations, so please share them on social media or leave a comment below! For more sweet inspiration, explore other easy chocolate recipes on my blog.
Frequently Asked Questions (FAQ)
Q: What’s the best type of white chocolate to use for bark?
A: I recommend using high-quality white chocolate chips or finely chopped bars with a good cocoa butter content. Avoid “candy melts” as they often contain less cocoa butter and can result in a waxy texture and less authentic flavor. Look for brands that list cocoa butter high on their ingredient list.
Q: How do I prevent my white chocolate from seizing?
A: To prevent white chocolate from seizing, ensure all your tools and bowls are completely dry. Melt the chocolate slowly and gently over a “double boiler,” making sure the bottom of your bowl does not touch the simmering water. Avoid letting any steam or water droplets get into the chocolate.
Q: Can I make this Easter bark dairy-free or nut-free?
A: Yes, you can! For a “dairy-free” version, use certified dairy-free white chocolate chips. For a “nut-free” bark, ensure your chocolate and all “Easter sprinkles” are certified nut-free. Always check ingredient labels carefully for allergy warnings.
Q: How long does homemade white chocolate bark last, and how should I store it?
A: Homemade white chocolate bark lasts up to 2 weeks at cool room temperature or 3-4 weeks in the refrigerator when stored in an airtight container. For longer storage, you can freeze it for up to 3 months. Thaw in the refrigerator overnight before serving.
Q: What are some creative topping ideas for Easter bark?
A: Beyond “Easter sprinkles,” consider mini chocolate eggs, pastel-colored M&Ms, crushed shortbread cookies, shredded coconut, or even a drizzle of contrasting melted dark chocolate. Edible glitter or tiny candy flowers can also add a beautiful touch.
Q: What if I don’t have a double boiler? Can I melt white chocolate in the microwave?
A: While I strongly recommend the double boiler for consistent, bloom-free results, you can microwave white chocolate in a pinch. Place chocolate chips in a microwave-safe bowl and heat in 20-30 second intervals, stirring thoroughly after each interval, until melted and smooth. Be extremely careful not to overheat it, as it can burn quickly.
Q: Why is my white chocolate not melting smoothly?
A: If your white chocolate is not melting smoothly, it is often due to low-quality chocolate with less cocoa butter, overheating, or exposure to moisture. Ensure you are using high-quality chocolate, melting it gently over indirect heat (like a double boiler), and keeping all water away from it. The coconut oil in my recipe also aids in a smoother melt.
Easy White Chocolate Easter Bark: Bloom-Free & Perfectly Snappy!
Ingredients
Equipment
Method
- First, line a large baking sheet, roughly 9×13 inches, with parchment paper. This non-stick surface is crucial for easily removing your finished bark.
- Next, set up your double boiler. Fill a saucepan with about an inch of water and bring it to a gentle simmer. Place a heatproof bowl on top of the saucepan, making absolutely sure the bottom of the bowl does not touch the simmering water. This creates gentle, indirect heat, essential for our unique bloom-free melt.
- Add your white chocolate chips or chopped bars and the refined coconut oil (if using) to the bowl. Stir continuously with a rubber spatula, watching as the chocolate slowly transforms into a silky, smooth liquid. Melt the chocolate slowly and carefully to prevent scorching or seizing. Keep any water or steam from getting into your chocolate, as even a tiny drop can cause it to seize.
- Once your white chocolate is completely melted and beautifully smooth, remove the bowl from the heat. Pour about two-thirds of this gorgeous melted white chocolate onto your prepared baking sheet.
- Using an offset spatula or the back of a spoon, spread it into a thin, even layer, aiming for about 1/4 inch thick.
- Now, divide the remaining melted white chocolate into small bowls, one for each pastel gel food coloring shade you plan to use. Add just a tiny drop of gel food coloring to each bowl and stir gently until the color is vibrant and evenly distributed.
- Drizzle these colored chocolates randomly over the white chocolate base on your baking sheet. Then, take a skewer or a butter knife and gently swirl the colors together, creating a beautiful marbled effect. Be careful not to overmix, as you want distinct swirls rather than muddy colors.
- Immediately sprinkle your Easter sprinkles and any other desired toppings over the wet chocolate. Gently press them down to ensure they adhere well before the chocolate starts to set.
- Once decorated, transfer the baking sheet to the refrigerator and chill for at least 1-2 hours, or until the bark is completely firm and set. This chilling time is vital for achieving that satisfying snap.
- After your bark is fully set, take it out of the refrigerator. Gently peel it off the parchment paper.
- You can then break the bark into irregular, delicious pieces using your hands or a sharp knife. Store your beautiful bark in an airtight container until you are ready to serve.